
 Background
Once the two great operations of the 1918 German Spring Offensive against the British – ‘Michael’ and ‘Georgette’ on the Somme and Lys respectively – had been halted and exhausted, the months of May through to July were quiet and stagnant on the British front. However while the British Army was recovering from the hard fighting of March and April, the Australians alone were on the offensive – not an offensive of grand attacks and large advances but a series of nibbles, raids and local operations carried out with a daring and stealth that unnerved the opposing enemy divisions. As soon as the front lines had stabilised the Australians out on patrol realised that without fortifications or the time to develop strongpoints they could infiltrate behind the enemy outposts and in this manner they could be taken quickly and with minimal force. Another important factor was that the ground had not been badly churned by the recent fighting leaving ditches, trees, and even long grass as a means of cover in which to enable their approach and escape. In addition for the soldier of the AIF the removal of a German post or the interception of a patrol was an enticement to his adventurous spirit and thus they became highly skilled and accomplished in this new type of active patrolling.
 These minor stunts – often carried out without supporting artillery fire – became known as ‘Peaceful Penetration’ and had a major demoralising impact on the morale of the German front line soldier. They were also important to gain ground, allowing more space for defence, plus a means to take prisoners which was one of the most important sources of gathering information as the Allies tried to guess where the next German blow would land. Front line battalions in their outposts (photograph above) also realised that if they were able to achieve small successes on a regular basis it also lessened the chance of a large scale attack which would undoubtedly result in greater casualties.
The German divisions left holding the line were often the weaker, less well-trained, leaving their crack units to the rear and in reserve. For the Germans though it was not just the fear of an unknown raid, but irregular bombardments from the British guns now with longer ranges, trench mortar fire, rifle grenades, bombing and strafing by aeroplanes plus the simultaneous bursting of gas drums by the engineers in the Special (gas) Brigade that all added to their strain and wearing down process.
Combat
One of the first significant raids of this type took place by the 1st Australian Division when having sensed the spirits of the Germans had waned hatched a plan to counter-attack and recapture the village of Meteren, without the aid of artillery but reliant upon surprise. The attack was to be made in two phases, the first a thrusting of the flanks on either side of the village to make the attack of the following night easier. The first phase on the night of the 22nd April 1918 by the 11th and 12th Battalions was a success at the relatively light cost of 33 casualties. However for the second phase of the Meteren attack the 9th & 10th Battalions advanced under bright moonlight and as a result were easily seen by the enemy and machine-guns opened up. The attack was repulsed and cost the 3rd Brigade 160 men. Evidently the element of surprise for this attack had been lost with the success of the previous night!
 Not all attacks during this period were purely ‘peaceful penetration’ (see Ville-sur-Ancre and Hamel below). On the 5th May artillery throughout the day was followed by a dense rolling barrage behind which attacking waves from the 35th and 34th Battalions followed closely towards the enemy trenches in front of Morlancourt, often catching the young German garrison cowering on the floor. Both lines of the enemy trench were captured on a front of ¾ mile and 153 prisoners, 10 machine guns and three trench mortars taken at the cost of only some 100 casualties, mostly minor. At this point even such minor successes were encouraging to all the Allied
  troops, and conversely discouraging to the enemy. [Click link for geo-referenced trench map reproduced with permission from the National Library of Scotland].
As illustrated above with the second Meteren attack on 23rd April, not all attacks were a success. On 7th May Capt. McMinn of the 34th Battalion was ordered to push forward at night and to take 1,200 yards of the German line south of the Bray-Corbie Road. Orders came through extremely late for the attack not giving the front line officers enough time for proper assembly or reconnaissance for a night attack. In the darkness McMinn’s half company got separated from the supporting battalion and being completed isolated and surrounded the seven officers and 85 men decision took the decision, after destroying their maps and papers, to surrender. The 3rd Australian Division was relieved three days later by the 2nd Division by which time the operations of 4th – 9th May had cost the 9th Brigade 18 officers and 246 other ranks as casualties. For the incoming 5th & 6th Brigades orders were given to continue the activity of peaceful penetration while preparing for an all-out assault on Ville-sur-Ancre in the coming days.
On the 18th May, the day prior to the planned attack at Ville-sur-Ancre it was noticed that a German machine gun strong post was proving to be troublesome on the flank between the 18th and 22nd Battalions. Intelligence officer Lieut. Irvine of the 18th Battalion suspecting that a night attack would be murderous and having observed the demeanour of his own troops came up with the plan to take the post in the middle of the day on the belief that most of the troops garrisoning the enemy front line posts would be napping during what were now hot sultry days. With 18 men Lieut. Irvine first walked and then ran to the post without a shot being fired, capturing twenty-two prisoners and a light machine gun, and without incurring a casualty. Congratulations were received from above, including AIF commanding officer General Birdwood, with Lieut. Irvine receiving a Bar to the Military Cross.
Ville-sur-Ancre (19th May 1918)
 The 6th Brigade’s Brig-Gen. Paton’s plan was for a night attack on the 18th/19th May 1918 to push past Ville-sur-Ancre on both flanks before entering the village itself. The chief burden of the attack would fall to the 22nd Battalion that would have to capture in succession the two sunken roads known as Little and Big Caterpillar which with a quarter of a mile between them ran parallel up the western and eastern sides of a spur whose capture was vital before the village could be taken. [Click following link for geo-referenced Trench Map of the map, reproduced with the permission of the National Library of Scotland.]
 When the artillery barrage started at 2am the 24th Battalion to the north of the village began to cross the river via the recently constructed bridges (photograph right of one of the bridges) and made good progress through the marshy ground taking the German outposts. To the south the 21st Battalion advanced and although meeting stubborn resistance at trenches near the Crucifix began to drop a line of posts to protect the 22nd Battalion conducting the main assault to the right from fire coming from the village. With casualties mounting by the time the sunken road had been reached the 22nd Battalion attackers were now short in numbers and facing in front numerous defenders capable of a strenuous resistance, plus the men were being sniped at from the rear. In the ‘Big Caterpillar’ (photograph below left) the resistance was serious and heavy hand to hand fighting took place. Sgt Ruthven seeing Capt. Hunter his company commander severely wounded and the seriousness of the situation took control, rallying his section, neutralizing an enemy machine gun before reaching their objective. Thirty prisoners were taken by Sgt Ruthven and for his action he was awarded the Victoria Cross, the first to be awarded to any member of the 6th Brigade.
 With the belief that the enemy’s morale had been broken the artillery was ordered to stop shelling the village at 4.15am and the 21st, 23rd and 24th Battalions told to enter Ville. It was now plain daylight but within two minutes of the lifting of the barrage a party of hardened men from the 23rd Battalion had seized three of the machine-guns defending the north-western edge of Ville before their operators could use them, and a fourth was abandoned. Meanwhile the 21st advanced in a series of sectional rushes across the marshes and by 4.40am the German garrison had surrendered. Working through the village enemy occupants of the houses were ordered to come out, and if not instantly obeyed were smoked or burnt out by phosphorous bombs. By 5.15am a defensive line had been established 200 yards in front of the village by a line of poplar trees from the river to the flank of the 22nd on the right. To the north a party of Germans put up some resistance and on two occasions, having already surrendered, the Germans including an officer fired upon their 23rd Battalion captors when their guard was dropped. The party were not offered a third attempt to surrender, and with the German officer summarily shot. This action ended all resistance in the village. On the right of the 6th Brigade the 18th Battalion (5th Brigade) also reached its objective and dug in.
The action at Ville-sur-Ancre and Morlancourt was a complete success and for the 6th Brigade the operations had worked out precisely as intended. The casualties had been relatively light at 418 considering that the defenders had approximately 800 casualties and that 330 Germans and 45 machine guns had been captured. The Germans defending the position, despite being prepared for the attack and with fresh troops, in all but a few cases showed little appetite for a fight and had poor morale.
 Back in Flanders, during the night of the 29th May a fighting patrol of the 10th Battalion looked to push forward their outposts near Merris (photograph right) but with stubborn German defence suffered heavy casualties of 8 officers and 89 other ranks killed or wounded. Four days later an advance was made by the 11th Battalion to seize the main defences of Merris supported by feints from two British divisions on their flanks. The small stunt was a success and although the 3rd Brigade suffered about 100 casualties, 5 German officers and 253 other ranks plus 27 machine guns and 17 trench mortars were captured. The instruction previously given in the working of German machine-guns proved useful. On the 5th June and in the Meteren area the 2nd Brigade, having just relieved the 3rd Brigade quietly advanced its outposts by a quarter of a mile. At this point the German trench forces were being kept under strain without reinforcements as all major attacking forces were being kept to the rear in preparation for the anticipated resumption of the attack in the north once British reserves had been sucked south to help the French. For the Australians they were told to expect a major German advance any day, and in order to predict where the next German attack was going to happen, the need to identify which enemy troops were manning the front became ever important. Raiding thus became a priority, and continued to help pin enemy forces thus assisting the besieged French to the south. British Second Army commanding officer General Plumer informed 1st Australian Division the need to man the front with two brigades in preparation for the resumption of the German offensive, with the 1st Brigade now joining its sister 2nd Brigade. As events would unfold in the coming hours, the attack would not fall in the north but on the French at Noyon. However the intelligence from the constant stream of prisoners being brought in by the very active 1st Division still said that an attack would still fall in Flanders.
On the Somme active patrolling was maintained and continued to yield a steady stream of prisoners for intelligence gathering purposes as well as providing further slices of ground in important areas such as on the Morlancourt ridge. One such large and successful dusk raid on the 10th June by Major-General Rosenthal’s 2nd Australian Division and led by the 7th Brigade captured part of the ridge between Sailly-Laurette and Morlancourt resulting in 330 prisoners and 33 machine guns. Demonstrations by the Australian infantry and artillery on both of the flanks of the 7th Brigade’s attack succeeded in causing the Germans there to believe that the front of the assault was much wider than was actually the case. Under the northern extension of the barrage the 6th Brigade had raided the Germans on the spur between Ville-sur-Ancre and Morlancourt. Led by Lieut. Harricks the 22nd Battalion raiders fought without suffering a casualty and brought back 6 prisoners and a machine gun. Farther north the 23rd Battalion attempted to enter the German trench opposite the old Casualty Clearing Station near Dernancourt but failed losing three killed and 18 wounded. Investigations and analysis after the raid concluded that the enemy was showing no signs of any preparations for a further attack in this area, and was indeed focusing his efforts further south and to the French. Further bold raids by the 4th, 6th and 10th Brigades on the nights of the 13th-15th June confirmed these impressions. In addition the ‘Diggers’ felt that if asked they could have gone further and even captured the German artillery.
To the north in Flanders, on the 13th June two companies of the 7th Battalion behind a barrage laid by artillery, trench mortars and machine-guns pushed forward 500 yards on a front of 650 yards, and although losing 20 men captured 47 prisoners, mostly consisting of young and small men. On the following night a German counter-attack on posts lost in the Meteren area resulted in losses of ground and some prisoners. [Click link for geo-referenced Trench Map reproduced with the permission of the National Library of Scotland]. General Walker called his 1st Australian Division brigade commanders together and they agreed that signs of an impending German offensive were accumulating and it was decided to assume battle-stations on the night of the 15th June. However for the Australian infantryman tasked with going out daily to bring back prisoners, no sign of an impending attack could be seen. On the 20th June the 3rd Battalion at Merris suffered 38 casualties in an attack to dislodge the Germans from the ridge. A week later and in support of a British attack to the south of Merris, the 10th Battalion under Lieut-Col Wilder-Neligan exploited the opportunity afforded by the barrage of smoke for a fighting patrol to go forward and capture 500 yards of the enemy’s front line along with 35 prisoners, 6 machine guns and two trench mortars at a cost of about 50 casualties. The impact of the constant raiding was by now having a detrimental effect on the German morale, particularly amongst its young soldiers.
Hamel (4th July 1918)
 Having discussed verbally with General Rawlinson, commanding officer of the British Fourth Army, the possibility and indeed importance of going on the offensive, Lieut-General Monash submitted his proposal for an attack at Hamel on the Somme and approval was given straight away. Monash’s operation was to be primarily a tank operation utilising the new Mark V Tank (photograph right) with its enhanced mobility, backed up by the infantry and integrated closely with the artillery and air force. A challenge for Monash was that the infantry that would be leading the attack – the 4th Australian Division – were the ones that were so badly let down by the tanks at the First Battle of Bullecourt in April 1917. Over the coming weeks infantry battalion after infantry battalion was brought by bus to Vaux to spend a day to play with the tanks and meet, chat and even picnic with the tank crews. More serious set-piece manoeuvre exercises on the scale of a battalion were rehearsed over and over again. Within a short time the ‘digger’ had taken the tank to his heart. Two new principles were to be employed: firstly that on the battlefield and until the objective had been taken the tank would come under the command of the infantry commander; and secondly that the tanks would advance in line with the infantry, much closer to the line of the barrage than had been done before. The attack was also going to involve the Americans for the first time – note the symbolic selection of the date – but just 24 hours before the attack General Pershing withdrew six companies, much to their disappointment and the consternation of the Australians.
 By 3am of the 4th July 1918 the whole force was lying out in the grass and crops behind its tapes, and two minutes later the normal early morning harassing fire of smoke and high explosive, but no gas this morning, from the Australian artillery began (map left courtesy of Australians on the Western Front 1914-1918). [Click link for geo-referenced Trench Map plus map below reproduced with the permission of the National Library of Scotland]. At that same moment the sixty tanks moved to full speed towards the front, with support from bombers that had been flying over Hamel all night to help mask the sound of the tanks. The morning of the attack was accompanied by a heavy ground mist, and although impeded observation for assembly greatly enhanced the
  element of surprise, thus reducing the need to fire a significant percentage of smoke shells particularly on the flanks. The main barrage when it came was one of the most accurate during the war, enabling the infantry in places to advance within 75 yards free from casualties, and supported by spare machine guns of all four divisions who sprayed the land ahead. However a few guns were falling short and casualties were incurred amongst the 15th and 43rd Battalions as well as a section of Americans heading for Pear Trench. The smoke plus the dust thrown up by the shells formed a dense haze through which the soldiers advanced, but created a difficulty for the tanks who in the early stages were behind their expected positions with the infantry. The 16th Battalion attacking with only half of the force initially allotted as 500 of the Americans had been withdrawn the previous day attacked Vaire Wood and faced with a troublesome machine gun L-Cpl Axford (photograph below right) threw his bombs and rushed the trench killing ten and capturing six Germans, an action which earned him the Victoria Cross. Many of the captured Germans that morning were hampered by wearing gas masks on account of gas being used in the previous day’s shelling. On the southern flank the barrage behind
  which the 21st and 23rd Battalions of the 6th Brigade advanced was perfect and the leading tanks caught up with the infantry at the first German trench and fired down it both ways crushing the spirit of the defenders. For the second stage and after the ten minute halt the tanks had caught up over the whole front and in the daylight were able to play their full part, including the drop-off of supplies by the carrier tanks. All except three out of sixty tanks had reached their objectives and all but five were back out their rallying points by the end of the battle, the missing five recovered over the next two days. The Australian confidence in the tank, particularly in the way they annihilated machine gun posts, had been truly restored.
Hamel and the ridge beyond it had been taken with slight loss. The capture of prisoners had been large and thus far showed no sign of counter-attack, but as night was just settling a party of enemy bombers supported by 200 infantry under a heavy artillery bombardment counter-attacked the front-line manned by the 44th Battalion. That night feint attacks were also carried out by the 14th and 15th Brigades between the Ancre and the Somme to help divert the attention of the Germans from the main event at Hamel.
The battle passed off smoothly, exactly to timetable, and was free of hitches. It was all over in ninety-three minutes, attained all objectives and yielded great results. At the heart of the success was the excellent co-operation between the infantry, machine gunners, artillery, tanks and the Royal Air Force, plus catching the enemy completely by surprise. The operation gave the British possession of the Hamel Valley plus drove the enemy from the adjacent ridge from which the enemy could observe the Australian forces. In excess of 1,500 prisoners were taken, a similar number killed or made casualty, plus two field guns, 26 mortars and 171 machine guns at a cost of 1,400 casualties. The Americans that took part acquitted themselves well and were for ever after received by the Australians as blood brothers. Another success was the use of aeroplanes for the supply of small-arms ammunition to the forward troops, particularly the infantry. During the harassing periods between offensives the practice had been to employ both gas and smoke shells making the enemy think that the smoke would be accompanied by gas therefore donning gas masks and hence hampering his vision, but on the morning of the attack only the smoke shells were fired but it would take time for the enemy to realise and thus significantly impact his ability to resist. Hamel, the first offensive anywhere on the Western Front since Cambrai, became the blueprint for further operations carried out by the Corps, and notably for the great offensive of the 8th August. Many messages of congratulations were received following the Australian success at Hamel (photograph below left of the Hamel Memorial) but none more so than Monsieur Clemenceau, the veteran statesman of France, who arrived and addressed many of the men that had participated in the attack. “When the Australians came to France, the French people expected a 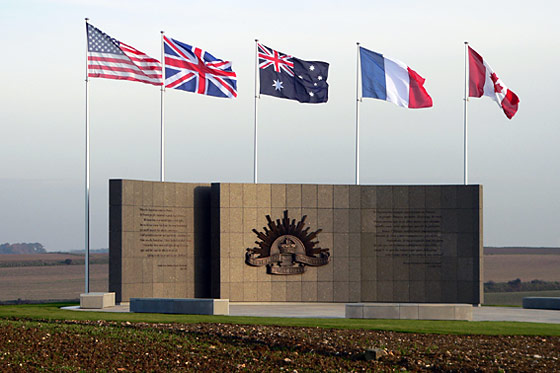 great deal of you… We knew that you would fight a real fight, but we did not know that from the very beginning you would astonish the whole continent… I shall go back tomorrow and say to my countrymen, I have seen the Australians, I have looked in their faces, I know that these men will fight alongside of us again until the cause for which we are all fighting is safe for us and for our children.”
During the night the 45th and 46th Battalions pushed forward on a 2,500 yard frontage astride of the Somme, together with an attempt by the 16th Battalion opposite Accroche Wood. Further south the process of peaceful penetration was conducted against the Germans to the south of Villers-Bretonneux in the vicinity of Monument Wood. During the night of 10th July the Germans voluntarily withdrew their outpost line from their deep salient in front of the French at Cachy and fallen back on a line more than 1,000 yards in the rear. Reports from prisoners frequently referred to this action as a result of the constant advances of the Australian troops on their northern flank.
As ground was continually being captured on an ongoing basis by the use of peaceful penetration, the front lines were constantly being advanced. After the Battle of Hamel, a second battle was ordered by Field Marshal Douglas Haig on 11th July to attack the Villers-Bretonneux Plateau. However, barely had the planning started, when it was realised that the area on a frontage of 4,500 yards and to a depth of 1,000 yards had already been captured through peaceful penetration for a loss of 437 casualties over a two week period. For the Germans they later reported that this type of warfare cost them more than a regular attack. In addition, the 3rd Australian Division forced the German front line back a mile at Morlancourt.
 Peaceful penetration by the 1st Australian Division in the Meteren sector reached its climax on 11th July led by Lieut. Gaskell, MC, of the 1st Battalion who within three and a half hours cleared the German front for 250 yards south of the railway taking 32 prisoners and 3 machine guns (see trench map below reproduced with permission from the National Library of Scotland). On the north side Lieut. Morley, MC, had even more spectacular success taking 36 prisoners and four light machine guns. In the whole enterprise comprising just two patrols of four men, only one Australian had been wounded. The raids having taken
  place in daylight resulted in the adjacent battalions watching the streams of prisoners coming across to also join in and advancing the line on average of 200 yards. However the losses incurred that day resulted in the Germans stiffening their resistance and Australians in days to come noticed that the Germans were more keenly alert and their machine-guns sweeping No-Mans Land. On the 19th July the British 9th Division attacked at Meteren enabling the 9th Battalion to push forward its outposts. The attack was successful with the 9th Division capturing Meteren and 354 prisoners and 38 machine-guns. For the 1st Australian Division, without covering artillery they managed to secure nearly a mile of additional line with 97 prisoners and 16 machine-guns. The 9th Battalion lost only 25 in the advance, but in the shelling of the next few days its casualties were increased to 140.
Outcome
 The effect of peaceful penetration on German morale was quite pronounced, with the impact being noticed by both the Allies and Germans. The domination that the Australians had over the Germans manning the front line during this period was such that a whole outpost would frequently surrender to on occasions just a single or a couple of Australians. The success of these ‘bush tactics’ (as one German General described them) can be illustrated by one measurement in that 85 officers, 3,700 men, 38 trench mortars, and 400 machine-guns were captured by the AIF alone in this period (photograph above showing some of the booty collected by the 22nd Battalion at Ville-sur-Ancre). A letter captured from a German taken in one of these raids spoke about a dread of the Australians ‘who would creep up to our posts at night like cats, killing and carrying off.’ A captured German soldier is reported as saying: ‘You bloody Australians, when you are in the line you keep us on pins and needles; we never know when you are coming over’.
These recent minor operations had delivered vital intelligence and shown the Germans were now manning their forward positions with tired, under-strength or poor quality units, with the stronger better troops in the rear for offensive operations. This now gave an opportunity of launching a surprise offensive and to make deep in-roads into the German lines. General Foch thus wrote to Field Marshall Haig requesting for an early British offensive. Agreement was reached to launch this offensive where their two armies met on the Somme, and that the great offensive would be led by the two dominion corps whose reputation was now firmly established, the Australian Corp under Lieut. General Monash and the Canadian Corps under Lieut. General Currie.
The appreciation from the British to the Australians of their deeds during this period can be summed up during a small memorial service held on the 4th August, the fourth anniversary of the beginning of the war, when the commander of the British 2nd Army Sir Herbert Plumer asked Major-General Glasgow to bring some of his senior officers and then spoke to them. ‘You are leaving my army. I am sorry that I cannot inform you where you are going or what you are about to do. I am sorry to lose you, but I wish you success. You know, gentlemen, that it is not my practice to make eulogistic speeches – there will be plenty of time for that after the war. At the same time I would like to tell you that there is no division, certainly in my army, perhaps the whole of the British Army, which has done more to destroy the morale of the enemy than the 1st Australian Division’.
 FIRST WORLD WAR TIMELINE