
 20th December 1915: Anzac and Suvla evacuation completed without casualties. Troops brought to Lemnos before transferring to Egypt
19th December 1915: On the night of 19–20 December, the last Anzac and British troops were evacuated from Suvla and Anzac. The evacuation of these positions over the preceding two weeks had taken place virtually without casualties. For a more detailed account of the evacuation visit the 22nd Battalion ‘events archives: 1915’ page
16th December 1915: All ranks warned of impending operations in the evacuation of Gallipoli.
10th December 1915: Following the orders to evacuate Gallipoli, on the 10th and 11th all sick, wounded, surplus troops, vehicles and valuable stores are removed.
8th December 1915: The British Government orders the evacuation from Gallipoli. General Monro gives the order to General Birdwood to proceed with the evacuation of Anzac and Suvla.
27th November 1915: On 27th and 28th November, severe rain and thunderstorms, which turned into blizzards, hit Gallipoli. More than 280 men died and there were 16,000 cases of frostbite and exposure.
24th November 1915: With the failure of the August offensive to break through the Turkish lines, worsening weather conditions affecting both the men and delivery of supplies, the strengthening of the Turkish positions with the arrival of German artillery through Bulgaria, and the shift in focus to fronts elsewhere, the decision was made that the Allied forces on the Gallipoli peninsula should be evacuated. Following his visit to the Dardanelles to personally review the situation Lord Kitchener agreed to the evacuation that would comprise some 93,000 troops and 200 guns. On the 24th November 1915 the
22nd Battalion were given orders that from 1800 hours no action should be taken against the enemy except  to repel attacks or unless clear targets were shown. Thus began a period of reduced activity as part of the grand deception plan, so that when the evacuation eventually took place and the troops highly vulnerable to Turkish attack – Monroe had earlier estimated as much as 1/3rd casualty rate – they would hope to slip away as much as possible unnoticed.
Just three days after the orders were received, the untenable situation on the Peninsula was demonstrated with the arrival of severe rain and thunderstorms, which turned into blizzards. During this time more than 280 men died and there were 16,000 cases of frostbite and exposure.
22nd November 1915: Lord Kitchener is advised that Gallipoli should be evacuated. This would involve taking off more than 93,000 troops, 200 guns and more than 5,000 animals as well as vast quantities of stores and ammunition.
17th November 1915: Gale force winds and rain hit the Gallipoli peninsula. The landing piers at Helles and Anzac were smashed, and the barges – the life-line for the troops bringing food, water and ammunition – hurled against the shore.
15th November 1915: Following the failure of the Dardanelles campaign, Winston Churchill resigns as Chancellor of the Duchy of Lancaster and goes to serve at the front as battalion commander.
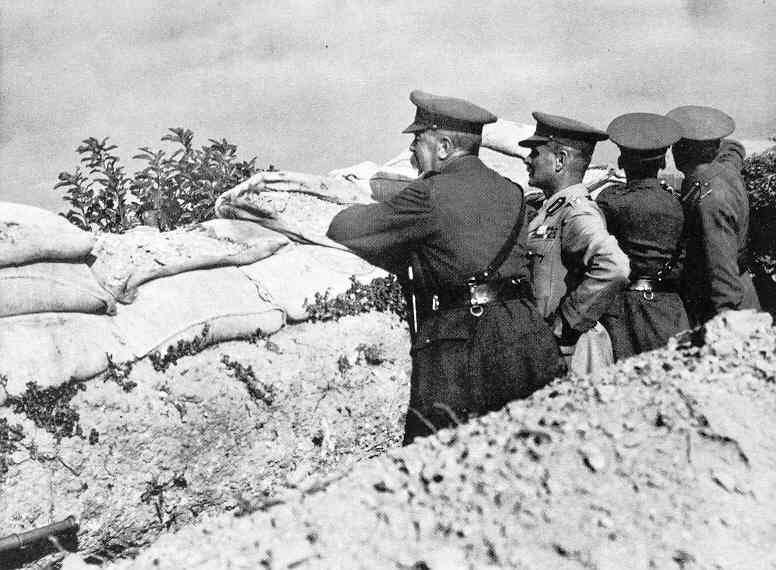 12th November 1915: Lord Kitchener (on the left in the photograph) visited the positions at Helles, Suvla and Anzac to see for himself the situation before giving the go-ahead for evacuation.
11th October 1915: Lord Kitchener asks Sir Ian Hamilton the estimated cost of an evacuation from the Gallipoli peninsula. Hamilton thinks 50% casualties might be expected. Hamilton replies that evacuation is unthinkable.
8th October 1915: First autumn storm on the Gallipoli peninsula causes damage to Allied harbours at Suvla and Anzac.
30th September 1915: The 10th (Irish) Division leaves Suvla for Salonika, followed by the French 2nd Division on 3rd October, signalling the beginning of the withdrawal from Gallipoli.
6th September 1915: The Kingdom of Bulgaria entered the war as an ally of Germany, Austro-Hungary and Turkey. This made it likely that the Turks on Gallipoli would be able to receive reinforcements from Germany along the Berlin to Constantinople railway.
 2nd September 1915: HMT Southland transporting Australian 2nd Division troops torpedoed by German submarine.
As part of the 6th Brigade convoy, HMT Southland had left Alexandria in Egypt three days before carrying Australian troops for the Gallipoli campaign. The ‘Southland’s’ contingent included the 21st Battalion, B Company of the 23rd Battalion, the 6th Brigade & 2nd Divisional Headquarters staff as well as various other details.
On the morning of the 2nd of September 1915, about 30 miles south of the island of Lemnos, she encountered the German submarine UB14, under the command of Oberleutnant Heimburg. The convoy had been following a zig-zag course all the way, the torpedo guard on each ship keeping a watch for submarines. The ‘Nile’, carrying the 24th Battalion and well ahead, had spotted the submarine and managed to outrun it, the ‘Scotian’ with the 22nd Battalion on board also managed to dodge it, but the first the ‘Southland’ knew of her predicament was the approaching torpedo. Following the explosion lifeboats  were lowered into the water, but many men ended up in the sea. The lifeboat containing Colonel Richard Linton, Commanding Officer of the 6th Brigade, capsized and he along with others fell into the water. According to eye-witness reports Colonel Linton refused to go into the rescue boat until all the other men had been rescued, but spending over two hours in the cold water took its toll, and he died soon after of shock and exposure.
The ‘Southland’ was the first Australian transport to be torpedoed, and although she did not sink and made it to Lemnos, thirty-six men died, fourteen in the explosion and twenty-two from drowning.
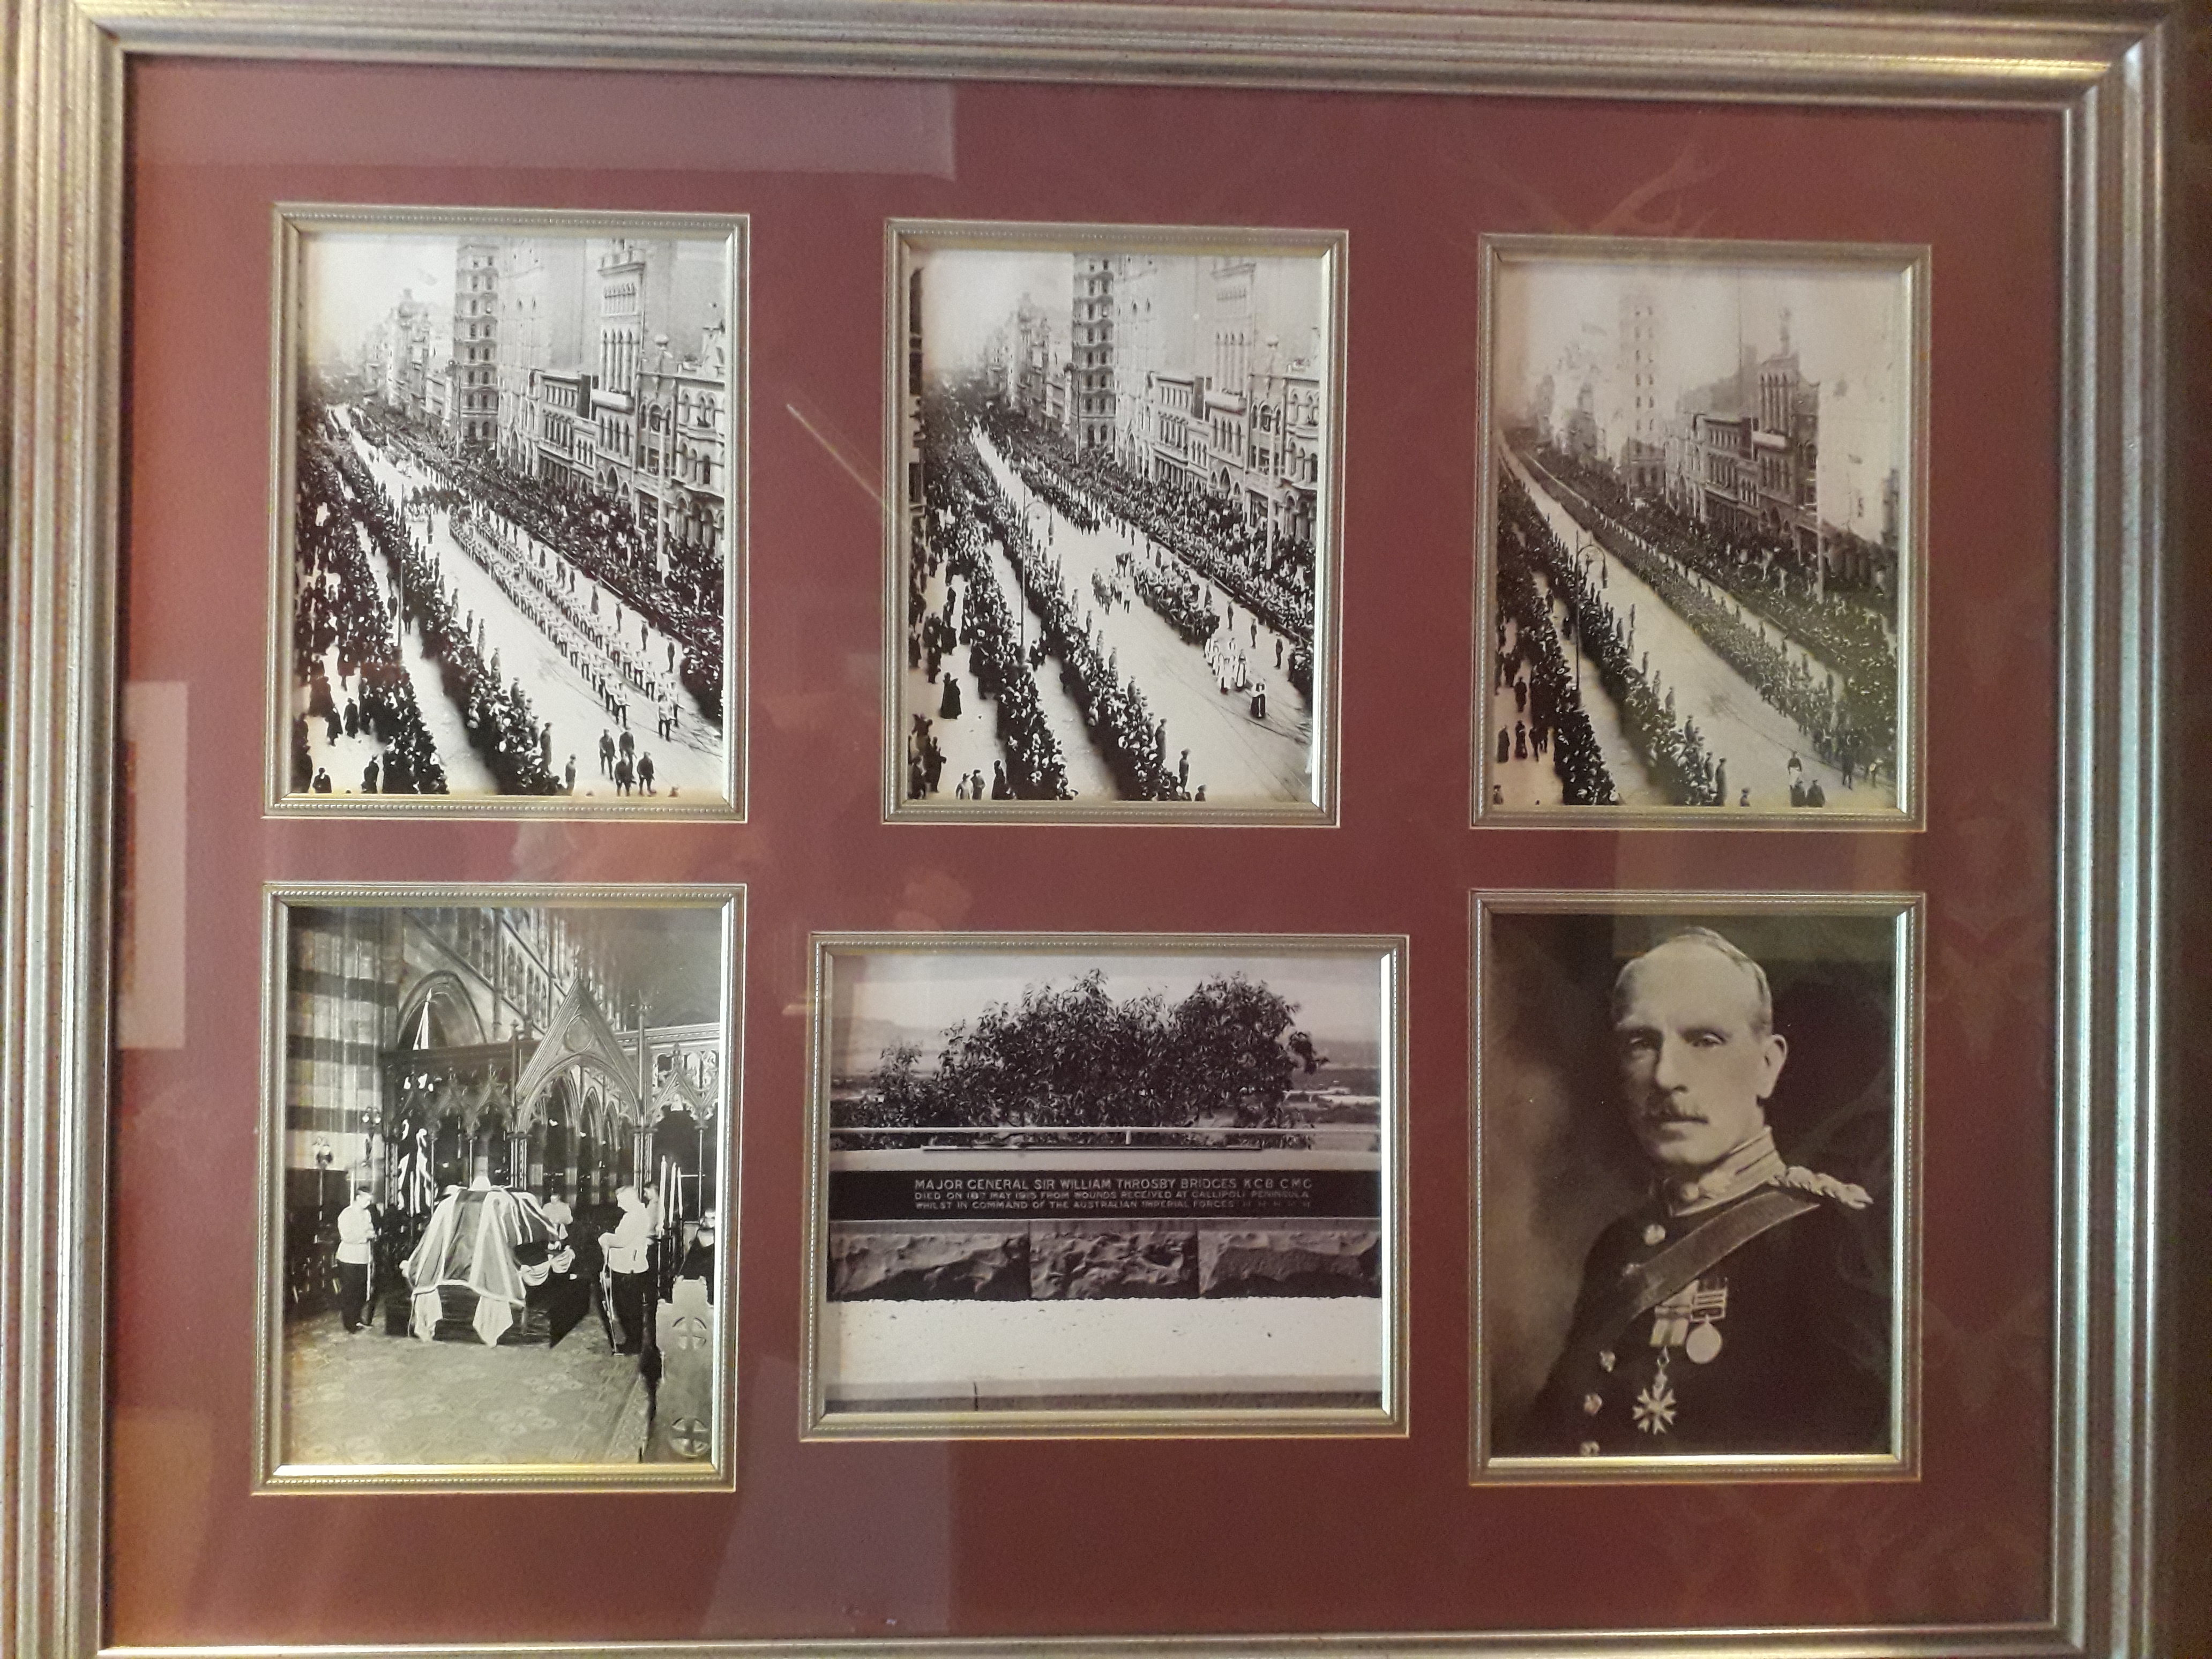 Meanwhile in Melbourne the military funeral took place of Major-General Sir William Throsby Bridges at St. Pauls Cathedral. General Bridges, who died of his wounds on the Hospital Ship ‘Gascon’ on the 18th May, was the only known Australian killed during the First World War to be brought home, and he was laid to rest at the Duntroon military college in Canberra the following day. [Photograph courtesy of the Hogg / Bardsley family]
29th August 1915: A combined British, Anzac and Gurkha force failed to take Hill 60.
27th August 1915: Battle renewed for possession of Hill 60. New Zealanders hold and consolidate their position on Hill 60.
21st August 1915: The British advanced at Suvla against Turkish positions at Scimitar Hill, and an Anzac force of the AIF 4th Brigade and the New Zealand Mounted Rifles attacked Hill 60. The attack, which was made in stifling heat and a swirling mist, was a failure and there were more than 5,000 British casualties. Many wounded perished in scrub fires ignited by the bursting shells. Attacking Hill 60 the following day, the Australian 18th Battalion was reduced to one third of its original strength after less than a fortnight of action. The attack on Hill 60 was destined to be the last at Anzac before the December evacuation.
15th August 1915: British units advanced at Suvla against the Turks on the Kiretch Tepe Ridge. Little progress was made and the attackers suffered more than 2,000 casualties.
13th August 1915: The German submarine UB-14 sank the transport HMT Royal Edward carrying reinforcements of the British 29th Infantry and members of the Royal Army Medical Corps to Gallipoli, with the loss of 861 British soldiers. Meanwhile the British submarine E2 got through the Dardanelles and between 13th August and 14th September conducted a successful campaign against Turkish shipping in the Sea of Marmara.
12th August 1915: The newly arrived British 54th Division attacked Kavak Tepe and Tekke Tepe. The 1/5th Norfolks disappear during the fruitless attack and enter history as “the Vanished Battalion”. The attack failed and Hamilton’s staff briefly considered the evacuation of Suvla and Anzac.
10th August 1915: Lieutenant-Colonel Mustafa Kemal led Turkish soldiers in a fierce counter-attack against British troops on the peak of Chunuk Bair. Of 760 men in the New Zealand Wellington Battalion who reached the summit 711 became casualties. The Turks drove the British from their positions and then charged over the rim of the mountain towards the sea. Here they were cut down in great numbers by machine-gun fire and naval bombardment. Nevertheless, the British had lost the heights and the August offensive was a failure. At Suvla the British attack is unsuccessful, and stalemate ensues. With the Turkish forces having recaptured the vital ground the Allies best chance of victory was lost.
9th August 1915: British reconnaissance planes reported significant numbers of Turkish reinforcements massing behind Chunuk Bair. General Sir Ian Hamilton personally visited Suvla in an attempt to get the stalled British advance moving forward. However, Turkish reinforcements were now arriving in strength at Suvla and an attack beat the British back from the key position of Teke Tepe.
8th August 1915: The New Zealand Wellington Battalion, backed up by British units — 7th Battalion, Gloucester Regiment and 8th Battalion, Royal Welsh Fusiliers — captured Chunuk Bair. Fierce Turkish counter-attacks throughout 8 August failed to drive them off. The New Army British forces made little progress at Suvla.
 7th August 1915: Dismounted Australian light horsemen charged the Turkish trenches at the Nek in what was a callous and ultimately futile charge against machine-gun and rifle fire. The attack failed, with 234 of the 8th and 10th Light Horse regiments killed and some 140 wounded.
6th August 1915: The August offensive to restart the Allied objective of taking the Gallipoli peninsular focused on capturing the heights of Chunuk Bair and Hill 971, and with the British to a land and push on at a new location slightly to the north at Suvla Bay. It was hoped that once the heights were captured the route would be open to cross and seize the peninsular. Part of the plan was to create a series of feints or diversionary attacks to confuse the Turkish defenders and draw fire away from the main thrust. One such diversionary attack, and biggest, was by the Australian 1st Division at Lone Pine.
Following a one hour bombardment the attack commenced on the 6th August 1915 at 5.30pm and took the Turks by surprise. Unknown to the Australian attackers much of the Turkish front line was covered by pine logs and many dropped through gaps that had been blown open by  the bombardment and fierce hand-to-hand combat took place. By 6pm the main objectives had been taken, but what followed was three days of determined counter-attacks by the Turkish army as they brought up reinforcements to try and take back the position. Both sides lost heavily over this three day period. Almost half of the 4,600 Australians that launched the attack became casualties, whereas Ottoman casualties were placed at between 5,000–6,000. Despite the success at Lone Pine, the main Allied objectives were not taken and the Gallipoli campaign ground to a halt culminating in the evacuation in December 1915. Later seedlings from the cones from the Lone Pine were taken back to Australia and commemorative trees have been grown and planted across the country.
During the period 6th – 9th August at Lone Pine seven Australians – from top left in clockwise direction: Pte Keysor, Pte Hamilton, Corporal Burton, Lieutenant Tubb, Captain Shout, Corporal Dunstan and Lieutenant Symons – were awarded the Victoria Cross, the highest military award in the British Army.


3rd August 1915: During the nights of 3–5 August, an extra 20,000 soldiers of the British 13th Division were secretly brought ashore at Anzac for the proposed August offensive.
31st July 1915: Mines are exploded opposite Tasmania Post, and in the ensuing attack the Turkish trench is captured by the 11th Battalion, 3rd Brigade.
 July 1915: With trench warfare and stalemate on the Western Front indicating that this war would now be one of attrition, and to meet the losses incurred by the AIF in Gallipoli (over 28,000 by the time of the December evacuation), more men were needed.
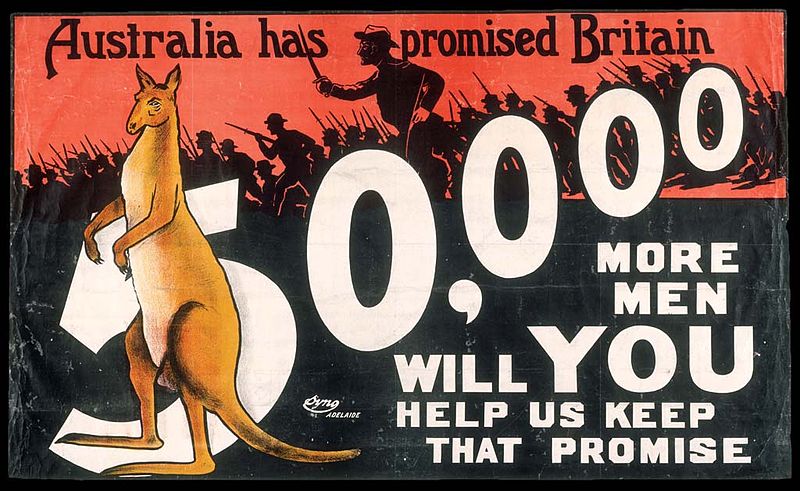
Recruitment into the AIF commenced at the outbreak of war in August 1914 to meet Australia’s initial commitment of 20,000 men. Recruits at this stage were plentiful and the recruiting stations were able to be more selective with respect to age, height and health and with a natural preference to those that had already had some military training and experience. By the end of 1914 more than 50,000 men had enlisted into the army, and many thousands more rejected on medical grounds. However, enlistment numbers in the first half of 1915 were low so a recruitment drive was required.
Nowhere was this more prevalent than in the State of Victoria. Recruitment nationally in the first half of the year was running at around 10,000 a month, of which about 2,000 per month were coming from Victoria. In June across the State this increased to 3,400 and then in July to 21,500 out of the national total of 36,500. July 1915 thus saw the greatest number of Australians enlist throughout the entire war. This was also the month that vast majority of the men from the ‘Following the Twenty-Second’ project focus group – the 5th Reinforcements / 22ndBattalion – enlisted with 12th July 1915 being the most active day when 43 of the 154 5th/22nd men signed up.
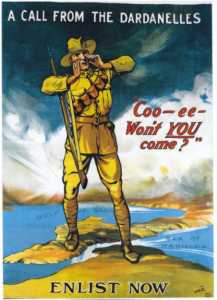 During this mid-1915 recruitment drive restrictions were lowered. Age limits were raised from 18-35 to 18-45, and height lowered from 5’6” to 5’2”. However medical checks were not as stringent – a combination of many men being economical with the truth about their conditions and age, and the sheer volume of men to process – and this together with the increased age limit led to a reduction in the overall standard of health within the AIF. Although commending men’s willingness to sign up for what was now becoming less of an adventure and more to do one’s duty against a brutal aggressor in Belgium and to show solidarity to fallen comrades, this reduction in standard did put an extra burden on the medical resources having to deal with the casualties coming back from the front.
17th July 1915: The transport ‘Kyarra’ disembarked at Melbourne with the first wounded from Anzac, 56 in number, along with 242 sick and 103 venereals.
12th July 1915: British forces at Helles launched an attack over a 1 mile front known as the Action of Achi Baba Nullah. Some Turkish trenches were captured but no significant headway was made. Between June and 13 July 1915, British forces had advanced just 500 yards at Helles at a cost of more than 17,000 casualties. Turkish casualties in the same period amounted to more than 40,000. On the same day General Masnou, commander of 1st French Division at Helles, is mortally wounded
5th July 1915: Between 28th June and 5th July, Turkish forces at Helles attacked British positions at Gully Ravine. In eight days the Turks suffered more than 16,000 casualties, more than 10,000 of whom had been killed. The British refused a truce in this area, similar to the one on 24 May at Anzac, to bury the dead.
29th June 1915: With the arrival of new troops of the 18th Turkish Regiment Kemal ordered a night attack on the Anzac lines at The Nek. The Turks rushed out from their trenches but were cut down by the 8th (Victoria) Light Horsemen, resulting in this being the last major offensive by the Turks at Anzac.
28th June 1915: Successful British attack on left flank at Helles , but with 3,500 Allied casualties (Turkish unknown)
21st June 1915: At Helles, French forces launched an attack on the Turks at Haricot Redoubt and Kereves Dere. The French, for little progress, suffered more than 2,500 casualties and the Turks lost more than 6,000 killed and wounded.
Meanwhile British troops reach the Euphrates in Mesopotamia, and re-occupy Aden.
4th June 1915: At Helles, the British launched the Third Battle of Krithia. Although the British broke through the Turkish lines towards Krithia, this advantage was not followed up and the Turkish line held. The British suffered more than 4,500 casualties, the French more than 2,000 and the Turks admitted to more than 9,000 dead and wounded. That night saw a raid by the Canterbury infantry at Quinn’s Post.
 29th May 1915: Major Quinn killed at Quinn’s Post. Named after Major Hugh Quinn, the 27-year old commander of C Company, 15th Battalion, AIF, Quinn’s post was established on the day of the Anzac landing as a New Zealand machine gun position and was taken over by Australian troops the following day.
Quinn’s Post was held by a variety of units until the evacuation of the Anzac sector and was the site of continual attacks and hand-to-hand fighting as Turkish troops defending the peninsula strove to recapture it. Fighting was intense, with heavy casualties on both sides, as it was a key position at the end of the Anzac line. It was overlooked by Turkish positions on three sides, and subjected to incessant sniper activity, and to grenade bombardment from Turkish positions only 15 metres away. In his official history, the Australian historian Charles Bean described the holding of the post as amongst the finest achievements of the Australian force.
On the night of 28th May the Turks fired a mine in front of Quinn’s Post and commenced an attack. On the following day, whilst reconnoitring for an attack to recapture the trenches seized by the Turks, Major Quinn was killed. He is buried in Shrapnel Valley Cemetery.
27th May 1915: U21 torpedoed and sank the battleship HMS Majestic as the ship guarded the ship to shore transports off ‘W’ Beach, Helles. Forty-nine sailors went down with the ship.
25th May 1915: The German submarine U21 torpedoed and sank the battleship HMS Triumph as the ship guarded the ship to shore transports off Anzac Cove. General William Birdwood, commander of the ANZAC Corps, wrote that the Triumph ‘suddenly turned just like a fish diving, and went straight to the bottom. It was really rather an awful sight and most solemn’. After the sinking of the Triumph, Admiral Sir John de Roebuck recalled the British battleships to the comparative safety of Mudros harbour. British war correspondent Compton Mackenzie wrote: The sense of abandonment was acute … every man had paused to stare at the unfamiliar emptiness of the water … it is certain that the Royal Navy has never executed a more demoralising manoeuvre in the whole of its history.
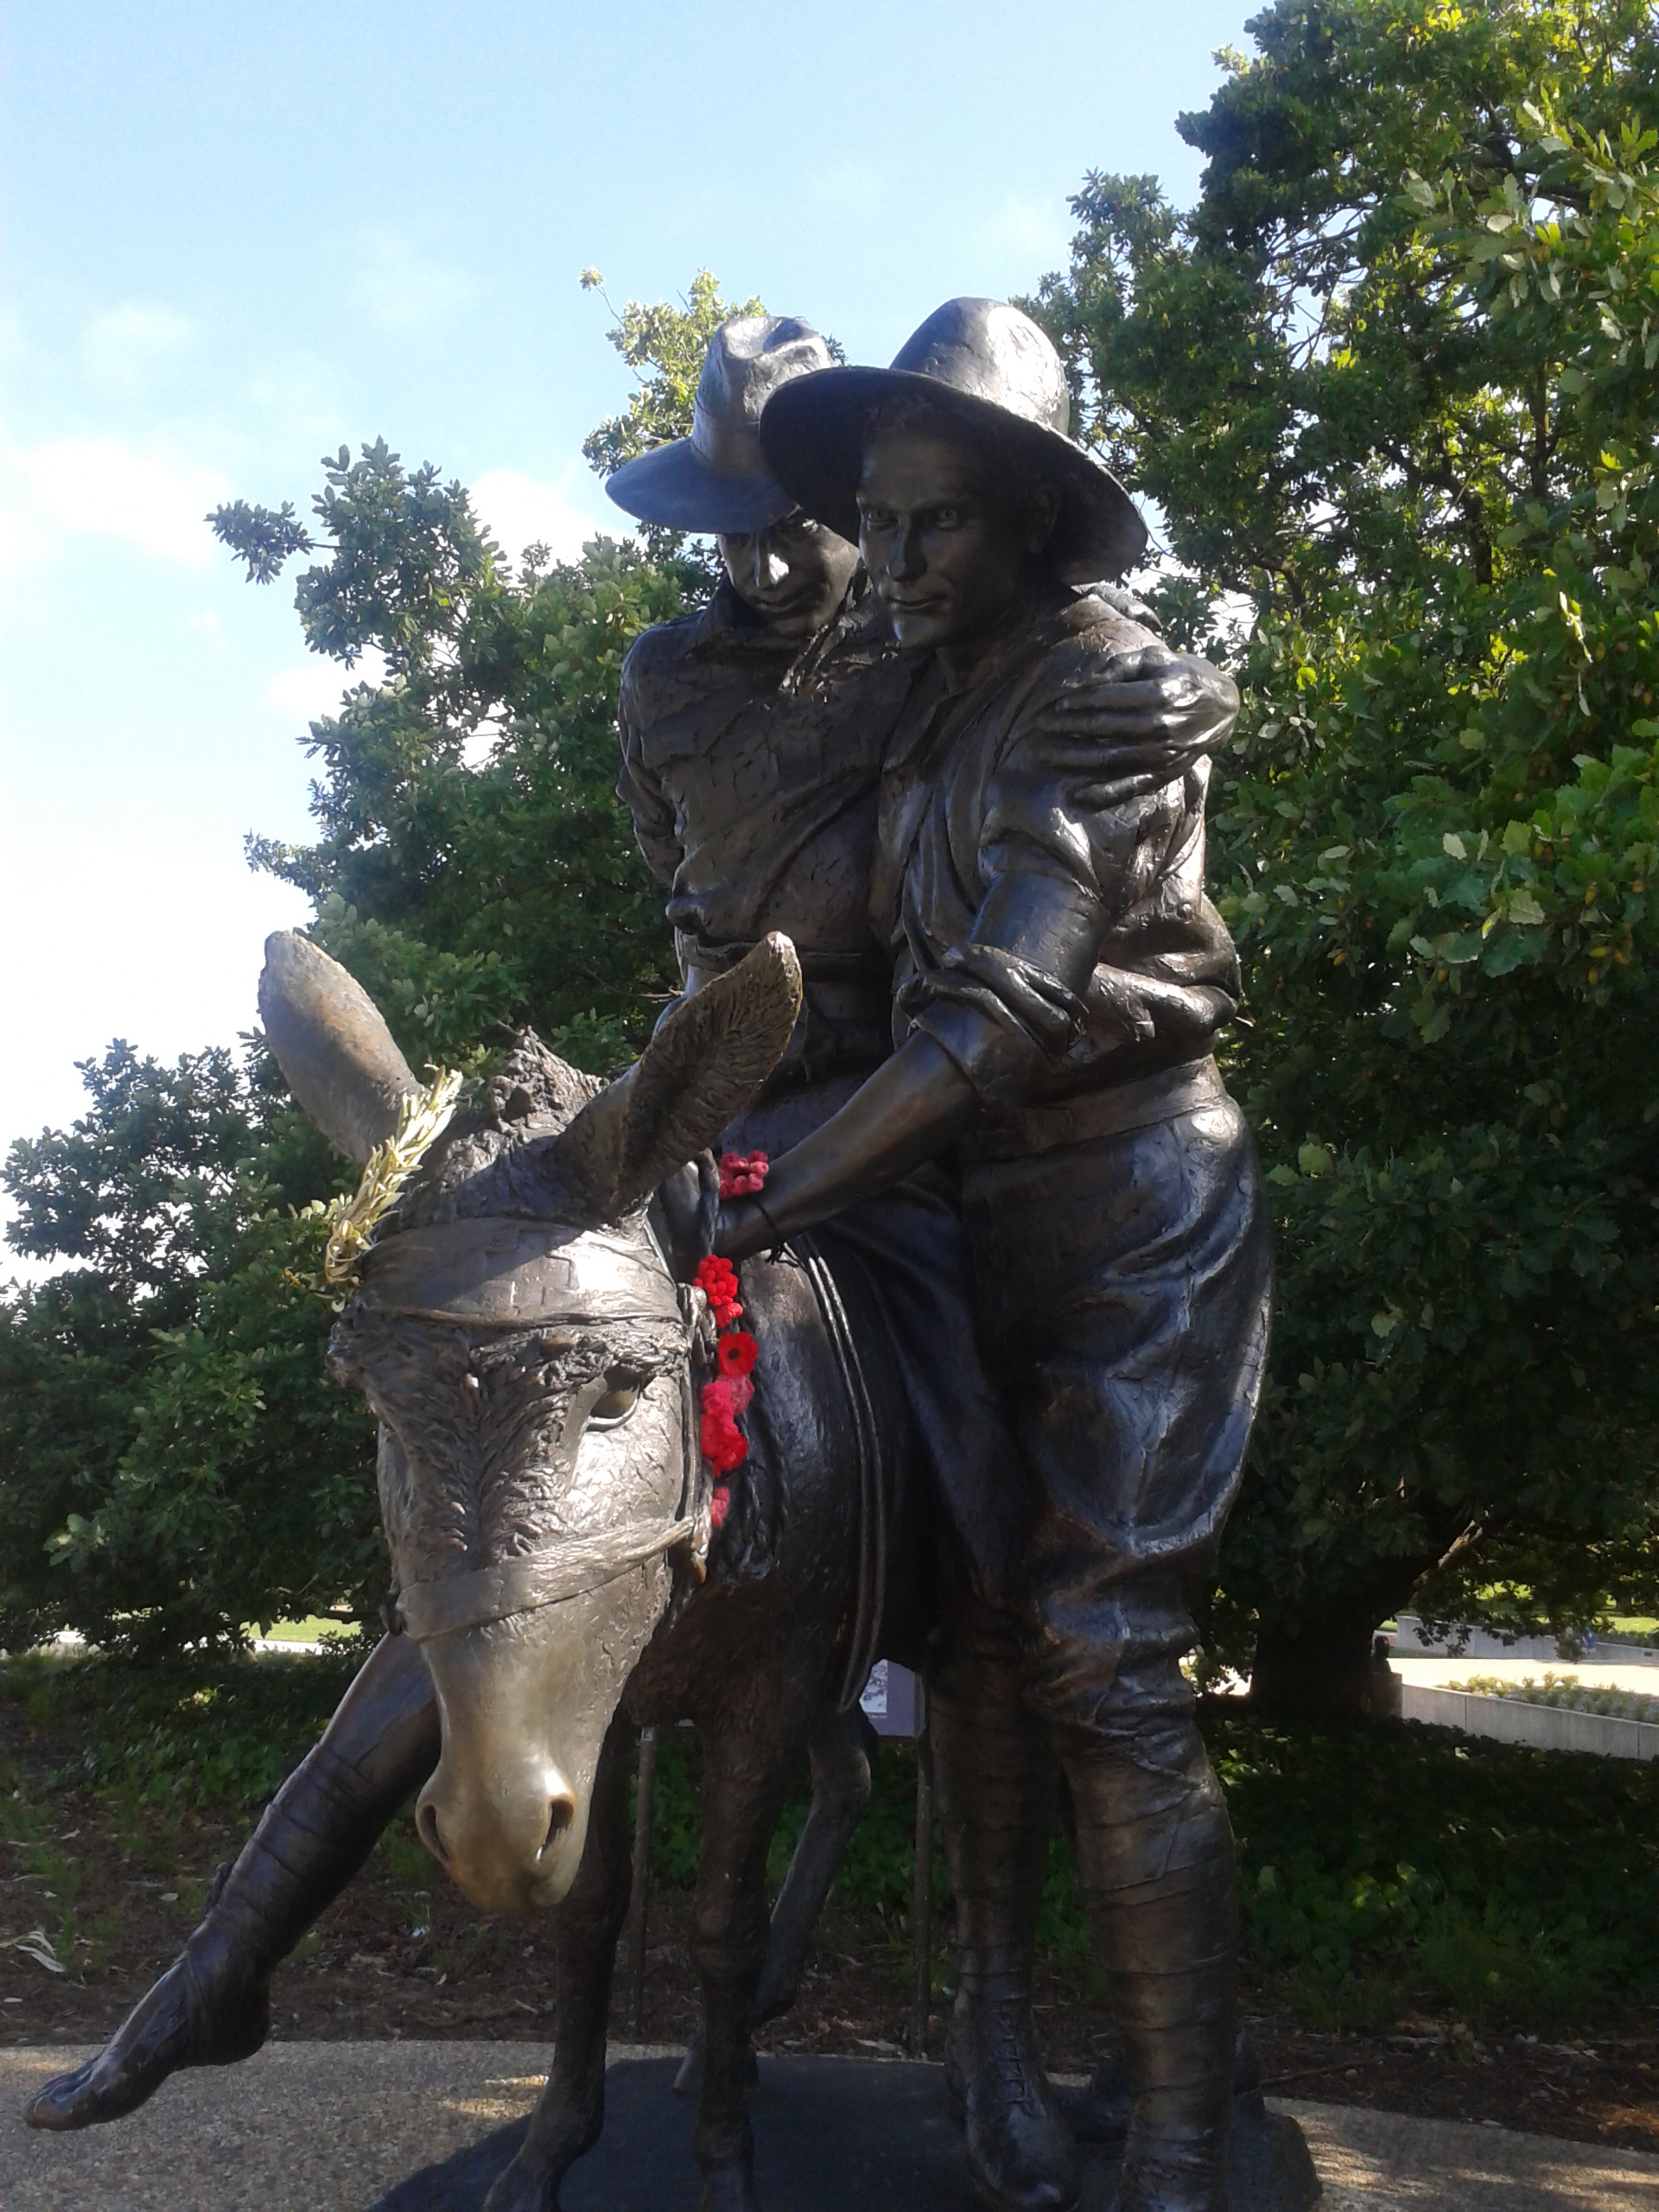
 19th May 1915: John Simpson Kirkpatrick, who served under the name John Simpson, was a stretcher bearer with the Anzacs during the Gallipoli Campaign. After landing at Anzac Cove on 25th April 1915, Simpson began to use donkeys to provide first aid and carry wounded soldiers to the beach for evacuation.
Simpson and the donkeys continued this work for three and a half weeks, often under fire, until he was killed on 19th May, during the Third attack on Anzac Cove.“Simpson and his Donkey” are a part of the Anzac legend, and his act of heroism is commemorated with a statue at the entrance of the Australian War Memorial in Canberra.
 During that day 42,000 Turks launched an attack at Anzac in an effort to push the 17,000 Australians and New Zealanders back into the sea. Lacking sufficient artillery and ammunition, the Turks relied on surprise and weight of numbers for success but their preparations were seen and the defenders forewarned. In the resulting battle the Turks suffered approximately 13,000 casualties, of which 3,000 men were killed; Australian and New Zealand casualties were 160 killed and 468 wounded. Ottoman losses were so severe that a truce was organised to bury the dead lying in no man’s land, which led to camaraderie between the armies, much like the Christmas truce of 1914 on the Western Front.
15th May 1915: Major General Sir William Throsby Bridges, Commanding Officer of the Australian Imperial Force at Gallipoli, was regularly seen on the front line at Anzac and on 15th May 1915 he was shot by a sniper through an artery in a leg.
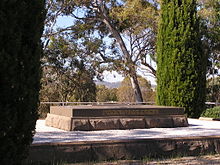 Bridges was evacuated to the hospital ship Gascon but his condition was such that doctors decided against operating to remove his leg. The wound became gangrenous and on 18th May 1915, en route to hospital in Egypt, he died. His remains were interred at Alexandria
but in June it was decided to return his body to Australia for burial. On 2nd September after a memorial service in St Paul’s Cathedral Melbourne and a funeral procession through the city, his body was transferred to Canberra and reburied overlooking the Royal Military College at Duntroon. Bridges is the only identified Australian killed in action in World War 1 to be repatriated and buried in Australia.
Read more on Bridges and his biography
6th May 1915: The Second Battle of Krithia commences. Between 6th and 8th May, the British with French, Australian and New Zealand forces attacked but the Turkish lines held and the village did not fall. Four battalions of New Zealanders attacked up Krithia Spur and with the 29th Division they managed to reach a position just south of the village. Amidst heavy small arms and shell fire, the Australian 2nd Infantry Brigade charged towards Krithia and gained 600 metres, though about 400 metres short of the objective with 1,000 casualties. Near Fir Tree Spur, the New Zealanders managed to get forward and link up with the Australians, although the British were held up and the French were exhausted, despite having occupied a point overlooking their objective. The attack was suspended and the Allies dug in, having failed to take Krithia or Achi Baba.
5th May 1915: Believing the Anzac position to be secure, General Hamilton moved the Australian 2nd Infantry Brigade and the New Zealand Infantry Brigade, along with 20 Australian field artillery pieces, to the Helles front as reserves for the pending Second Battle of Krithia.
1st May 1915: General Birdwood ordered the New Zealand and Australian Division under Major General Alexander Godley, to attack towards “Baby 700″. Colonel John Monash’s Australian 4th Infantry Brigade, the New Zealand Infantry Brigade and marines from the Chatham Battalion took part in the attack. The troops advanced a short distance during the night, under a combined naval and artillery barrage but in the dark became separated and after coming under heavy fire from their exposed left flank, were eventually forced to withdraw, having suffered about 1,000 casualties.
The first Victoria Cross (VC) to be awarded at Anzac went to Lance-Corporal Walter Parker, a stretcher-bearer with the Royal Naval Division. He assisted the wounded in an isolated trench and, despite his own wounds, helped to evacuate the position.
Night attack by 21 Turkish battalions at Helles breaks into French and British positions and is only stopped with great difficulty.
 30th April 1915: The Australian submarine AE2 is sunk in Sea of Marmara. In the five days following the Gallipoli landings the submarine had made appearances across the Sea of Marmara to give the impression of multiple boats, and several attacks against Turkish ships were made, although all failed because of increasing mechanical problems. All personnel survived the attack and were captured by Sultanhisar, although four died from illness while in captivity. Elsewhere on the peninsula there were heavy Turkish attacks at Anzac and Helles. Although these briefly broke through in the French sector, the attacks were repulsed by massed Allied machine-gun fire, which inflicted heavy casualties on the attackers.
28th April 1915: The First Battle of Krithia. Between the 25th and 28th April at Helles, British troops consolidated their positions from the initial landing beaches to form a line across the tip of the Gallipoli Peninsula. However on 28th April at the First battle of Krithia, they fail to take the village of Krithia or to make any headway against the Turks up the peninsula. At Anzac, battalions of the Royal Naval Division begin a temporary relief of the Australian units.
27th April 1915: On the afternoon of 27th April, the Turks under Mustafa Kemal launched an attack to drive the six Allied brigades at Anzac back to the beach. With the support of naval gunfire, the Allies held back the Ottomans throughout the night. Meanwhile the French forces comprising six battalions evacuate Kum Kale and take over positions on the right of the British line at Helles. The New Zealand Wellington and Canterbury battalions are engaged in battle at Walkers Ridge.
 25th April 1915: The invasion of Turkey commences with the British 29th Division, the Australian and New Zealand forces (Anzacs) and the French landing on the Gallipoli peninsula. In the early hours of the 25th April, twelve rowing boats were brought alongside each of the three battleships ‘Queen’, ‘Prince of Wales’ and ‘London’ transporting the Australian troops. These were made up into four tows of three boats, each being towed by one of the warships small steamboats. At 3.30am the battleships stopped, and the order was given to the troops to go ahead and land. At 4.30am on Sunday 25th April, half an hour before the opening of the British bombardment of Cape Helles, the Australian 9th, 10th & 11th Battalions of 3rdBrigade landed at Ari Burnu, about a mile north of their intended destination of Gaba Tepe. As Charles Bean, the official historian described, the bullets were striking sparks out of the shingle as the first boats reached the shore. The unfamiliar terrain was in parts steep and scrubby, covered by gorse like vegetation hindering the progress off the beach. The British were landing to the south at Helles, while the French targeted the eastern side of the Dardanelles strait at Kum Kale as a diversion to the main attack.
By the end of the day strong Turkish counter attacks confined the British to two small pockets of land on the tip of the peninsula at Cape Helles and the Anzacs to a strip of rugged country inland of Ari Burnu point (Anzac Cove). Both sides experienced heavy casualties. The French successfully got ashore at Kum Kale.
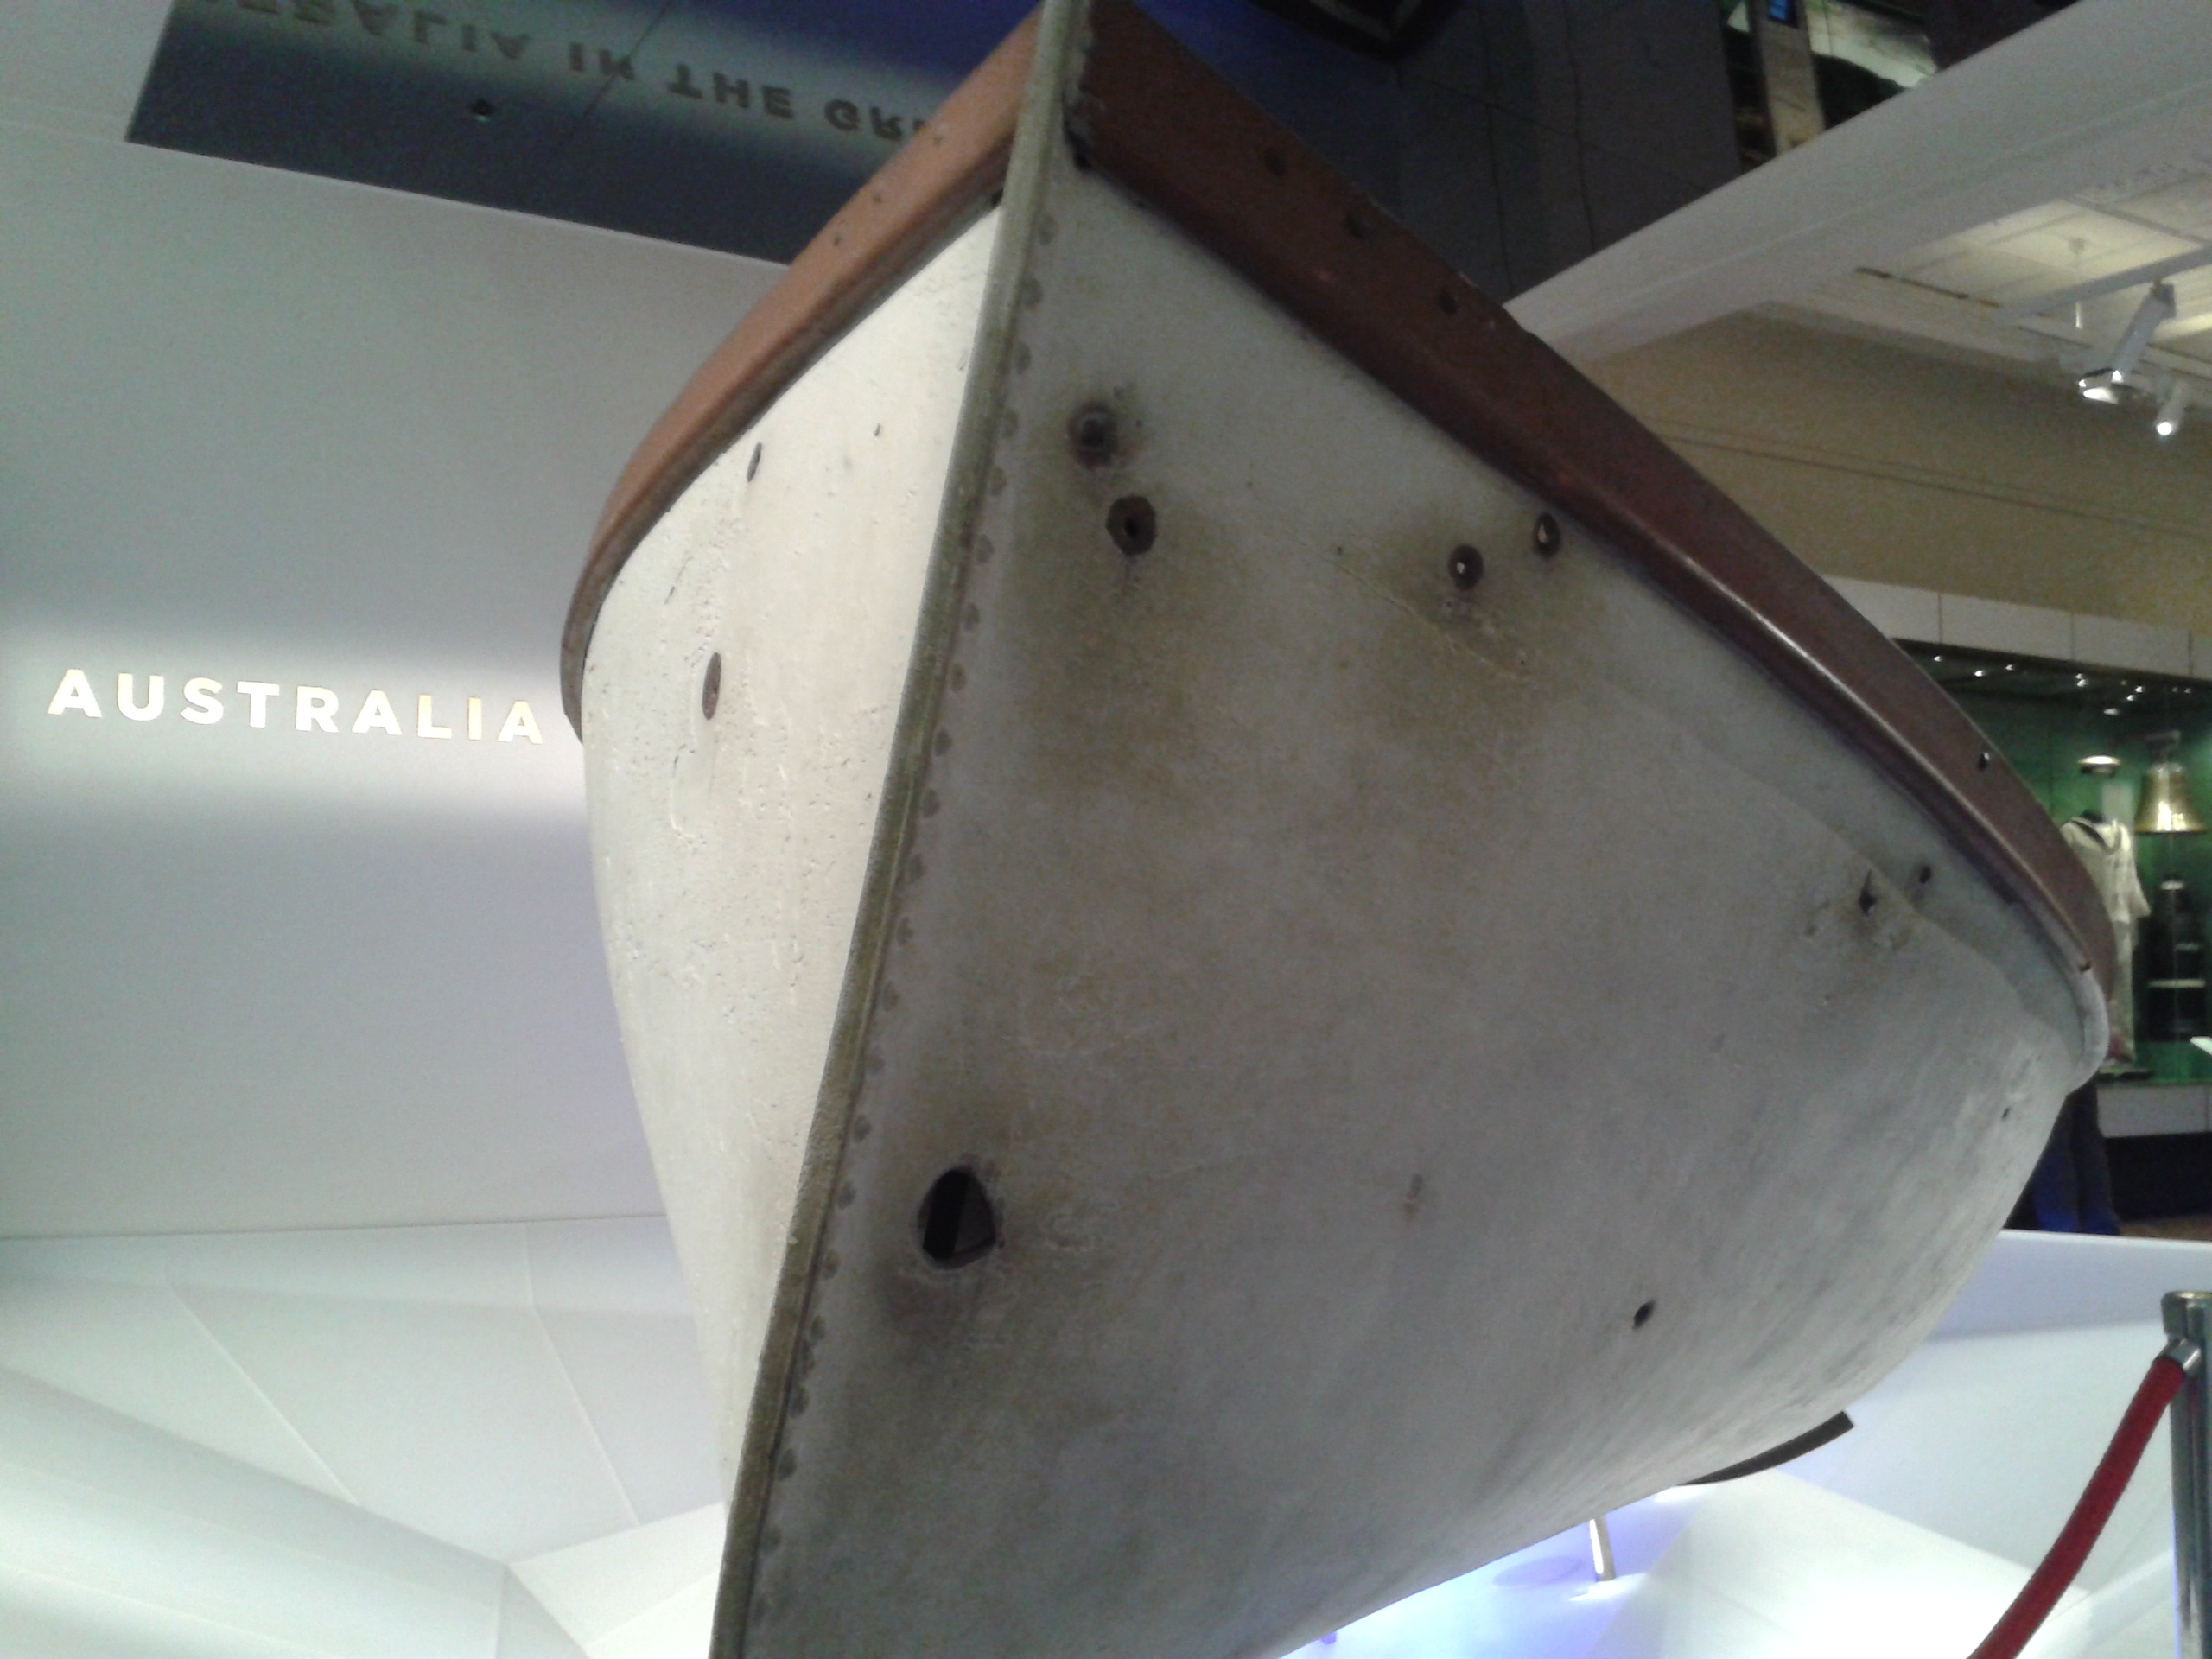
Photograph: a lifeboat from the ‘Ascot’ used to carry men ashore of the 13th Battalion on the 25th April, found at Anzac Cove after the end of the war. The lifeboat is now exhibited at the Australian War Memorial.
24th April 1915: Just after midday destroyers came alongside the transports of the AIF 3rd Brigade and transferred half of the 9thBattalion to the ‘Queen’, half of the 10th to the ‘Prince of Wales’ and half of the 11th to the ‘London’. The men, with their full packs and rifles, clambered on board very quietly and disappeared below decks. At 2pm the ships left port with the ‘Queen Elizabeth’ leading the line out of the harbour. There was tumultuous cheering from the French ships moored in the harbour. Just before dusk on the 24th the men of the 1st and 2nd Brigades in their transports to the north of the island of Lemnos saw steaming slowly a squadron of five warships. They were the battleships carrying men of the 3rd Brigade to Gaba Tepe, Gallipoli. (CEW Bean, Official History V1)
20th April 1915: More than 200 ships are assembled in the harbour at Mudros, Lemnos, in preparation for the British and French invasion of Turkey. The order came that first movement of troops would take place the following day, with the landing on the Dardanelles peninsula on the 23rd April. However bad weather and strong winds delay the movement of troops across to the transport by two days.
17th April 1915: One day out from Lemnos, the transport ship Manitou is threatened by a Turkish torpedo-boat. Although the Manitou had escaped without damage as the torpedoes fired missed their target, one of the lifeboats full of men crashed into the sea and many of the men ended up in the water. Fifty-three British soldiers were drowned.
4th April 1915: By morning the greater part of the 1st Infantry Brigade AIF had left Cairo by train for Alexandria, to sail to Lemnos. The 2nd and 3rd Brigades would follow.
22nd March 1915: With the danger of mines being greater than expected, and the number of Turkish guns increasing, it was decided that the only feasible method of getting the fleet through the straits was to undertake a grand attack by landing an army to fight upon the Peninsula. The great decision was taken. The Dardanelles Campaign became military in nature, and as Bean says the tragedy of Gallipoli was born.
18th March 1915: The great attempt to take the Dardanelles commences, with a naval bombardment of the Turkish forts. The British Fleet is shelled, mined and torpedoed, and the attempt fails.
4th March 1915: On a reconnaissance visit, General Birdwood is taken as far up the Dardanelles Straits as it was possible, and was at once convinced that the fleet could not get through without large military operations on land. This was more than Lord Kitchener had contemplated when the ‘demonstration’ to help the Russians in the east was first considered. Birdwood made it clear that in his opinion the landing of all his troops would be needed. Kitchener permitted the British 29th Division to sail from England, bringing Birdwood’s army including the Anzac forces up to 80,000 men.
28th February 1915: In preparation for the Gallipoli landing, the 3rd Australian Infantry Brigade, along with the 1st Field Company of Engineers and 3rd Field Ambulance left Mena Camp for the British military base on the Greek island of Lemnos.
20th February 1915: Lord Kitchener telegraphed Sir John Maxwell, General Officer Commanding British troops in Egypt, to warn the Australian and New Zealand contingents, now 30,000 strong, to prepare as a landing force for the Dardanelles. The command of the whole military force, including marines and a French Division, which would act with the Navy in the Dardanelles was entrusted to General Birdwood.
19th February 1915: The Dardanelles (Gallipoli) Campaign commences. The Russians, allied to the British and French, requested assistance in early January 1915 to the Ottoman attack in the Caucuses, so a demonstration of force was planned by the western powers. Winston Churchill, First Sea Lord of the Admiralty proposed a naval bombardment supported by a limited number of occupation troops to seize the forts and therefore control the straits. On the 19th February a naval bombardment by a combined Anglo-French task force soon put the outer forts out of action, but Turkish mobility thwarted any significant breakthrough and increased military effort was therefore required.
3rd February 1915: The Turkish 25th Division attacks the Suez Canal between Tussum and Serapeum. It is repulsed by Indian troops, and the Turkish army withdrew. British army casualties were less than 160, whereas the Turks lost an estimated 1,600 men.
1st February 1915: A further 10,500 Australians and 2,000 New Zealanders disembark at Alexandria from 19 transport ships. For the men that had arrived in Egypt two months previously, training is progressing well. The men are allowed one whole holiday per week, a partial holiday on Sunday’s, and the hours of training reduced to eight on the other five days.
15th January 1915: News came that Turkish troops had entered the Sinai desert, with the Suez canal as their objective
1st January 1915: Training for the AIF was under way in Egypt but under the new four companies per battalion structure. It would not be until the end of the month that the new battalions began to train as battalions and the middle of February before they were exercised as brigades.
Events Archives 1914
Published as ‘news’ 100 years on to the day, follow the 22nd Battalion on the project website and via Facebook and Twitter
 FIRST WORLD WAR TIMELINE
1914 1915 1916 1917 1918 1919
