

 24th December 1918: HRH The Prince of Wales presented medals to the 6th Brigade during a parade at Nalinnes. This was one of a series of parades and presentations made by the Prince to the Australian Corps during the latter part of December.
15th December 1918: HRH the Prince of Wales visited the 4th Australian Division at Dinant, and the following day the 1st Australian Division at Solre-le-Chateau.
6th December 1918: A conference was held at Australian Corps Headquarters, Avesnes, to discuss education, training and the future movements of the Divisions.
4th December 1918: Orders were issued over the coming days to the Australian Divisions to commence their movement towards the Rhine.
2nd December 1918: His Majesty the King visited the scene of recent battles of the Australian Corps. The Divisional Commanders of the 2nd, 3rd, and 5th Australian Divisions met his Majesty at different parts of the battlefield and described the part played by their respective Divisions in the battle of the 29th September and afterwards.
1st December 1918: His Majesty King George V visited the Australian Corps area. The troops of the 1st & 4th Australian Divisions lined the road entering the town of Avesnes and the troops of the 2nd and 5th Australian Divisions were drawn up in fields along the road leading from Avesnes to Landrecies. Divisional and Brigade Commanders were presented to the King at different places en route.
 26th November 1918: Lieutenant-General Sir John Monash (photograph below) wrote his ‘Farewell Order’ to the troops of the Australian Corps thanking all the men for their splendid and loyal support of the past six months. The letter laid out the importance of the next few months, to prepare the men for their return home by re-training and acquiring the new skills required to help in the building and development of the Australian nation. Monash knew too how important it was to keep the men, desperate to get home after years away, occupied and motivated while the repatriation process ground along well into the New Year.
21st November 1918: Lieut.-Gen. Monash returned to Le Cateau and held what would be his last great conference of divisional and brigade commanders to launch his scheme of repatriation and industrial training for the troops preparing to return home. It was unlikely that Field Marshall Haig would release the troops under his command until February when the  peace negotiations might end. It was expected that repatriation would take a year to complete so it became important that the troops understood that although the fighting had finished, they were now to be involved in the future development of Australia by acquiring the new skills and trades to take home. The priority for repatriation would be based upon i) length of service; ii) family responsibilities; and iii) assured employment. After the ‘Anzac’ contingent, the men that left in the first half of 1915 followed by those in the Australian convalescent bases in London, Monash put in place a quota system that was adopted by each division, with 1,000 men in each quota. In December and January nearly 20,000 men of the ‘Anzac’ and convalescents embarked from England. In May 1919 the last 10,000 men in France were brought to England where the camps on Salisbury Plain now held 70,000 men. At this stage Australian soldiers were marrying at 150 a week resulting in 15,000 new partners and children being carried to Australia in 1919.
16th November 1918: The British Fourth and Second Armies were detailed to commence their march into Germany where the occupation of the Rhine was an Armistice condition. The Fourth Army consisted of the 2nd Cavalry Division, VI Corps, IV Corps, IX Corps and the Australian Corps. Meanwhile the Australian Demobilisation and Repatriation Branch was formed with General White presiding.
 11th November 1918 – Armistice Day: The first news of the Armistice was received by telephone from 3rd Australian Division at 7am who picked up the message by wireless. The German delegation headed by Matthias Erzberger agreed to the terms and at 5.20am the Armistice was signed aboard Marshal Foch’s private train parked in a railway siding in Compiegne Forest. To allow time to get the message to the troops in the front line it was decided that the Armistice would come into effect at eleven a.m. on the eleventh day of the eleventh month bringing to an end a four year war that had cost over 11 million military and 8 million civilian lives, including more than 62,000 Australians (62,272 CWGC records). [Photograph right of crowds celebrating the news of the Armistice in Melbourne]
10th November 1918: The Australian 1st and 4th Divisions began to move forward to relieve the British 32nd and 66th Divisions beyond Le Cateau. Their progress was slowed by time delayed mines that demolished railway, road junctions and bridges. Later that night Marshal Foch ordered that all operations were to cease at 11am the next day.
21st October 1918: Back in the rest area, General Hobbs who was commanding the Australian Corps in Monash’s leave of absence was warned that the Corps would again be required. As Prime Minister Hughes had promised the divisions that they would have a long and unbroken rest British 4th Army General Rawlinson agreed to a two week delay.
17th October 1918: The artillery of the Australian 3rd, 4th and 5th Divisions were transferred under the British 6th Division (IX Corps).
12th October 1918: With the decision to grant furlough to Australia to the officers and men who embarked in 1914, the seven battalions earmarked for disbandment in September along with the 60th – the 19th, 21st, 25th, 29th, 37th, 42nd, & 54th – finally met their fate.
6th October 1918: The II American Corps took over the line on a one division frontage. General Rawlinson was still anxious regarding its lack of experience – as shown by incidents in this relief of parties arriving without water, rations, Lewis Guns, ammunition and telephones and thinking they were taking over billets – so arrangements were made for temporary supply from Australian stocks plus Colonels Wiltshire (22nd) and Forbes (20th) plus Majors Brown (28th) and Matthews (22nd) stayed until the Americans settled down and all the Australian field artillery was temporarily transferred to II American Corps. The rest of the Australian 2nd Division followed the four others to a rest area far to the rear between Abbeville and the sea.
 5th October 1918: The previous day ended with Beaurevoir still in German hands but the 6th Brigade’s front protruding between it and Montbrehain. Meanwhile Lieutenant-General Monash received orders from General Rawlinson to retain control of the battle front for one more day until relief by the American II Corps. The 22nd and 23rd Battalions remained in their positions guarding the right flank while the 21st, 24th and the 2nd Pioneers, assisted by twelve tanks would attack and seize Montbrehain (map courtesy of the DVA Anzac Portal). For the Pioneers this would be the first time that they would attack as infantry. The British 137th Brigade would protect the right flank by seizing Mannequin Hill. To the north the British 25th Division would again attack Beaurevoir. At dawn on the 5th October the barrage fell, but with some batteries arriving late shells fell upon the attackers from the 21st Battalion causing losses. In front of the Pioneers the Germans had set up a line of machine guns manned by about 100 men along the railway embankment, but Lieut Wilkinson of the 6th Machine Gun Company managed to outflank them, pouring fire into their positions killing or wounding dozens and the rest simply melted away. This action allowed the right of the line to reach its objectives without further trouble, though operations on the IX Corps front on the right had failed. On the left the 24th Battalion had met strong opposition from posts in the hedges, houses and trenches on the western side of the village plus from the enemy barrage being directed into their positions. Company Sgt. Major Cumming was killed trying to lead a charge and then recently commissioned Lieut. Ingram along with Lieut Pollington (Military Cross) led a rushed attack from both flanks
  killing or capturing forty and taking six machine-guns. Lieut Ingram (photograph left) – Victoria Cross – then with the assistance of a tank captured 63 prisoners from one dugout before bursting into the back of a house where he rushed the cellar stairs capturing another thirty prisoners. The left company of the 24th Battalion had been caught by heavy fire from the village, and its Company Commander Capt. Fletcher killed by a field gun firing at the tank which had come up to support the attack. As the two centre companies attacked through the village their progress was often impeded by French civilians emerging from houses and cellars gratefully greeting their liberators. By noon the northern edge of Montbrehain had been taken. To the north the British 25th Division had captured Beaurevoir. At night two battalions of the 118th Regiment, 30th American Division came up and took over the salient formed by the capture of Montbrehain, in what had been the last and one of the most gallant actions fought by the Australians in the First World War. Although taking its objectives including 400 prisoners, victory came at a high price with 30 officers and 400 men becoming casualties, a consequence of a limited attacking into a salient somewhat reminiscent of the costly attacks at Mouquet Farm two years previous. Ten officers and 110 other ranks had been killed, including some of the best leaders in the 6th Brigade, and many of the best NCO’s that had served with the AIF.
4th October 1918: With the British 7th Brigade on their left attacking the village of Beaurevoir, the 22nd and 23rd Battalions of the Australian 6th Brigade attacked towards Geneve and Ponchaux. Both battalions were stopped at the Montbrehain-Geneve road, with every attempt to go farther meeting intense fire from three copses on the ridge ahead. The day ended with Beaurevoir still in German hands but the 6th Brigade’s front protruding between it and Montbrehain. Meanwhile Lieutenant-General Monash received orders from General Rawlinson to retain control of the battle front for one more day until relief by the American II Corps. Major-General Rosenthal in turn received orders that his 6th Brigade was to take over the line held by the British 138th Brigade for an attack on the following morning at Montbrehain.
 3rd October 1918: With the 5th Brigade on the right, astride the Le Cateau Road, and the 7th Brigade on the left (see map below) the objectives were first the Beaurevoir Line and then passing through to the village of Beaurevoir and the uncaptured part of the Beaurevoir Line on the left. The attacking battalions would be supported by five artillery brigades, a company of heavy tanks, and eight Whippets would assist the 5th Brigade to capture Beaurevoir. The 7th Brigade looked down on the Torrens canal, more of a stream than a major waterway. The early part of the night was wet making it difficult for the tanks to arrive on time, and the infantry had to endure a steady stream of gas shells being fired at the positions at Joncourt, Estrees and Folemprise Farm. The barrage fell and the 18th and 19th Battalions on the right followed by the 17th and 20th made progress through the thick wire, assisted by the tanks, but made possible through the bravery of men like Lieut. Maxwell (photograph above right) of the 18th Battalion who was awarded the Victoria Cross. On the left the 7th Brigade encountered pill-boxes and over fifty machine-guns in their sector. Lewis gunners of the 25th Battalion suppressed much of the enemy fire aided by two tanks. The Germans were holding Prospect Hill to the left and Major-General Rosenthal was content with securing a foothold on the heights just short of Beaurevoir when he brought forward his reserve 6th Brigade, the orders not reaching the 22nd Battalion until 3pm. A barrage was placed at 4.30pm but it would not be until two hours later at 6.30pm that the 22nd and 24th Battalions would make their attack. By the end of the day the Beaurevoir Line had now been seized by IX Corps on a 5,000 yard front from Sequehart to Joncourt and by the Australian Corps for 6,000 yards up to the south of Prospect Hill. The undulating countryside beyond Beaurevoir and Montbrehain still lay in German hands – Field Marshal Haig was straining at the bit to put his cavalry through once these two villages were taken.
 2nd October 1918: The 5th Brigade took over the part of Monash’s front facing the Beaurevoir Line during a cold and clear night. In the morning the 16th Lancashire Fusiliers on their right attacked but any orders for the 18th Battalion to assist had not materialised, and like so many hurried local efforts to exploit a potential breakthrough failed despite initial successes. During the intensely dark night the 7th Brigade relieved part of the 5th Brigade on the northern half of the 2nd Division front while the reserve brigade (6th Brigade) came up to the gully in rear of Nauroy. The attack would be delivered at 6.05am, 45 minutes before sunrise.
1st October 1918: Overnight the enemy decided that any further hold on the tunnel line was hopeless and further resistance melted away. By 10am the 5th Division reported the capture of Joncourt and soon passed it over to the 15th Lancashire Fusiliers of the 32nd Division. By midday the whole of the village of Bony was in Australian hands and that patrols were rapidly approaching Le Catelet village, with the Germans withdrawing their troops, transport and guns up the hills beyond the Beaurevoir Line whereupon they settled and began to shell the Australian outposts heavily such they had to be withdrawn beyond the crest. Just to the south the British IX Corps had sized the Beaurevoir Line east of Joncourt. Meanwhile the northern end of the tunnel had been taken and by nightfall the whole operation had been successfully completed. The three day operation had resulted in the capture of 3,057 prisoners and 35 guns. The way was now open for XIII Corps to pass across the line of the tunnel and swing left to knock the enemy out of the northern continuation of the Hindenburg Line, and for the Australian Corps to push on to the final obstacle in the Hindenburg Line, the Beaurevoir Line. The Australian 3rd & 5th Divisions were by now exhausted from their efforts and were relieved by the 50th Division from the British XIII Corps and the Australian 2nd Division respectively. The two relieved divisions now joined the 1st & 4th Divisions in the welcome rest area to the west and south-west of Amiens, their service in the front line now done.
30th September 1918: Passing through the 30th Division the objectives for the reserve Brigade of the 3rd Division (9th Brigade) were Bony village and the northern entrance of the tunnel. The battlefield, cratered, wet and muddied and crossed by belts of wire was proving difficult for all to cross and by the time of the assault only seven of the eighteen tanks allotted for the attack had appeared. For the 14th Brigade of the 5th Division they were to swing their right flank forward in the direction of Joncourt in conjunction with any advance made by IX Corps. This was a day of intense, slow and methodical hand to hand fighting. By nightfall the line of the 3rd Division had advanced 1,000 yards and had reached the southern outskirts of Bony village, and the 5th Division had cleared the Le Catelet trench system and its right well to the east of Nauroy. Pte Ryan of the 55th Battalion was awarded the Victoria Cross for defeating a determined counter-attack.
 29th September 1918: The day broke with familiar mist and at 5.50am the attack against the Hindenburg Line at the Bellicourt Tunnel was launched (map courtesy of the DVA Anzac Portal). Quite early in the day excellent news came in that the 46th (North Midland) Division within IX Corps had skilfully crossed the canal at Bellenglise / Riqueval, thereby relieving pressure on Monash’s right flank. The initial reports coming in from the Americans leading in the Australian Corps were also encouraging, but at the time that the Australians were due to cross the first objective (at 11am, the Green Line which lay on the Le Catelet Line) messages started to arrive that the both the 5th and 3rd Divisions had been held up. Once again, having reached the villages of Le Catelet and Gouy, it appeared that the Americans had failed to properly mop-up, though another factor was that many of their officers – already few in number for the size of their units – had become casualties. To the south the American 30th Division was making better progress and Bellicourt was reached, though here too Germans appeared from underground between the Americans and the 5th Division. In spite of hard fighting in the face of vigorous defence the Australian 5th Division cleared away the opposition taking Bellicourt. By 2pm the 5th Division had advanced through Nauroy and had passed the Le Catelet line in that vicinity. However the 3rd Division was only part across the canal and to the north still in the vicinity of the American start line, the 10th & 11th Brigades now intermixed with the Americans. Major Wark of the 32nd Battalion received the Victoria Cross for picking up and reorganising a considerable number of Americans he found there along with securing the help of a tank to break through. Pushing on and heading south-eastwards Major Wark was surprised to see British troops from the 4th Leicester’s (46th Division) that had managed the extraordinarily difficult crossing of the
  canal, seizing bridges before they could be blown up. The south entrance to the tunnel (photograph left) was now in Allied hands, but the north still in German. As a result Monash had to amend his plans abandoning the objective of taking the whole Hindenburg Line in one day. Any concern that the enemy might launch a concerted counter-attack against his vulnerable troops astride the canal soon dissipated probably on account of the 46th Division’s success on the right flank. During the night orders were issued to the Second American Corps to withdraw all advanced troops for rest and re-organisation. In the meantime the Australian 2nd Division was ordered up by bus from the Peronne area and to take up position just west of the Hindenburg Line.
28th September 1918: The battle lines for the Australian Corps on the Hindenburg Line had the two American divisions, the 30th Division on the right with the 60th Brigade leading and the 59th Brigade forming a defensive southern flank in case IX Corps failed to cross the canal, and the 27th Division on the left attacking with the 54th Brigade and with the 53rd Brigade providing a defensive flank for XIII Corps. For the exploitation phase the Australian 5th Division (8th & 15th Brigades attacking, with 14th Brigade in support) on the right and the Australian 3rd Division (10th & 11th Brigades attacking, with 9th Brigade in support) on the left. The total frontage was 7,000 yards with the first phase to be conducted under a barrage, and the second phase by the Australians open warfare to the Beaurevoir Line.
 27th September 1918: At 5.30am the 27th American Division carried out their attack on the uncaptured Hindenburg Outpost Line under a barrage and aided by tanks. The main objectives were the trench system about Quennemont and Gillemont Farms. The attack by the battle-green Americans failed to take its objectives, and although many men made it to the German trench line they became surrounded until relieved by the Australians two days later. The failure appeared to be down to over eager troops rushing on and not ‘mopping-up’ correctly – a lesson learned the hard way by the British and Australians in 1916 and 1917 – and as a result it compromised the artillery plan for the main assault two days later. Monash succeeded in getting General Rawlinson to provide additional tanks out of Army reserves to place on the 27th Division front to bring the infantry up to the barrage. Of the five divisions available to Lieut.-Gen. Monash, the Australian 2nd Division was to remain in Corps reserve but would be brought forward by motor bus to the vicinity of Peronne.
26th September 1918: Lieut.-Gen. Monash held what would be his largest conference of the war which included the two American Divisional Generals and Brigadiers, the Australian 2nd, 3rd & 5th Divisional Generals and their Staff, plus the commanding officers of the Tanks, Air Force and Cavalry. Field Marshal Haig also called in while the conference was in full swing and offered a few words of encouragement to those gathered. The subject was the attack on the Hindenburg Line which at this part of the front lay just to the east of the St. Quentin canal, constructed in Napoleonic times to link the Somme and the Scheldt rivers, and hence creating a formidable natural barrier. In the Australian Corps sector the canal passed through a 5km tunnel at Bellicourt which afforded the Germans with shell-proof accommodation, and on top was well protected with multiple belts of wire and pillboxes. Monash decided that the best chance of success and less risk was to attack across the ‘land bridge’ over the tunnel. The attack planned for the 29th September would in part start from territory previously attacked by III Corps on the 18th September that had yet to be captured, and this task was given to the 27th American Division for the following day. That night an intense artillery action began against the German positions on the Hindenburg Line in preparation for the main assault in three days time. Included in the bombardment was the use of a newly developed ‘mustard gas’ targeted at the German living quarters, occupied defences and approaches.
23rd September 1918: By the evening the last of the Australian 1st & 4th Divisions had been relieved by what were now the only two American Divisions remaining in the British zone, the 27th and 30th Divisions numbering 50,000 men in total. This was the Second American Corps, but now coming under Monash’s Australian Corps command. The British IX Corps on the right shifted their boundary north. For the first time since their arrival in France in April 1916 there were, just for a few days, no Australian troops in the front line.
22nd September 1918: Due to the falling numbers of reinforcements and the losses in most of the infantry battalions down to critical levels, orders were received that selected battalions should be disbanded in order to reinforce the others within their Brigade. The 19th, 21st, 25th, 37th, 42nd, 54th and 60th Battalions were selected, but all except the 60th refused to disband. By this time many of the Australian battalions had independently reduced their companies from four to three, and the number of platoons per company down from four to in some cases just two. Lewis gun teams were now to just two men, and Vickers gun crews could no longer carry full loads of ammunition. On the 27th September Monash postponed the order until after the coming attack on the Hindenburg Line.
21st September 1918: With the Australian 1st Division being withdrawn from the front line following their successful attack three days earlier, orders were received for the 1st Battalion to return to the front to take part in an attack on the Hindenburg Outpost Line and to do what they saw as the ‘unfinished work of III Corps’ on their flank. All but one member of ‘D’ Company refused to take part in an attack as a protest and 118 members of the company that went missing were subsequently Court Martialed and imprisoned for 10 years for desertion. This was the AIF’s largest incidence of ‘combat refusal’ during the war and was a result of the stresses of prolonged periods of combat. All 118 men were pardoned at the end of the war.
19th September 1918: Following the great victory of the previous day the Australians were now able to look down upon the St. Quentin canal and sweep with fire the whole of the sloping ground down to the canal denying the use of that ground by the enemy and making it impossible to withdraw the guns and stores which now littered the area. However the two Corps on either side had not fared as well. The IX Corps to the right had reached the Red Line, but the exploitation phase was not pressed until a day later, whereas to the north III Corps failed to take any of the enemy’s outpost line meaning that the left flank of the Australian Corps bent back sharply. This portion of the Fourth Army front lay opposite the Bellicourt tunnel and would create problems for Monash in the days to come.
 18th September 1918: A soaking rain set in two hours before the 5.20am start to attack the Hindenburg Outpost Line (map courtesy of the DVA Anzac Portal), drenching the attackers and defenders alike. The Australian 1st and 4th Divisions attacked with two Brigades and with the exception of Grand Priel Woods in front of the 3rd Brigade no serious opposition was encountered. Under the devastating creeping artillery and machine-gun barrage the first ‘Red Line’ objective across the Corps front was taken by 10am, putting the Australians in possession of the old British front line of March 1918, but still some 1,500 to 2,000 yards from the Hindenburg Outpost Line. Sgt Sexton of the 13th Battalion took out a field gun and several machine guns for which he was awarded the Victoria Cross. Major General Glasgow’s 1st Division pushed on without pause and by nightfall had overwhelmed the garrison of the Hindenburg Outpost Line along its front. Major General Maclagan’s 4th Division also fought its way forward to within 500 yards of that line, but the troops exhausted from crossing difficult terrain and in full view of the enemy, were ordered to rest. Advantage was taken to advance the artillery, and at 11pm the 4th Division again attacked and after severe fighting also captured the whole of the objective trench system, during which Pte Woods of the 48th Battalion rushed a post and held off a counter-attack earning him the Victoria Cross. A great victory had been achieved with relatively little loss. The 1st Division, attacking with 2,854 men
  suffered 490 casualties in total whereas the 4th Division had 532 casualties from a strength of 3,048. Over 4,200 prisoners were taken in addition to the large numbers of enemy killed or wounded, plus the Corps captured more than 80 guns that had been abandoned by the German Army. As it turned out both the Australian 1st and 4th Divisions had fought their last battle in the Great War, finishing in a blaze of glory. [Photograph of the Australian 4th Division Monument, Bellenglise]
 16th September 1918: Lieut.-Gen. Monash held a conference with his Commanders that would be involved in the next battle, and the date set for the 18th September. After the successful manoeuvre battle at Mont St. Quentin the attack on the Hindenburg Outpost Line would revert back to being a set-piece battle similar to that of the 8th August, though this time there would be just eight tanks supporting the Australians. In order to compensate for the lack of tanks Monash arranged to double the machine gun resources by bringing up complete machine-gun battalions from the 3rd and 5th Divisions, giving a total of 256 Vickers Machine Guns on a frontage of 7,000 yards to deliver a dense machine gun barrage that would advance 300 yards ahead of the infantry. Also to try and trick the enemy Monash ordered the creation of dummy tanks, clearly visible to the enemy, to give the impression that there were many more tanks about to attack, thus hastening the defenders abandoning their positions. On the morning of the attack the moon would set at 3.37am and the sun would rise at 6.27am: zero hour was therefore fixed for 5.20am.
14th September 1918: The next few days saw some daring exploits on the part of the 13th Brigade and 2nd Brigade in the capture of tactical points and in the bloody repulse of all attempts by the enemy to recapture them. In this way the line was carried up and a little beyond what had been the old British reserve line of trenches of March 1918 which lay within 5,000 yards of the final objective of the first phase.
 13th September 1918: General Rawlinson called a conference of his three British 4th Army Corps Commanders – Butler (III), Monash (Australian) and Braithwaite (IX) – at Assevillers to discuss the next series of operations that would take the great Hindenburg Line system comprising the Hindenburg Outpost Line (or Hagricourt Line), the main Hindenburg Line, the support or Le Catelet Line and finally the reserve Beaurevoir Line (map courtesy of the DVA Anzac Portal). The first phase, the taking of the Hindenburg Outpost Line, would be made in conjunction with the British Third Army to the north and the French to the south. The attack would be conducted with just eight Tanks for the Corps on account of the attrition of the previous month, and with no great supply of replacements likely before the end of the month. Although no date for the attack had been yet set, the two Australian Divisions (1st & 4th) needless to say kept pushing their line forward, as they had done throughout the summer, with their highly successful aggressive patrolling or peaceful penetration tactics.
12th September 1918: A new Corps was added to the British 4th Army – the IX Corps – to operate on the Australian right, and as a result the British 32nd Division passed from Monash to this new Corps under the command of Lieut.-Gen Braithwaite, who like Monash and Lieut-Gen Godley on the left were all Gallipoli veterans.
10th September 1918: The Australian 3rd & 5th Divisions were relieved by the 1st and 4th respectively with the 1st Division on the north and the 4th Division on the south. The southern Corps boundary was on the Omignon River which due to its course would mean that the Australian Corps frontage would reduce as the advance progressed.
 6th September 1918: The Australian 3rd Division came into the line on the north, with each of three divisions now operating a single brigade frontage – 11th Brigade (3rd Division), 8th Brigade (5th Division) and the 97th Brigade (32nd Division). To each division a squadron of Australian Light Horse and Cyclist Battalions were assigned to provide energetic forward reconnaissance through vigorous pursuit and to keep pressure on the enemy rear-guards and disrupting any plans they had to replicate the ‘scorched earth’ policy that they had employed during the 1917 withdrawal to the Hindenburg Line.
5th September 1918: To the east of the River Somme Lieut.-Gen. Monash had two divisions – the Australian 5th and British 32nd Divisions – operating on a two brigade frontage. The previous night the British 74th Division had taken over the line held by the Australian 2nd Division. Furthermore Marshal Foch had decided to readjust the boundary between the British and French with the latter taking over from the 32nd Division with the new boundary on the Amiens-St. Quentin road reducing the Australian Corps frontage. During the day the Australians advanced to the line Athies-Le Mesnil-Doingt-Bussu, with severe fighting taking place in the vicinity of Doingt. Opposition mainly came from machine-guns though some isolated field guns also caused problems. 150 prisoners were captured that day.
 4th September 1918: With the Canadians Corp having broken through the Drocourt-Queant Switch Line near Bullecourt on the 2nd September, from the morning of the 4th September it was obvious that the German Army intentions were to withdraw to the Hindenburg Line some 20 kms distant to the east. The Somme that had been to focal point for so many years had been crossed and now attention was turning to the enemy’s last line of defence. However on the Australian Corps the river still caused a great obstacle and for many days in early September the area was a mass of activity in fixing, strengthening or rebuilding bridges and crossing points to enable all the machinery of war to move eastwards. Every available technical unit that could be spared from other urgent duty was concentrated upon this vital work. Most of the Engineer Field Companies, three of the five Pioneer Companies, both Tunnelling Companies and all the Army Troop Companies laboured in relays night and day. Peronne itself was now becoming a bottleneck, at times resembling central London at peak traffic time.
 3rd September 1918: The loss of Mont St. Quentin was a major factor in the Germans deciding to retreat from the area and as a result the high ground of the Flamicourt Spur fell to the attackers from the British 32ndDivision fighting within the Australian Corps. Meanwhile the Australian 3rd Division had continued to push up the Bouchavesnes spur in a north-easterly direction helping to consolidate the position around Mont St. Quentin during which Pte Cartwright (33rd Battalion, photograph top right) and Pte Weathers (43rd Battalion, photograph bottom right) were awarded the Victoria Cross. To their left the British 74th Division within III Corps pushed forward and further on again north the British Third Army having crossed the old Somme 1916 battlefields was now approaching the Canal du Nord over a wide front.
 By the night of the 3rd September Lieut.-General Monash’s Australian Corps had achieved all its objectives set since the launch of the offensive four days previously, and resulted in the award of eight Victoria Crosses (click on link or photographs to read more), the most in any single Australian action during the Great War. During the offensive the Australians had suffered some 3,000 casualties but had taken 2,600 prisoners. General Rawlinson, British 4th Army Commanding Officer, referred to the operation as the finest single feat of the war, with many of the congratulations falling to Major General Rosenthal’s 2nd Division (photograph below left of the Australian 2nd Division monument, Mont St. Quentin). “The capture of Mont. St. Quentin by the Second Division is a feat of
  arms worthy of the highest praise. The natural strength of the position is immense and the tactical value of it, in reference to Peronne and the whole of the system of the Somme defences, cannot be over-estimated. I am filled with admiration at the gallantry and surpassing daring of the Second Division in winning this important fortress, I congratulate them all with my heart.” Rawlinson.
2nd September 1918: The 15th Brigade succeeded in putting the 58th Battalion across the river and this assisted the 14th Brigade to mop up the remainder of Peronne. Later the rest of the 15th Brigade and two battalions of the 8th Brigade were also involved in the fighting, during which St. Denis and the brickfields were taken.
 1st September 1918: The 6th Brigade, some 1,334 strong, had been ordered to cross the Somme and move up behind the 5th Brigade in readiness to carry the attack and take possession of the remainder of the main Mont St. Quentin spur. Passing over the line won the previous day the 21st, 23rd and 24th Battalions assault in the rain carried it well over the crest of Mont St. Quentin. Pte Mactier (photograph top right) of the 23rd Battalion was killed while silencing machine guns that blocked the way for which he was posthumously awarded the Victoria Cross. Sgt Lowerson of the 21st Battalion (photograph bottom right) led a charge that overcame the centre of resistance on the left flank, and Lieut. Towner of the 7th Machine Gun Company provided continuous covering
  fire for which both men were awarded the Victoria Cross. Ferocious hand to hand fighting took place, with the bayonet to the fore and as a result very few enemy prisoners were taken that day. After two attempts the summit of the Mont was taken and with it a commanding position over Peronne and the land to the east. The 7th Brigade moved forward into support thereby relieving the 5th Brigade from front line duty. Meanwhile just to their south on the Australian 5th Division front the 14th Brigade had crossed the river at Clery (see map below) besides the 6th Brigade and the 53rd and 54th Battalions assaulted with a direct attack against Peronne. Many belts of wire had to be struggled through before crossing the moat and taking the western half of Peronne. Cpls Hall, Buckley (posthumously) and Pte Currey were all awarded the Victoria Cross. During the day the Brig-Gen. Elliott’s 15th Brigade made spirited attempts to cross the river and to co-operate from the south but suffered a number of casualties in the process.
 31st August 1918: The advance by three battalions of the 5th Brigade, with an average of just 330 men per battalion, of the Australian 2nd Division began at 5am on the 31st August 1918, with the 19th, 17th and 20th Battalions yelling and making as much noise as possible to make it appear that their numbers where much greater than they actually were. The ruse worked resulting in the surrender of many of the enemy lying out in their advanced positions, and a nest of seven machine guns was rushed and taken without any loss. The centre (17th) and left (20th) Battalions gained a footing in Feuillaucourt and on the main hill (photograph left) but the progress of the 19th Battalion on the right was stopped by heavy machine gun fire from St. Denis. This was the site of a ruined sugar refinery and lay on the main road between Peronne and Mont St. Quentin, and the defenders held out to the last. The 17th
  Battalion had by 7am passed through the ruins of Mont St. Quentin village and had crossed the main road when it received a strong counter-attack while it was recovering from the initial assault causing it to withdraw across the road to an old trench system to the west. The 19th Battalion beat off five successive counter attacks inflicting severe losses upon the enemy though suffering themselves 380 casualties.
30th August 1918: In preparation for the attack against Peronne and Mont St. Quentin the Australian 2nd Division sent its reserve 5th Brigade to cross the river at Feuilleres, to pass through the area in front of the Third Division and to secure a bridge head on the Clery side of the river opposite the Ommiecourt bend. The 5th Brigade found part of the village of Clery occupied and the trench system to the east still held in strength, however after determined fighting the 5th Brigade reached its allotted destination with only slight casualties but capturing seven machine guns and 120 prisoners.
 29th August 1918: The line of the Somme had been reached and all three divisions south of the Somme stood upon the high ground sloping down to the river looking past Peronne and as far south as St. Christ (map courtesy of Australians on the Western Front). To the north of the river the 3rd Division kept in step reaching Suzanne, Vaux, Curlu, Hem and Clery. The last two days of the advance led the Australian Corps across the maze of trenches and debris of the 1916 campaign. The weather was unfavourable, there was little shelter plus the Germans fought a determined withdrawal all leading to the line brigades reaching the Somme in a very tired condition. Later that day Lieut.-Gen. Monash called a conference with his Divisional commanders at Proyart to discuss the next phase, the crossing of the Somme and the taking of Mont St. Quentin.
27th August 1918: Through energetic pursuit of the enemy the Australian Corps line now lay to the east of the villages of Vermandovillers, Foucaucourt and Fontaine. The Australians also had control of the whole of the Cappy bend including the crossing of the Somme at Eclusier.
26th August 1918: With the offensive focus now shifted further north with the British Third and First Armies, Lieut.-Gen. Monash took up the mantle to keep up an aggressive policy by ordering the 5th Division (8th Brigade) and 2nd Division (6th Brigade) to keep up continued pressure and advance by infiltration but avoid fighting that might involve heavy losses. A similar order was given to the Maj-Gen. Gellibrand’s 3rd Division north of the river and the British 32nd Division on the far right of the Corps.
 25th August 1918: South of the river a new effort was made by the Australian 1st and British 32nd Divisions at 4pm to drive back the enemy along the whole front. At dusk the German artillery in this sector fired a heavy barrage of smoke and gas shells, and it was afterwards found that their infantry had withdrawn. By the evening the line had moved forward to the old French front between Frise and Dompierre. However the troops having been heavily shelled with gas for the previous two days were in no condition to press on so the relief was effected by the Australian 5th and 2nd Divisions replacing the 1st Division.
23rd August 1918: The 4.45am dawn attack by the Australian 1st Division and the British 32nd Division supported by a creeping barrage, full artillery engagement plus Tanks and Aircraft in what became known as the Battle of Chuignes was an unqualified success. Characterised by a series of river valleys feeding into the Somme, it was an ideal country for machine gun defence from the numerous woods, hedges and copses in the area. The 32nd Division successfully captured Herleville, taking some 400 prisoners with little loss, and the 1st Division under the skillful leadership of Major-General Glasgow had seized ground to a depth of 2,400 yards from Herleville to the western edge of 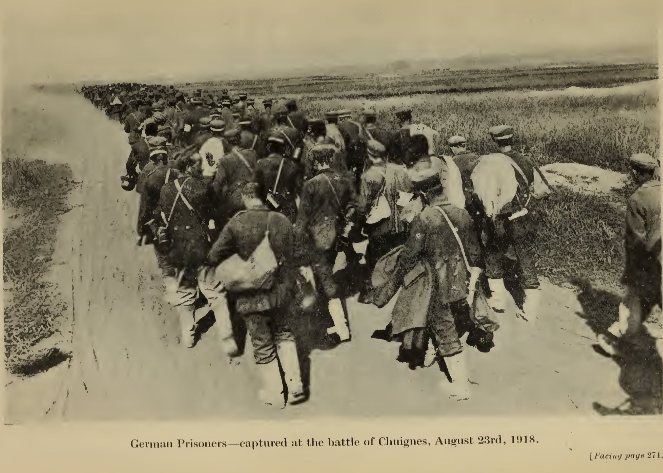 Cappy by the river. The Germans suffered many casualties at the hands of the onrushing infantry supported by the Tanks which disposed of the numerous machine gun units, plus 3,100 prisoners were taken along with 21 guns plus a huge 15 inch railway gun that had been bombarding Amiens. To the north of the river the 3rd Division took the village of Bray, with the 40th Battalion taking 200 prisoners with few losses. This defeat in the Chuignes Valley compelled the German High Command to abandon all hope of holding the ground to the west of the Somme and they began the evacuation in the coming days ahead. In the British Third Army sector V Corps were now only two miles outside of Bapaume, and Field Marshal Haig issued a new order to be less cautious and for each division to be given a distant objective for exploitation.
21st August 1918: With the general offensive now being widened by the French to the south, which yielded 10,000 prisoners in the first day, and the British Third Army over the old battlefields of the Somme at Albert, where a further 2,000 prisoners were taken, the time was now appropriate for the resumption on the British Fourth Army front. By now the Liaison Force had been broken up and the British 32nd Division had replaced the 17th Division under Lieutenant-General Monash’s Corps command. From south to north the Corps frontage was the Fourth, 32nd, Fifth, and the Third north of the river. The First and Second Divisions were in Corps Reserve. A conference was held at Fouilloy near Corbie to announce the plan for the next phase of the battle at the big bend where the river changed its flow from due north to due west.
 18th August 1918: The 6th Brigade, following the victory at Ville-sur-Ancre in May and the subsequent gas attacks at Villers-Bretonneux was so weak that the centre battalion in the attack at Herleville, the 22nd Battalion had three companies of only 30, 24, and 36 men with the fourth supporting company just 40 strong. On the brigade right the 23rd Battalion had already taken its objectives through peaceful penetration, but in the process discovered that a fresh German division had just come in. From the outset the under-strength 22nd Battalion, with limited artillery support, came under heavy artillery and machine gun fire. Of the ninety men from the 22nd Battalion that attacked, sixty were either killed, wounded or taken prisoner.
15th August 1918: Through peaceful penetration and sharp bombing up trenches the 6th Brigade reached Hill 90 on the outskirts of the old trench network south of the tumbled mounds of Herleville. To their south the 13th & 14th Battalions of the 4th Brigade advanced further up the trenches ahead. Lieut.-Gen Monash therefore set the objective for the 2nd Division beyond Herleville, the decision aided by reports from prisoners that the German Army was preparing to withdraw back across the Somme and that the position could be taken even with light forces.
14th August 1918: The next week was occupied by local operations conducted by the front line units to straighten the front and to dispose of a number of strong points, small woods and village ruins which as long as they remained in enemy hands were a source of annoyance. The attitude of the Germans was alert but not aggressive, and that he showed every desire to stand and fight. There was no indication of any intention to withdraw out of the great bend in the river, a point corroborated from the statements from the steady toll of prisoners being taken.
13th August 1918: The Australian 3rd Division, having been in the line for the longest time ahead of the offensive and had a hard time fighting its way forward from Mericourt to Proyart, was in badly need of rest, and the newly arrived British 17th Division duly effected the relief with the 3rd Division moving into Corps Reserve. To the north of the river Monash also created a temporary ‘Liaison Force’ comprising the 13th Brigade and the 131st American Regiment under the command of Brigadier-General Wisdom of the 7th Brigade. Its functions were to keep in touch and liaise with III Corps to the left and to protect the left flank preventing the Etinehem Spur being recaptured. At this stage Monash now had seven divisions under his command.
12th August 1918: A halt was called to the Amiens offensive which enabled Lieutenant-General Monash to re-organise his Australian Corps, now holding a frontage of 16,000 yards as a result of the right flank that had been hugging the railway diverging away from the river Somme, plus having taken over the ground north of the river. To help the stretched Australians General Rawlinson temporarily placed the British 17th Division under Monash.
11th August 1918: Foch having been impressed by the progress so far and the success of the French to the south urged a continuation. Field Marshal Haig continued to press the general attack on this the fourth day however he was now having doubts as he expected German reserves to be soon impeding progress here as the attacking forces came across the old trench lines and wire entanglements of the French sector in 1916. As a result his thoughts were now turning to his Third and Fourth Armies further north. The Australian role on the 11th August was for the 1st Division to continue swinging up the flank for the Canadians on the right at Lihons, while the 2nd Division on their left was to straighten the line and complete the objectives of the previous day.
10th August 1918: With the task of reaching the line Roye-Hallu—Bray still not completed, Lieutenant-General Currie placed orders to attack with his reserves – the 4th Canadian Division through on the left and the British 32nd Division on the right – in conjunction and simultaneously with Monash’s Australian 1st Division on the left at 8am. The attacks of both the 9th & 10th August were not as well planned or co-ordinated as the opening day, and hence resulted in greater casualties. For the Australians they would be attacking without tanks as few had survived the attack on the 9th, and the reserve 13th Tank Battalion had been given to the Canadian Corps whose task was the vital one. The artillery barrage fell too far ahead and with the Germans alerted, the 11th Battalion suffered many casualties including eleven officers in just a few minutes. The 5th Battalion also lost heavily as they attacked at factory Wood in front of Lihons. Private Beatham of the 8th Battalion, having knocked out four machine guns the previous day was killed in another disjointed attack and was awarded the VC posthumously. To the north of the Somme the 13th Brigade moved across the river and sealed off the Etineham Spur. A simultaneous attempt to cut out the Mericourt Spur on the southern bank failed disastrously when the Germans caught the 10th Brigade near Proyart.
9th August 1918: The night after the great battle was quiet and efforts turned to digging and fortifying ahead of any German counter-attack. Rawlinson informed his three corps commanders that the effort for this day would fall to the Canadians thrusting south-east in the direction of Roye alongside the French to their right. The cavalry was tasked in gaining the objectives of the Canadian Corps. As the Australian Corps frontage increased with the Canadians moving south-east, the Australian 1st Division newly arrived from Belgium would be inserted through the 5th Division’s right. However their arrival to the front was delayed so Brig.-Gen. Elliott and his 15th Brigade took up the challenge, without full artillery support and facing stiff German resistance, to attack forward and protect the Canadian flank. To help in the further co-ordination of the attack both sides of the river, III Corps was temporarily placed under the command of Lieut.-Gen. Godley who reported through to Monash. On the Australian northern flank the 1st Battalion sent a small party across the Somme river, to assist the 2/10th Battalion London Regiment in dislodging the Germans from the Chipilly Spur while the 131st American Regiment attacked higher upon the ridge. When they got there they found Chipilly abandoned and the guns gone.
 8th August 1918: For the start of the great Amiens 1918 offensive Lieutenant-General Monash’s Australian Corps lined up on and 8km frontage with its left boundary on the river Somme and its right the railway line. Their objectives were first the Green Line, some 3km from the start and including the German artillery line, then the leap-frogging battalions would push on another 4.5km to the Red Line and then the last phase was the 1.5km advance to Harbonnieres and the Blue Line. The infantry brigades started their approach at different times, with the units of the Australian 2nd & 3rd Divisions destined for the first objective passing through those of the 4th & 5th Divisions that were detailed for the second and third objectives. At 3am with the forward attacking units now in position a heavy mist covered the ground and with the approaching dawn it was difficult to see more than 20 yards. At 3.50am the drone of aeroplanes flying over the German front to be attacked were heard, and with engines throttled down, only the Australians close to where the tanks were passing were aware of their steady progress forwards.
At 4.20am the main 2,000 British guns as well as those of Debeney’s First French Army farther south started almost as a single crash. As Bean recalled nearly every man lit a cigarette as all along the line the companies of the attacking brigades rose and moved forward. Leading the way were the scouts or ‘beaters’ pointing out hostile posts to the tank crews, followed by the main body of the leading battalions each on a two company front strung out in successive lines of tiny columns, each a section of 6-8 men in single file, but in the mist which was now thickened by the dust keeping the formations became a challenge.
 On the Australian 2nd Division right the 7th Brigade ran into some unexpected effective wire entanglement when nearing Card Copse just to the north of Marcelcave, with concentrated German machine gun at this point. The 28th Battalion, with 2nd Lieutenant Gaby, VC, and 26th Battalion on the far right found gaps and with the arrival of the tanks all resistance was ended. Assistance was then given to the Canadians on their right that were encountering resistance in Marcelcave south of the railway line. To the north the 17th and 18th Battalions of the 5th Brigade passed on either side of Warfusee before entering the village from the north and south, bombing cellars and routing German headquarters out of their dugouts. To the left and on the Australian 3rd Division front the 9th Brigade took Accroche Wood and the 11th Brigade advanced on the southern side of the Somme. With the fog hanging thick the attackers were often on the Germans before they realised and many surrendered without a shot being fired. The 42nd Battalion advancing along the southern edge of the River Somme had to struggle through mud, weed and undergrowth but the scattered German posts could only fire blindly and were easily captured. When the fog began to rapidly clear both the 2nd and 3rd Divisions were approaching their first or Green Line objectives, and with this the
 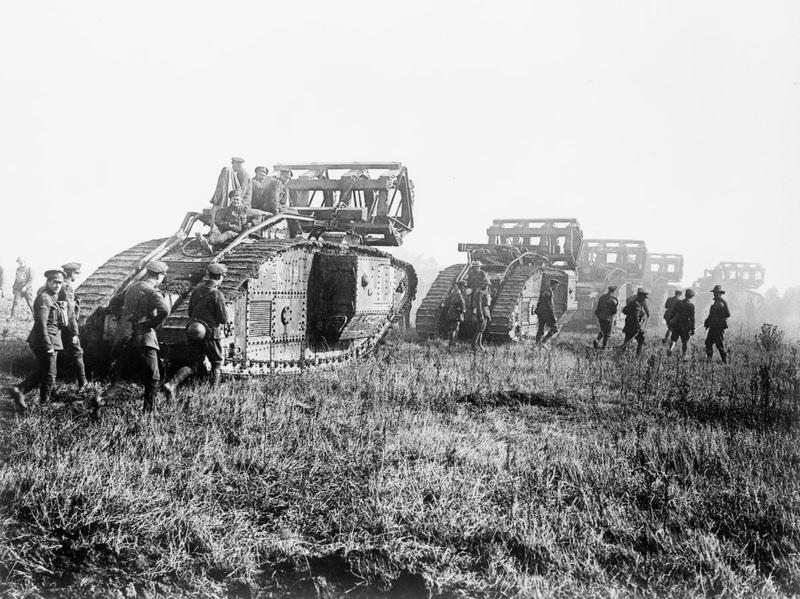 tanks along with the foremost parties struck out and went for the strong points of resistance that they could now see. By now the infantry with the tanks in support also began to encounter and over-run German batteries. Throughout this opening phase there was hardly any stubborn resistance, with the fog helping to conceal the advance, and where the tanks appeared most of the Germans were terrified. As for the German artillery it had been so smothered by the British counter-batteries and by the fog that its reply was negligible and caused only minor loss, chiefly to the leap-frogging 4th & 5th Divisions. The advance was the most bloodless ever made the Australian infantry in a great battle – one Company of the 42nd Battalion had no casualties. At 8am the mist lifted like a curtain, and looking from the high ground north of the Somme both British and Germans on the hills could observe the first units digging in and the leap-frogging battalions, the artillery, tanks and cavalry all moving forward across open countryside as the breakthrough had been achieved.
 At 8.20am, simultaneously with the Canadians to the south, the Australian 4th & 5th Divisions moved through as phase two to the Red Line began. This time the infantry would not have the support of the creeping barrage but would have the tanks leading the way plus a number of field artillery brigades (photograph left) which had come forward. To the right of the Australians the Canadians were facing stiffer resistance as they were faced by the German 117th Division, a completely fresh and one of the most battle-worthy division in the German Army, plus utilising the defensive obstacles provided by the villages of Wiencourt and Guillaucourt. By far the most difficult task on the Australian front fell to the 4th Brigade on the far left by the Somme river as the British 58th Division had difficulty in clearing the flank on the Chipilly Spur high ground north of the river and German guns were able to pour fire down onto the advancing Australians, tanks and the artillery being brought forward. Ferocious short range artillery duels ensued, but the German guns could not be supressed. Of its four battalions it was the 16th Battalion tasked with taking the final objective that had the toughest task.
 As the infantry readied itself for the third phase to the old Amiens Line, British Armoured Cars and Whippet Light Tanks (photograph right) along with the Cavalry were seen ahead causing havoc in what was now the German headquarters and transport area, often catching the enemy unaware until machine guns opened up. Including in the capture was the 11 inch railway gun (photograph below showing the war trophy now at the Australian War Memorial, Canberra). Except on the northern and southernmost flanks on the Australian Corps front, the furthermost planned objective had been reached by 1.30pm and by 3pm news was coming in to Monash that the Canadians and the French to the south were about to do the same.
 Much has been written about the success of the battle down to the integration between the various fighting elements. However the experience of the great majority of the troops throughout the day was that not only aeroplanes, tanks, armoured cars, cavalry, artillery and machine-guns working in unison, but so too the pioneer parties remaking the roads or helping the artillery over the trenches, engineers building bridges, fixing wells, providing sign-posts, the transport with working materials, and the quartermasters with food and drink all came up precisely when needed.
 The Australian Corps took over 7,000 prisoners, the Canadians took some 6,000 prisoners and the French 3,500 (photograph right of German Prisoners of War). Total German losses were estimated at 30,000 and over 300 guns were also captured that day, whereas the British, Australian (2,000) and Canadian were around 9,000 for the gain on average of 11kms across the front. General Ludendorff attributed the Allies success on this ‘the black day (der Schwarz Tag) of the German Army in the Great War’ to the failure of the German soldier’s morale. Six or seven divisions had been completely broken, with bodies of men surrendering to singles troopers, and retiring troops shouting ‘you’re prolonging the war’ at the reserves that went through them. Many German regimental historians explain the Allies success as due to tanks, but by far the biggest factor was surprise plus another was the mist. Another major difference between this and previous battles was the ability to exploit success behind the enemy lines before reserves could be brought up by for the first time the effective use of the cavalry and the motorised armoured cars.
 7th August 1918: On the day before the battle Lieutenant-General Sir John Monash delivered a message to all the troops:
To The Soldiers of The Australian Army Corps
For the first time in the history of this Corps, all five Australian Divisions will tomorrow engage in the largest and most important battle operation ever undertaken by the Corps. They will be supported by an exceptionally powerful Artillery, and by Tanks and Aeroplanes on a scale never previously attempted. The full resources of our sister Dominion, the Canadian Corps, will operate on our right, while two British Divisions will guard our left flank. The many successful offensives which the Brigades and Battalions of this Corps have so brilliantly executed during the past four months have been the prelude to, and the preparation for, this greatest culminating effort. Because of the completeness of our plans and dispositions, of the magnitude of the operations, of the number of troops employed, and of the depth to which we intend to over-run the enemy’s positions, this battle will be one of the most memorable of the whole war; and there can be no doubt that, by capturing our objectives, we shall inflict blows upon the enemy which will make him stagger, and will bring the end appreciably nearer. I entertain no sort of doubt that every Australian soldier will worthily rise to so great an occasion, and that every man, imbued with the spirit of victory, will, in spite of every difficulty that may confront him, be animated by no other resolve than grim determination to see through to a clean finish, whatever his task may be. The work to be done tomorrow will perhaps make heavy demands upon your endurance and the staying powers of many of you; but I am confident, in spite of excitement, fatigue, and physical strain, every man will carry on to the utmost of his powers until his goal is won; for the sake of AUSTRALIA, the Empire and our cause. I earnestly wish every soldier of the Corps the best of good fortune, and glorious and decisive victory, the story of which will echo throughout the world, and will live forever in the history of our homeland.
JOHN MONASH
Lieut.-General
Commander Australian Corps
6th August 1918: A German raid on an outpost of the 51st Battalion in the 13th Brigade resulted in five men being taken prisoner in an area previously held be the French, thus raising concerns amongst the senior commanders that the Germans might become suspicious or extract information from the prisoners and so go on a state of heightened alert. Captured German reports later showed that despite intensive questioning the Australian prisoners did not divulge anything beyond their name and unit, and it went further by praising these men and holding them as a model on how their own soldiers should react. As a result of the raid it was decided that the Canadians could not relieve the 13th Brigade until the very last minute, therefore depriving General Maclagan of one of his brigades, so Monash took the decision to temporarily transfer one of the AIF 1st Division brigades which was due to arrive in the coming days. Later that night the 1st Brigade having been hastily despatched, arrived for their involvement in the forthcoming operation. To the north of the river Somme a German counter-attack retook the ground taken a week previously by the 8th Brigade and now held by Butler’s III Corps, taking 8 officers and 274 other ranks prisoner. There was no sign that the Germans discovered anything new, but for Monash this vulnerability of his left flank across the river was evident and causing great concern.
5th August 1918: Field Marshall Haig tells Rawlinson to place a brigade of the 1st Cavalry Division and a company of Whippet light tanks at Monash’s disposal to exploit any opening and opportunity on the right side of the Corps next to the Canadians. The focus for the exploitation phase would be by the Canadians towards Chaulnes and the French to their right towards Roya, and with the Australians swinging up on the right to protect the Canadian flank.
4th August 1918: To the east of Villers-Bretonneux the AIF 2nd & 3rd Divisions rearranged their defensive dispositions so that each of them deployed only a single brigade for passive defence and their two remaining brigades withdrew to the rear to complete their preparations. Also that day the Canadian Corps commenced their arrival releasing the two brigades of the AIF 4th Division to do likewise, leaving the 13th Brigade manning the front. By this time talk began to increase behind the British lines that something big was about to be happening soon. The amount of traffic on the roads was increasing, but the weather was wet and cloudy therefore unsuitable for flying and observation.
 During a small memorial service held on the fourth anniversary of the beginning of the war, the commander of the British 2nd Army Sir Herbert Plumer asked Major-General Glasgow (photograph right) to bring some of his senior officers and then spoke to them: ”You are leaving my army. I am sorry that I cannot inform you where you are going or what you are about to do. I am sorry to lose you, but I wish you success. You know, gentlemen, that it is not my practice to make eulogistic speeches – there will be plenty of time for that after the war. At the same time I would like to tell you that there is no division, certainly in my army, perhaps the whole of the British Army, which has done more to destroy the morale of the enemy than the 1st Australian Division.”
2nd August 1918: The AIF 4th Division having been relieved from Corps Reserve moved south and took over the French front as far south as the Amiens-Roye road, and the next night took over the frontage held by the AIF 2nd Division south of the railway, hence now holding the front that would ultimately be passed to the Canadian Corps.
1st August 1918: The AIF 5th Division was relieved from the III Corps front north of the River Somme and passed into Monash’s Australian Corps reserve in the rear to undergo training with tanks.
31st July 1918: With the danger to Hazebrouck now receding the AIF 1st Division, to the disappointment of XV Corps, began its relief by the British 29th Division for its move south and to join the Australian Corps on the Somme.
29th July 1918: Orders were received that the AIF 4th Division should relieve the French XXXI Corps as far as a new southern boundary for the Australian Corps. Meanwhile to the north and with the call from Allied Commanders for larger offensives to be carried out, the 10th Battalion attacked Merris, being enclosed by eight solid platoon posts. The German 4th Division – fresh attack troops just brought into the line – lost 14 officers and 270 other ranks and the 10th Battalion 1 officer and 34 others of whom only four were killed. The 10th Battalion had only two companies – about 160 men – in the attack. Haig’s Inspector-General of Training is said to have described this attack as ‘the best show ever done by a battalion in France.’
28th July 1918: To ensure secrecy and close co-ordination Foch placed General Debeney’s French First Army under Haig’s command for the coming offensive on the Somme. Three of his corps – the XXXI next to the Canadians, the IX in the centre and the XXXV on the far right flank – would take part in the offensive. Meanwhile to the north of the river Somme the 8th Brigade made an attack up on the ridge to the south of Morlancourt in order to push the line another 500 yards east and to deprive the Germans of some good observation posts that would overlook the coming offensive. The Germans put up little resistance with 130 men being taken prisoner.
25th July 1918: Two battalions of the American 65th Brigade, 33rd Division were attached to the AIF 2nd Division, and a day later two battalions into the AIF 3rd Division. The Americans were withdrawn on 6th August prior to the offensive.
 24th July 1918: At a meeting at Foch’s headquarters with the Commanders-in-Chief – Haig, Petain and Pershing – the decision was made that the turning point had been reached and now time to go on the offensive across the front. The offensives must come as a surprise, and should follow as much as possible soon after the previous one to keep the enemy stretched and unable to effectively manipulate his reserves. The attack at Amiens would come first, not just because of the flat terrain that suited both the tanks and cavalry, plus being at the junction between the British and French forces enabling both to be engaged, but on no other part on the battlefield was the morale so high as that of the Australians on the Somme, and been so dominant over the enemy for four months as a result of their continuous peaceful penetration operations. However the Australians had been in the line and forward area first stopping and then harassing the Germans since April, and although not exhausted most brigades were reporting that the men were in need of a decent rest to face any major future effort. The Canadian divisions on the other hand had largely been in reserve, rested, up to full strength and being kept back for the pending offensive. It would be the two Dominion Corps that would spearhead the attack with four divisions each, supported by two divisions of the British III Corps (58th & 18th Divisions) on the left flank north of the river Somme and three divisions of the French XXXI Corps on the right flank south of the Luce. The Fourth Army’s attack would be supported by 432 fighting tanks, the first wave moving with the infantry on the fringe of the creeping barrage, though none could be spared for Debeney’s XXXI Corps. Fresh tanks, plus all those that survived the first stage would then move on to the second objective in most cases ahead of the infantry endeavouring to suppress enemy positions and with the infantry mopping-up. In the second and third phases aeroplanes would drop smoke bombs in front of certain enemy villages or defences. In the exploitation or third phase the only tanks participating would be the Mark V Star Tanks carrying extra Vickers or Lewis gun crews. In addition the Cavalry Corps would be supported by two battalions of whippets. The Fourth Army’s artillery would be increased to 2,000 guns, half of which were 18-pounders at a rate of one gun per 22 yards of front to be attacked. The fire would creep forward in 100 yard lifts, the first two lifts occurring at two minute intervals, the next eight at three minutes, and the later ones at four minutes giving the infantry more time to fight around obstacles as they advanced. To prevent the Germans withdrawing their guns the density of the barrage would increase when crossing the Warfusee-Cerisy valley. Once the guns in the creeping barrage had finished their task they would move forward with the advancing forces for the next phase. As it was known that the Germans had spent little time on their defences it afforded the luxury of two-thirds of the heavy guns to be employed in counter-battery work. In the air the British had 800 planes available and the French 1,104, many employed in dropping phosphorous bombs to raise smoke screens. The cavalry would be used by punching through the Canadians and taking the third objective, the old Amiens defence line, before looking to exploit further with the whippets.
21st July 1918: General Rawlinson, commanding officer of the British 4th Army, called a meeting at Flixecourt with Generals Monash, Currie (Canadian Corps), Butler (III Corps) and Kavanagh (Cavalry) plus senior representative of the Tank and Air Force to outline the whole of the Army plan for the August offensive followed by lengthy discussions between the Corps commanders. The strictest secrecy was kept, and outside of the above, Field Marshal Haig and the other British Army Commanders none outside the Fourth Army had an inclination of what was being planned.
 19th July 1918: On visiting the recently captured Mound to the east of Villers-Bretonneux AIF 2nd Division commanding officer Maj-Gen Rosenthal (photograph right) was shot and severely wounded in the arm by a sniper and was sent back to England for treatment. To the north the British 9th Division attacked at Meteren enabling the 9th Battalion to push forward its outposts. The attack was successful with the 9th Division capturing Meteren and 354 prisoners and 38 machine-guns. For the AIF 1st Division, without covering artillery they managed to secure nearly a mile of additional line with 97 prisoners and 16 machine-guns. The 9th Battalion lost only 25 in the advance, but in the shelling of the next few days its casualties were increased to 140.
15th July 1918: By peaceful penetration the Australian infantry had now secured practically all of the objectives originally set by Monash for his developing Anglo-French ‘Hamel 2’ offensive on the Villers-Bretonneux plateau. One outstanding troublesome area was The Mound which was attempted to be taken by the 25th Battalion during a night raid which failed before the 19th Battalion completed the task the following night. Thus through peaceful penetration by two brigades of the 2nd Division new ground 1,000 yards deep on a front of 4,500 yards had been secured for a loss of 437 casualties over a two week period. For the Germans they later reported that this type of warfare cost them more than a regular attack.
 11th July 1918: Peaceful penetration by the 1st Division in the Meteren sector reached its climax led by Lieut Gaskell, MC, of the 1st Battalion who within three and a half hours cleared the German front for 250 yards south of the railway taking 32 prisoners and 3 machine guns. On the north side Lieut. Morley had even more spectacular success taking 36 prisoners and four light machine guns. In the whole enterprise just one Australian had been wounded. The raids having taken place in daylight resulted in the adjacent battalions watching the streams of prisoners coming in to also join in. The losses incurred that day resulted in the Germans stiffening their resistance and Australians in days to come noticed that the Germans were more keenly alert and their machine-guns sweeping No-Mans Land.
10th July 1918: During the night the Germans voluntarily withdrew their outpost line from their deep salient in front of the French at Cachy and fallen back on a line more than 1,000 yards in the rear. Reports from prisoners frequently referred to this action as a result of the constant advances of the Australian troops on their northern flank.
 7th July 1918: Many messages of congratulations were received following the Australian success at Hamel, but none more so than Monsieur George Clemenceau, the veteran statesman and Prime Minister of France, who arrived and addressed many of the men that had participated in the attack, addressing them in English “When the Australians came to France, the French people expected a great deal of you… We knew that you would fight a real fight, but we did not know that from the very beginning you would astonish the whole continent… I shall go back tomorrow and say to my countrymen, I have
  seen the Australians, I have looked in their faces, I know that these men will fight alongside of us again until the cause for which we are all fighting is safe for us and for our children.”. During the night the 45th and 46th Battalions pushed forward on a 2,500 yard frontage astride of the Somme, together with an attempt by the 16th Battalion opposite Accroche Wood. Further south the process of peaceful penetration was conducted against the Germans to the south of Villers-Bretonneux in the vicinity of Monument Wood.
5th July 1918: By the afternoon of the Hamel attack orders were being issued to all divisional commanders to keep up pressing the Germans though ‘peaceful penetration’, to stop them consolidating their defences, to push forward the outposts and take more ground, plus keep the enemy under great strain. Meanwhile Field Marshall Haig was asking the commanders of the British First and Third Armies to consider a limited attack to the east of Arras by the Canadians supported by the three of four British divisions, and to the north a counterstroke at Kemmel if the Germans as expected attacked again there.
 4th July 1918: By 3am the whole force was lying out in the grass and crops behind its tapes for the Australian 4th & 11th Brigade attack at Hamel, and two minutes later the normal early morning harassing fire of smoke and high explosive, but no gas this morning, from the Australian artillery began (map courtesy of Australians on the Western Front 1914-1918). At that same moment the sixty tanks moved to full speed towards the front, with support from bombers that had been flying over Hamel all night to help mask the sound of the tanks. The morning of the attack was accompanied by a heavy ground mist, and although impeded observation for assembly greatly enhanced the element of surprise, thus reducing the need to fire a significant percentage of smoke shells particularly on the flanks. The main barrage when it came was one of the most accurate during the war, enabling the infantry in places to advance within 75 yards free from casualties, and supported by spare machine guns of all four divisions who sprayed the land ahead. However a few guns were falling short and casualties were incurred amongst the 15th and 43rd Battalions as well as a section of Americans heading for Pear Trench. The smoke plus the dust thrown up by the shells formed a dense haze through which the soldiers advanced, but created a difficulty for the tanks who in the early stages were behind their expected positions with the infantry. The 16th Battalion attacking with only half of the force initially allotted as 500 of the Americans had been withdrawn the previous day attacked Vaire Wood and faced with a troublesome machine gun L-Cpl Axford (photograph below left) threw his bombs and rushed the trench killing ten and capturing six Germans, an action which earned him the Victoria Cross. Many of the captured Germans that morning were hampered by wearing gas masks on account of gas being used in the previous day’s shelling. On the southern flank the barrage behind
  which the 21st and 23rd Battalions of the 6th Brigade advanced was perfect and the leading tanks caught up with the infantry at the first German trench and fired down it both ways crushing the spirit of the defenders. For the second stage and after the ten minute halt the tanks had caught up over the whole front and in the daylight were able to play their full part, including the drop-off of supplies by the carrier tanks. All except three out of sixty tanks had reached their objectives and all but five were back out their rallying points by the end of the battle, the missing five recovered over the next two days. The Australian confidence in the tank (the new Mark V photographed below), particularly in the way they annihilated machine gun posts, had been truly restored.
Hamel and the ridge beyond it had been taken with slight loss. The capture of prisoners had been large and thus far showed no sign of counter-attack, but as night was just settling a party of enemy bombers supported by 200 infantry under a heavy artillery bombardment counter-attacked the front-line manned by the 44th Battalion. That night feint attacks were also carried out by the 14th and 15th Brigades between the Ancre and the Somme to help divert the attention of the Germans from the main event at Hamel.
 The battle passed off smoothly, exactly to timetable, and was free of hitches. It was all over in ninety-three minutes, attained all objectives and yielded great results. At the heart of the success was the excellent co-operation between the infantry, machine gunners, artillery, tanks and the Royal Air Force, plus catching the enemy completely by surprise. The operation gave the British possession of the Hamel Valley plus drove the enemy from the adjacent ridge from which the enemy could observe the Australian forces. In excess of 1,500 prisoners were taken, a similar number killed or made casualty, plus two field guns, 26 mortars and 171 machine guns at a cost of 1,400 casualties. The Americans that took part acquitted themselves well and were for ever after received by the Australians as blood brothers. Another success was the use of aeroplanes for the supply of small-arms ammunition to the forward troops, particularly the infantry. During the harassing periods between offensives the practice had been to employ both gas and smoke shells making the enemy think that the smoke would be accompanied by gas therefore donning gas masks and hence hampering his vision, but on the morning of the attack only the smoke shells were fired but it would take time for the enemy to realise and thus significantly impact his ability to resist. Hamel, the first offensive anywhere on the Western Front since Cambrai, became the blueprint for further operations carried out by the Corps, and notably for the great offensive of the 8th August. Many messages of congratulations were received following the Australian success at Hamel (photograph below left of the Hamel Memorial) but none more so than Monsieur Clemenceau, the veteran statesman of France, who arrived and addressed many of the men that had participated in the attack. “When the Australians came to France, the French people expected a
 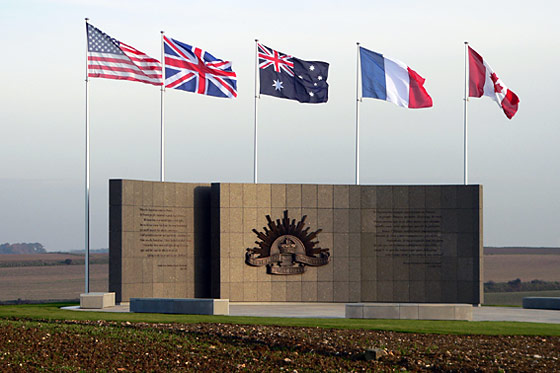 great deal of you… We knew that you would fight a real fight, but we did not know that from the very beginning you would astonish the whole continent… I shall go back tomorrow and say to my countrymen, I have seen the Australians, I have looked in their faces, I know that these men will fight alongside of us again until the cause for which we are all fighting is safe for us and for our children.”
3rd July 1918: Before dawn the front was occupied by most of the troops that were to attack, and the pegs to mark the starting line had been placed. The tanks were in the assembly area in the orchards around Aubigny three miles behind the front line. The troops were told to lie low for the whole day, when an order came through from General Pershing, the American Commander-in-Chief, that six American companies were to be withdrawn, causing concern for the Australians on losing hundreds of men plus having to re-arrange their formations. The disappointment for the Americans though was far greater. At 6pm telegrams reached the Australian troops saying that the attack was to be launched at 3.10am. Several of the commanders saw to it that their troops had a second meal, around midnight. At 10.30pm the tanks, with their engines throttled down began their journey to the assembly point about ½ mile behind the front.
2nd July 1918: Prime Minister W. Hughes and Sir Joseph Cook, Minister of the Navy visited the Australian Corps area, at first unaware of the impending Hamel attack, and then delivered stirring addresses to the battalions that would be going into action.
1st July 1918: The 11th Brigade along with its American platoons in place practised the Hamel operation on the aerodrome at Allonville. Moving gradually by night the artillery began to arrive and the work commenced on emplacing the batteries into the camouflaged positions.
30th June 1918: Final conference ahead of the Hamel offensive was held at Bertangles with the date set for the 4th July. Part of the choice of this date, American Independence Day, was that a contingent of 1,000 men of the US Army was to co-operate in the fight, fighting as complete platoons under their own platoon commanders.
29th June 1918: The AIF 3rd Division was replaced by the 2nd Division in the front line. That day a tenth of the men from the Hamel attack brigades (4th and 11th) along with the 21st Battalion practised, and picnicked, with the tanks at Vaux-en-Amienois in a quiet valley north-west of Amiens. These practices and informal gatherings including joy rides were vital to build and restore the confidence of the men with the men and machines that had let them down so badly at Bullecourt the previous year. The newer Mark V tanks, their speed, manoeuvrability, and determination of their crews soon won around any doubting infantryman. Furthermore on the battlefield each tank would come under the command of the infantry commander.
28th June 1918: In support of a British attack to the south of Merris, the 10th Battalion under Lieut-Col Wilder-Neligan exploited the opportunity afforded by the barrage of smoke for a fighting patrol to go forward and capture 500 yards of the enemy’s front line along with 35 prisoners, 6 machine guns and two trench mortars at a cost of about 50 casualties. The impact of the constant raiding was having a detrimental effect on the German morale, particularly amongst its young soldiers.
26th June 1918: In order to keep the Hamel attack as secret as possible the brigade commanders were not informed until the 25th June, the day before the 4th Brigade were withdrawn for a week’s rest and training.
22nd June 1918: 480 gas projectors were fired by engineers north of Merris and on the following night the 2nd Battalion together with two companies of South Africans advanced the out-post line 200-300 yards on a front of slightly over a mile.
21st June 1918: Having discussed verbally with General Rawlinson, commanding officer of the British Fourth Army, the possibility and indeed importance of going on the offensive, General Monash submitted his proposal for an attack at Hamel on the Somme in writing and approval was given straight away. The operation was to be primarily a tank operation utilising the new Mark V Tank with its enhanced mobility, backed up by the infantry. A challenge for Monash was that the infantry that would be conducting the attack – the AIF 4th Division – were the ones that were so badly let down at the First Battle of Bullecourt in April 1917. Over the coming weeks infantry battalion after infantry battalion was brought by bus to Vaux to spend a day to play with the tanks and meet and chat with the tank crews. More serious set-piece manoeuvre exercises on the scale of a battalion were rehearsed over and over again. Within a short time the ‘digger’ had taken the Tank to his heart. Two new principles were to be employed: firstly that on the battlefield until the objective had been taken the tank would come under the command of the infantry commander; and secondly that the tanks would advance in line with the infantry, much closer to the line of the barrage than had been done before.
At the meeting Rawlinson asked Monash about the position concerning reinforcements. The present shortage was over 8,000 men across the five divisions of which there were just 5,000, the majority in the UK, in the depots in England and Le Havre. At this time GHQ had ordered a reduction across the British infantry battalions from 966 to 900 as a result of the heavy losses in March and April, but the Australian battalions would still be below this number.
20th June 1918: American infantry battalions began to arrive in the back area near the Corps and Army headquarters for training in the front line with the British and Australians. Right from the beginning the Americans and the Australians mixed well as they were more akin than with the British. To many observing Australians the arriving Americans reminded them of the fine old AIF 1st Division arriving at the start of the war in Egypt. General Rawlinson received approval for the Americans to have their first attack with his forces at Hamel on 4th July, their Independence Day. To the north at Merris the 3rd Battalion suffered 38 casualties in an attack to dislodge the Germans from the ridge.
14th June 1918: A German counter-attack on posts lost in the Meteren area resulted in losses of ground and some prisoners. AIF 1st Division General Walker called his brigade commanders together and they agreed that signs of an impending German offensive were accumulating and it was decided to assume battle-stations on the night of the 15th June. For the Australians tasked with going out daily to bring back prisoners, no sign of an impending attack could be seen.
13th June 1918: Two companies of the 7th Battalion behind a barrage placed by artillery, trench mortars and machine-guns pushed forward 500 yards on a front of 650 yards, and although losing 20 men captured 47 prisoners, mostly young and small men.
10th June 1918: Active patrolling was maintained and continued to yield a steady stream of prisoners for intelligence gathering purposes as well as provide further slices of ground in important areas such as the on the Morlancourt ridge. One such large and successful dusk raid by Rosenthal’s AIF 2nd Division led by the 7th Brigade captured part of the ridge between Sailly-Laurette and Morlancourt resulting in 330 prisoners and 33 machine guns. Demonstrations by the Australian infantry and artillery on both of the flanks of the 7th Brigade’s attack succeeded in causing the Germans there to believe that the front of the assault was much wider than was actually the case. Under the northern extension of the barrage the 6th Brigade (22nd Battalion) had raided the Germans on the spur between Ville and Morlancourt. Led by Lieut. Harricks the 22nd Battalion raiders fought without suffering a casualty and brought back 6 prisoners and a machine gun. Farther north the 23rd Battalion attempted to enter the German trench opposite the old Casualty Clearing Station near Dernancourt but failed losing three killed and 18 wounded. On the southern flank demonstrations on the front of the AIF 3rd & 4th Divisions consisted of artillery fire only.
Investigations and analysis after the raid concluded that the enemy was showing no signs of any preparations for a further attack in this area, and was indeed focusing his efforts further south and to the French. In addition The Diggers felt that if asked they could have gone further and even captured the German artillery. Further bold raids by the 4th, 6th and 10th Brigades on the nights of the 13th-15th June confirmed these impressions.
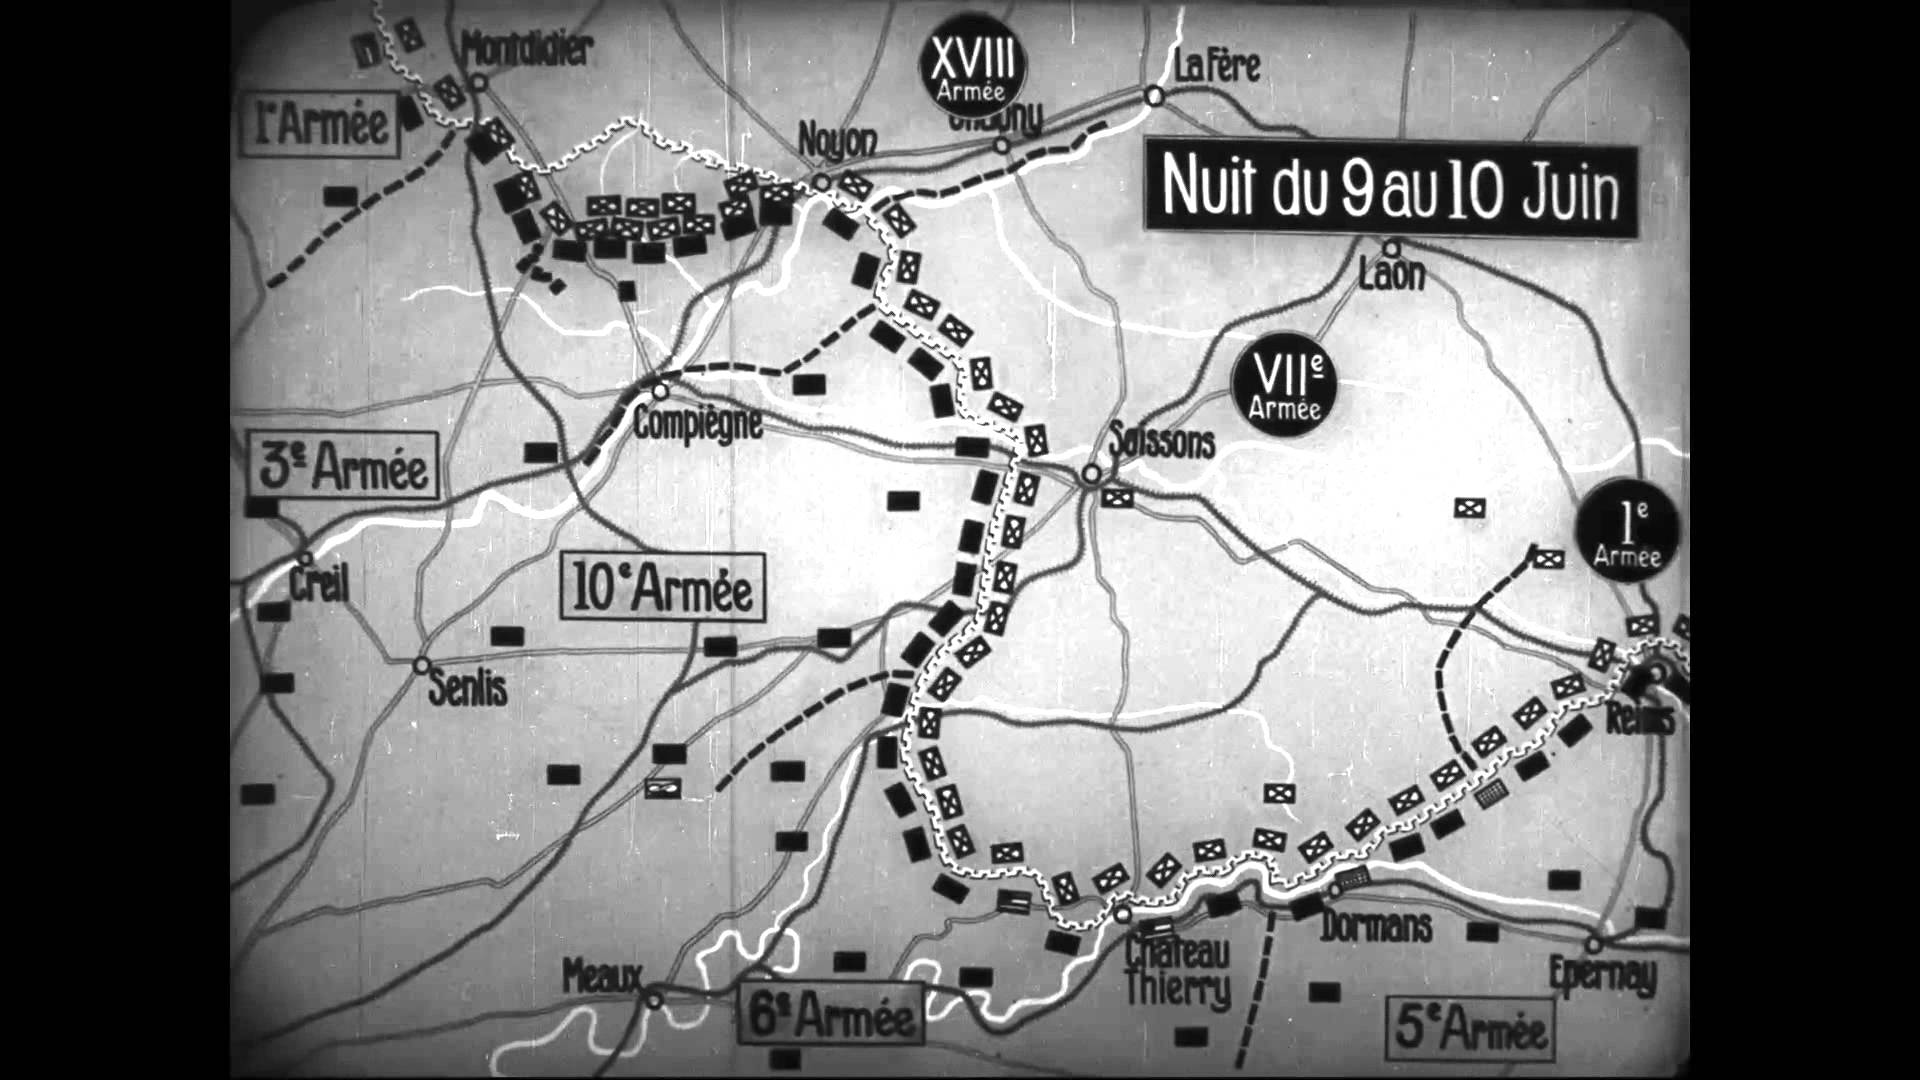 8th June 1918: In order to predict where the next German attack was going to happen, the need to identify which enemy troops were manning the front became ever important. Raiding thus became a priority, and continued to be to help pin enemy forces and help the French to the south. To the north General Plumer informed AIF 1st Division the need to man the front with two brigades in preparation for the resumption of the German offensive, with the 1st Brigade now joining its sister 2nd Brigade. As events would unfold in the coming hours, the attack would not fall in the north but on the French once more at Noyon and the Matz River (picture above, right). However the intelligence from the constant stream of prisoners being brought in by the very active 1st Division still said that an attack would fall in Flanders.
6th June 1918: In preparation for the next phase of the German Spring Offensive Lieutenant-General Monash held his first conference with his divisional commanders to discuss the disposition of troops and artillery in order to negate the effective enemy barrage used in the battle-zone. Major-General Hobbs pointed out that for the first time all those present, generals and staff officers, were members of the Australian Imperial Force.
5th June 1918: In the Meteren area the 2nd Brigade, having just relieved the 3rd Brigade quietly advanced its outposts by a quarter of a mile. At this point the German trench forces were being kept under strain without reinforcements as all major attacking forces were being kept to the rear in preparation for the anticipated resumption of the attack in the north once British reserves had been sucked south to help the French. For the Australians they were told to expect a major German advance any day.
4th June 1918: Following a fierce bombardment of every type of light and medium shell, the Germans raided against the outposts and front line trench of the 19th Battalion north of the Bray – Corbie road. Faced with a determined defence and men charging from the flank the attack failed in its mission and no prisoners were taken. The attack convinced the Australians of the need to occupy a continuous trench and not just isolated posts. Not only did it enable lateral communication, but the Germans would not know which parts were occupied or not and therefore would waste effort by their artillery and infantry on empty lengths of the front.
2nd June 1918: An advance was made by the 11th Battalion to seize the main defences of Merris supported by feints from two British divisions on their flanks. The small stunt was a success and although the 3rd Brigade suffered about 100 casualties, 5 German officers and 253 other ranks plus 27 machine guns and 17 trench mortars were captured. The instruction previously given in the working of German machine-guns proved useful.
1st June 1918: The relief by the 6th Brigade of the 7th was completed by 1am, with the 5th Brigade on the right and the British 47th Division on the left. Enemy opened a yellow cross gas bombardment (sulfur mustard based affecting exposed surfaces of the body). Elsewhere to the south two American divisions helped the French to halt the German offensive on the River Marne.
 31st May 1918: Major changes took place within the senior ranks of the Australian Corps. General Sir William Birdwood, commanding officer of the Australian Corps was given the command of the British Fifth Army, handing over the Corps to Australian born Lieutenant-General Sir John Monash (photograph right) who in turn at the AIF 3rd Division was replaced by Major-General Sir John Gellibrand, commanding officer of the 13th Brigade, and formerly of 6th Brigade. Brigadier-General Sir Neville Smyth, VC, (AIF 2nd Division) became commanding officer of the British 58th & 59th Divisions, and he was replaced by Major-General Sir Charles Rosenthal.
29th May 1918: During the night a fighting patrol of the 10th Battalion looked to push forward their outposts near Merris but with stubborn German defence suffered heavy casualties of 8 officers and 89 other ranks killed or wounded.
 28th May 1918: As the German Spring Offensive restarted with the attack on the French plus the four British divisions on the River Aisne, General Rawlinson used the opportunity of revisiting Foch’s proposed joint Anglo-French offensive on the Somme but with him having more troops under his own British Fourth Army command and hence having more control in the enterprise. Rawlinson also hoped that by keeping arrangements in the hands of a single army staff secrecy would be better preserved.
26th May 1918: French staff were startled that statements from two German prisoners indicated that a massive attack was going to take place on the Chemin des Dames (map above right) in the coming days. Headquarters of the British IX Corps and French XI Corps were warned at about 4pm. Local reserves were brought up and the British artillery opened up in ‘counter-preparation’.
 Meanwhile, the Fremantle registered Kyarra which had transported the Australian medical units to Egypt in 1914, was in the English Channel heading for Devonport to embark 1,000 Australian wounded when she was torpedoed off Swanage, Dorset, sinking and killing 6 of her 126 crew members. The wreck was not discovered until the late 1960’s and today the Kyarra is one of the most well-known and popular wrecks for divers in southern England.
25th May 1918: With the warmer spring weather came the growth of the crops in No Man’s Land such as wheat, and there was concern on both sides that poor visibility could make their positions more vulnerable to attack, so orders were given in places to bring forward reaping hooks to clear in front of outposts and the support trenches. However just in front of the parapet a screen of two feet was to be left. Meanwhile at Villers-Bretonneux the Germans fired an estimated 18,000 gas shells into the AIF 3rd Divisional area causing some 600 casualties.
21st May 1918: Following the meeting earlier on the month between Foch and Haig, General Rawlinson visited Birdwood and White at Australian Headquarters to tell them of Foch’s proposed offensive and that it would involve the Australian Corps. To help in keeping things secret no record of the meeting was kept at Australian HQ. During the meeting they suggested that any attack south of the Somme should be extended north of the river to include the heights south of Morlancourt from Sailly-Laurette to the Chipilly spur. However events of the 27th May with the recommencing of the German Spring Offensive in the Champagne region put the plan on hold.
20th May 1918: The first American units to come among the Australians arrived to work in the area of the AIF 4th Division which had just been withdrawn from the Villers-Bretonneux sector following the relief by the AIF 3rd Division.
19th May 1918: The 6th Brigade attack at Ville-sur-Ancre. When the zero hour uproar of the barrage started at 2am the 24th Battalion to the north of the village began to cross the river via the recently constructed bridges (see photograph 16th May) and made good progress through the marshy ground taking the German outposts. To their south the 21st Battalion advanced and although meeting stubborn resistance at trenches near the Crucifix began to drop a line of posts to protect the 22nd Battalion conducting the main assault to the right from fire coming from the village (click on the above link for detailed account of the 22nd’s action at Ville). During the assault Sgt Ruthven of the 22nd Battalion became the first soldier in the AIF 6th Brigade to be awarded the Victoria Cross during the war
 With the belief that the enemy’s morale had been broken the artillery was ordered to stop shelling the village at 4.15am and the 21st, 23rd and 24th Battalions informed and told to attempt to enter the vilage. It was now plain daylight but within two minutes of the lifting of the barrage a party of hardened men from the 23rd Battalion had seized three of the machine-guns defending the north-western edge of Ville before their operators could use them, and a fourth was abandoned. Meanwhile the 21st advanced in a series of sectional rushes across the marshes and by 4.40am the German garrison had surrendered. Working through the village enemy occupants of the houses were ordered to come out and if not instantly obeyed were smoked or burnt out by phosphorous bombs. By 5.15am a defensive line had been established 200 yards in front of the village by a line of poplar trees from the river to the flank of the 22nd on the right. To the north a party of Germans put up some resistance but on two occasions, and having surrendered, the Germans including an officer fired upon their 23rd Battalion captors when their guard was dropped. The party were not given a third opportunity to surrender, with the German officer summarily shot. This action ended all resistance in the village. On the right of the 6th Brigade the 18th Battalion (5th Brigade) also reached its objective and dug in.
 The action at Ville-sur-Ancre was a complete success and for the 6th Brigade the operations had worked out precisely as intended. The Germans defending the position, despite being prepared for the attack and with fresh troops, in all but a few cases showed little appetite for a fight and had poor morale. The casualties had been relatively light at 418 in all considering that the defenders had approximately 800 casualties and that 330 Germans and 45 machine guns had been captured (photograph left of some of the trophies, many of which were sent back to Australia and are now in the AWM museum).
 18th May 1918: A German machine gun strong post was proving to be troublesome on the flank between the 18th and 22nd Battalions. Intelligence officer Lieut. Irvine (photographed second from the left) of the 18th Battalion suspecting that a night attack would be murderous came up with the plan to take the post in the middle of the day having witnessed most of his own troops garrisoning the front line posts napping during what were now hot sultry days. With 18 men Irvine first walked and then ran to the post without a shot being fired, capturing twenty-two prisoners and a light machine gun, without a casualty. Congratulations were received from above, especially from General Birdwood, with Lieut. Irvine receiving a Bar to the Military Cross.
 16th May 1918: Orders came down to Brig-Gen. Paton to prepare for an attack at Ville-sur-Ancre by his 6th Brigade, an event that he himself been preparing since the 10th May. His proposal was for a night attack between moonset and dawn in the small hours, pushing past both sides of the village. On the previous nights the 24th and 22nd Battalions had by ‘peaceful penetration’ been pushing forward gradually, stealing new bits of land on either side of the river. The chief burden of the attack would fall upon the brigade’s right battalion, the 22nd Battalion who would have to capture in succession the two sunken roads known as the Little and Big Caterpillars which served the Germans
  for their front and main line defences. To their right and higher up the spur was the 18th Battalion of the 5th Brigade and advancing and protecting the left flank of the attack was the 21st Battalion. The goal would be that by 4.45am the village of Ville would be enclosed on three sides. It was believed that the village was strongly garrisoned and there was no intention of fighting in it. To assist the 24th Battalion in the attack, ready-prepared footbridges were made by the 6th Field Company for the crossing of the river (photograph right).
14th May 1918: German fighting patrols attempted to breakthrough in the weak part of the Australian line held by the 17th Battalion south of the Bray – Corbie road. Despite early successes and taking prisoners they were eventually pocketed and either captured or shot, and the few Australians that they had previously made prisoner released. Meanwhile during the night the German artillery was unusually active on the whole front, a prelude to what many thought as the next part of the German offensive. As a result the attack at Ville-sur-Ancre scheduled for the following day was postponed and AIF 2nd Division Commanding Officer Maj-Gen Smyth, VC, warned his battalion commanders that they might need to act in short-notice as a counter-stroke if the German offensive was launched.
13th May 1918: A conference was held at 6th Brigade HQ at Heilly on the proposed attack at Ville-sur-Ancre with the objective of straightening the line and capturing the village. The Germans were now using phosgene and mustard gas shells plus machine-guns to a large effect, but while attacking the 5th Brigade on the 22nd Battalions right they suffered a crushing defeat. Practically the whole of the attacking force was either captured or killed.
10th May 1918: The AIF 3rd Division was relieved by the AIF 2nd Division, with the 5th Brigade in the sector on top of the ridge and the 6th Brigade astride the river and facing the village of Ville-sur-Ancre. The operations of 4th– 9th May had cost the 9th Brigade 18 officers and 246 other ranks as casualties. For the incoming brigades orders were given to continue the activity of peaceful penetration while preparing for an all-out assault on Ville in the coming days.
 7th May 1918: For the Australian force the 15,083 losses between 21st March and 7th May resulted in the need for re-organisation, something that was dreaded by all, and particularly for the men of the 36th, 47th and 52nd Battalions (battalion insignia badges right and below) that were earmarked for disbandment over the coming weeks. For the British, the stream of reinforcements through conscription increased
  from a trickle to a flood, but mainly with the use of boy soldiers under the age of 19, many of whom were good but still lacked the hardening process and thus thrown headlong straight into some of the hardest fighting of the war. Meanwhile Capt. McMinn of the 34th Battalion was ordered to push forward at night and to take 1,200 yards of the German line south of the Bray-Corbie Road. Orders came
  through extremely late for the attack not giving the front line officers enough time for proper assembly or reconnaissance for a night attack. In the darkness McMinn’s half company got separated from the supporting battalion and being completed isolated and surrounded the seven officers and 85 men decision took the decision after destroying their maps and papers to surrender.
5th May 1918: Artillery during the day was followed by a dense rolling barrage behind which attacking waves from the 35th and 34th Battalions followed closely towards the enemy trenches in front of Morlancourt, often catching the young German garrison cowering on the floor. Both lines of the enemy trench were captured on a front of ¾ mile and 153 prisoners, 10 machine guns and three trench mortars taken at the cost of only some 100 casualties, mostly minor. At this point even such minor successes were encouraging to all the Allied troops, and conversely discouraging to the enemy.
4th May 1918: Brig-Gen Rosenthal, commanding officer of the 9th Brigade together with Lieut.-Col. White of the 33rd Battalion while checking posts were bemoaning the lack of prisoners taken so they ventured forward themselves in search of Germans to take prisoner. In the dark they were approached from the rear by a party of German ration carriers that had got lost, and despite trying to escape were taken prisoner by the Australian commanding officers.
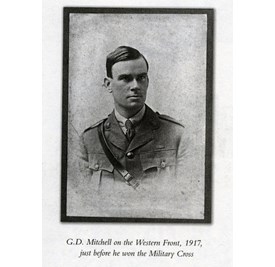 3rd May 1918: At 2am the 48th Battalion moved into position for the attack at Monument Wood but just as they were about to advance they were spotted and flares shot into the air to illuminate the area. A short and weak barrage at zero hour, followed by ferocious machine-gun fire and frenetic throwing of stick bombs in the area of the wire caused many casualties and the attack failed. Once the fighting had ended stretcher-bearers went out to recover the wounded under the supervision of a young German officer that had climbed out of his trench. Lieut. GD Mitchell, MC (photograph above right) of the 48th did the same and they made arrangements for a formal armistice allowing the Australians to bury their dead in No-Man’s Land and bring back the wounded. At the end both officers saluted and returned to the trenches. With this unsuccessful effort the Second Battle of the Somme, which for most of the British Army had ended of 5th April, closed on the French and British forces in front of Amiens.
2nd May 1918: The northern most Australian division on the Somme, the 2nd Division (including the 22nd Battalion) was relieved by the British 18th (Eastern) Division and moved into reserve and ready to counter-attack should the Germans breakthrough in the sector. The Australian Corps held its now shortened line with three divisions – the 4th Division in front of Villers-Bretonneux, the 5th Division astride the river Somme, and the 3rd Division to a point half a mile south of the Ancre between Ville-sur-Ancre and Morlancourt.
30th April 1918: Given the narrow foothold to the east of Villers-Bretonneux, the newly arrived 4th & 12th Brigades were presented with the task to push forward their outposts to be better positioned for the attack on Monument Wood planned for a few days time.
28th April 1918: The AIF 4th Division arrived at Villers-Bretonneux with the 4th Brigade, itself having just been relieved from Hebuterne, relieving the 15th Brigade in the 1,200 yard sector north of the Roman road. The 12th Brigade relieved the Australian 13th Brigade plus the 8th British & Moroccan Divisions south of the road on a front of 2,500 yards to the south-west corner of Monument Wood.
27th April 1918: The task of securing the position north of Villers-Bretonneux by improving the connection between the 15th and 14th Brigades was undertaken by the left company of the 60th Battalion, eliminating the re-entrant through a series of rushes that resulted in the Germans retiring. Although the straightening operation had been a success it actually cost the 60th Battalion more casualties than the main attack. The line was thus complete and lay upon its objective. After a furious bombardment the enemy were seen gathering for a counter-attack, but the machine guns of the 25th Company, the captured German machine-guns, Lewis guns and the artillery caused the enemy to scatter and the threat faded.
The Villers-Bretonneux operation cost the 13th Brigade the most with 1,009 casualties compared to the 455 in the 15th Brigade. The 51st Battalion alone lost 365 officers and men, mainly as result of having to skirt the Bois l’Abbe and in passing the wire near the Cachy Switch. However the Australian had 2,473 casualties in total many on account of the gassing during the German bombardment. In all the British, including the Australians, had approximately 12,000 casualties, plus the 3,500 Moroccans, while the Germans on are estimated to have lost 8,000 men.
26th April 1918: As daylight broke the Australians of the 13th Brigade looked on with admiration and astonishment as the Moroccan Division advanced en-masse across the plateau to take Hangard Wood, but faced with a storm of machine-gun fire from the Wood and the Monument they were cut down, the suicidal attack costing the division some 3,500 casualties.
25th April 1918: The progress of the attacking battalions of the 15th Brigade to the assembly position at Villers-Bretonneux was slow on account of the dark and gas lying on the low ground. Lieut-Col. Marshall of the 60th Battalion took the decision to wait until the attacking companies of the 59th and the supporting 57th Battalions had arrived. As a result the brigade did not advance until midnight, two hours after the allotted time. The first part of the advance proceeded well in silence, and when a flare was fired the men would remain motionless. Once seen a machine-gun began to open up firing high and erratically at which point the order was given to charge and with it unleashed with a ferocious roar the infantry that with their rifle and bayonet gave no quarter to the enemy machine-gunners. This half hour would rank as one of the wildest experiences of the Australian infantry during the war. The main fighting was on the right where the brigade brushed the village, while to the north and on the plateau the Germans were manning the old British reserve trench that had been dug by the AIF 5th Division. The 60th and 59th having passed the north of the village continued rushing south-eastwards pursuing the fleeing enemy and killing those that remained in their shell-holes, until the objective of the old Roman road on the right and the Villers-Bretonneux-Hamel road was reached, and with what turned out to be relatively few casualties. However there was now confusion as the right battalion, the 57th, had been given orders to move on to what was the old British front line. With senior command not yet available, local commanding officers Capt.’s Peacock and Morgan decided to push on to what was now the old British out-post line, but there was no sign of the 13th Brigade on their right and unbeknown to them they were about 1,500 yards past the farthest point reached by the 13th Brigade attacking the Monument. Their northern flank was about 700 yards ahead of the 59th, and with the Germans beginning to out-flank them the decision was made to abandon the attempt to cross the Roman road so they withdrew to the captured trench-line in the rear of the 59th.
 By 4am on the 25th April, the third anniversary of the Anzac Landing, the 15th and 13th Brigades had established themselves in a position around the village, albeit not fully surrounded, to make the enemy holding and reinforcing of the village difficult. However the Germans had yet to be forced out as the attack by two battalions of the British 8th Division allotted with the task of attacking where the Germans most expected it had suffered heavy losses in their failed attempt. As daylight came sniper fire increased from the houses in the village. The task of clearing now fell to the 57th Battalion. Every now again a machine-gun opened on them from one of the houses, a Lewis gun would pour fire on it from the front while other men made their way round and bombed from the rear, and finding themselves surrounded the Germans surrendered. This process repeated itself as the troops advanced. By the time the main street was reached 300 prisoners had been taken. Some of the scattered German parties fought stubbornly, while 200 were seen retiring across the open country south of the railway towards Monument Wood. To the south the 13th Brigade were approached by three white-flagged Germans carrying messages that they were surrounded on three sides and should surrender forthwith to avoid destruction. By now the Germans in the wood to the rear had been cleared and the response to the Germans was short and less than courteous! As it turned out, and confirmed by the three whippets which went on one of their fast reconnaissance behind enemy line, this was just a bluff, but for the Australian troops digging in this added to their anxiety particularly as a tremendous bombardment began to fall on them at 7am for an hour. At 10am a gap of 500 yards still existed either side of the railway, but due to the machine-guns at the Monument and Hangard Wood sweeping the plateau during the day it would not be until the early hours of the next morning that the gap would eventually be closed.
 24th April 1918: At 4.45am and under a mist an intense German artillery bombardment including gas shells fell on Villers-Bretonneux extending six miles south of Hangard into the French sector [Map courtesy of Australians on the Western Front]. This was not a resumption of the Michael offensive but a localised attack to put pressure on Amiens and create a diversion to the offensive that was taking place in Flanders. The village and its front was held by the 8th British Division, a particularly good British division but which had lost half of its 10,000 infantry in the March offensive. Reinforcements now coming from England included many young fresh-faced soldiers, and in some cases the battalions were more than half manned by boys under the age of nineteen. To the north and rear of the town Brig-Gen. Elliott’s 15th Brigade were in divisional reserve, with the 14th Brigade manning the front to the north of the village. If the village was lost Elliott had already primed his 59th & 60th Battalions for the counter-attack. Around 8am patrols from the two 15th Brigade battalions came across both wounded and non-wounded British troops that the Germans had been attacking with tanks. By 8.35am the 14th Brigade’s 56th Battalion in reserve on Hill 104 could see the village and that the Germans were now holding it and advancing north i.e. around the front of the 14th Brigade, but the position was secured through both the 56th Battalion and a battery of British field artillery firing at point blank range. At about noon the 8th Division began their counter-attacks, the first of which was delivered by three heavy tanks, one ‘male’ and two ‘female’. Heading for the vulnerable Cachy Switch Trench the tanks soon came
  across at a distance of 300 yards a German tank approaching with two waves of infantry, and two more tanks on either side. The machine-gun carrying ‘female’ tanks were no match and after being fired upon retired leaving tank commander Lieut. Mitchell in his ‘male’ tank, carrying two six-pounder guns, to fight what would become the first tank duel with the leading German tank, manoeuvring to bring first one gun into action and then the other. Eventually Mitchell took the risk of stopping to give the gunner a better platform and at once hit the opposing tank three times causing the crew to abandon and flee (photograph above of the disabled German tank ‘Mephisto’). Seeing this and to his surprise the two other tanks turned and made off. As Mitchell retired after being hit by artillery shell he was passed by seven light ‘Whippet’ tanks speedily coming in to action to clear up the situation in front of Cachy, causing havoc to the German battalions forming up in the open. German artillery and their remaining tanks fired at the whippets putting four out of action, but by now the contemplated attack by the Germans had been foiled. As for the British, the only counter-attack carried out with success by the infantry was by 2nd Royal Berkshire in front of the 14th Brigade’s position on Hill 104. At 9.30am and as soon as General Rawlinson had learnt of the loss of Villers-Bretonneux he ordered the nearest Australian reserve brigade, the 13th Brigade billeted at Querrieu north of the Somme, to march south at once to III Corps to assist in the recapture of Villers-Bretonneux, which as he put it was ‘imperative to the security of Amiens’.
 At 10pm on the 24th April 1918 the British artillery opened on the village of Villers-Bretonneux as the two brigades of the AIF, the 15th Brigade to the north and the 13th Brigade to the south, prepared to counter-attack and to encircle and then regain the village. Within five minutes the German barrage started to fall on the assembly positions and at 10.10pm with all battalions in position the attack commenced. For the 51st Battalion of the 13th Brigade they had to pass a wood on their left which had supposedly been cleared by the British earlier in the day but flares were soon in the air and German machine-guns enfilading their advance. Pressing on to their objective at Monument Wood would have been futile at this stage so the local decision was taken by Lieut. Sadlier (photograph below) to attack the wood and bomb the guns out. His attack for which he was awarded the Victoria Cross was extraordinarily bold taking the German machine-gunners by surprise and with the Western Australians fighting wildly in the dark and amongst the
  trees. By this audacious attack all the machine guns along the edge of the wood were eventually silenced and a great danger was removed from the flank of the advancing brigade. To the centre and right better progress was made, but in one incident they ran into a party from the 2nd Devon and 1st Worcester who unaware of the counter-attack thought that they were being attacked by Germans from the rear. As the 13th Brigade advanced they had to now negotiate the diagonally running wire entanglements that had been erected to stop the Germans, who by now had positioned their outposts on the other side of the wire. By morning the wire was lined by the dead of the 52nd and 51st Battalions. Some 500 yards beyond lay a stronger line of defenders but once having engaged with their Lewis guns the Australian line rushed yelling and shouting and the Germans, newly arrived from the eastern front and not used to this ferocity, turned and ran as the 52nd chased the fleeing parties into the dark between the Monument and Hangard Woods The 51st on the left, whose progress had been hindered earlier by the fire from the woods plus the railway embankment that ran to the south of the village, reached a quarry in which several British wounded who had lain there since the previous morning were found, along with a German tank lying on its side. However the objective at Monument Wood was becoming less achievable as the attack moved forward with the Germans to the left and rear in the village, and the 7th Bedford’s on the right not in contact with a flanking company so a decision was made to establish a defensive line on the high ground behind the quarry. Although short by between a quarter and a mile from their objective, they had still pushed forward a mile and in a position to squeeze out the Germans in the village if the 15th Brigade to the north were able reach its objective.
23rd April 1918: For the second phase of the Meteren attack the 9th & 10th Battalions advanced under bright moonlight and as a result were easily seen by the enemy and machine-guns opened up. The attack was repulsed and cost the 3rd Brigade 160 men. Evidently the element of surprise for this attack had been lost with the success of the previous night! With the renewal of the gas shelling of Villers-Bretonneux and intelligence on the ground and in the air it was evident that the Germans were massing for an attack on the village. The British artillery began to fire heavily into the expected assembly positions.
22nd April 1918: Having sensed the spirits of the Germans had waned a plan was hatched to counter-attack and recapture the village of Meteren, without the aid of artillery but reliant upon surprise. This was an early example of a type of limited attack which became known as ‘Peaceful Penetration’. The attack was to be made in two phases, the first a thrusting of the flanks on either side of the village to make the attack of the following night easier. The first phase on the night of the 22nd April by the 11th and 12th Battalions was a success at the relatively light cost of 33 casualties.
 21st April 1918: In the skies above the Somme there was much activity with Manfred von Richthofen, the ‘Red Baron’ (photograph right) and his ‘red circus’ squadron again involved. While chasing a British scout over the Australian sector von Richthofen was himself dived by Canadian airman Captain Roy Brown who thought he saw the Red Baron collapse under his fire. Brown broke off but noticed the scout and von Richtohfen fly on for about a mile, flying low along the valley and now a target for the many Lewis gunners and riflemen on the ground. As the two planes rose to clear the hill to the east of Corbie, von Richthofen swerved and crashed. There is still debate whether it was Capt. Brown or an Australian gunner that was responsible for von Richthofen being killed. Regarded in high respect by the Allied air officers
  von Richthofen was given a full military burial with officers from No.3 Squadron Australian Flying Corps acting as pallbearers and the guard of honour from other ranks of the squadron (photograph left) firing a salute. Von Richthofen was originally buried in the cemetery in the village of Bertangles before being moved to the German Military Cemetery at Fricourt in 1920, and five years later was he brought back to Germany by his family.
 19th April 1918: The 5th Brigade was relieved at Hangard Wood and returned to the Australian Corps, leaving with generous praise from the British 58th Division commanding officer. However the losses from Brigadier-General Smith’s brigade were high and wasted for what appeared to be rather fruitless local enterprises.
18th April 1918: The French First Army attacked south of Villers-Bretonneux and partially succeeded in pushing the Germans back about half-a-mile on several miles of front at the junction of the Avre & Luce rivers.
17th April 1918: The Australian sector at Strazeele was shelled heavily, and though the German guns had yet to be accurately registered the village and the railway station were wrecked. At 10am the Germans attempted to attack up the valley between Merris and Meteren but were met with a deluge of fire from the 4th and 1st Battalions. The 1st Brigade estimated that they had caused between 1,500 – 2,000 casualties whereas the 3rd Battalion to their south estimated that at the railway embankment their Lewis and machine-gunners had accounted for 700 casualties. By contrast the casualties in the AIF 1st Division were few.
However strain was being felt on the entire British front, with seven divisions needing withdrawal and rest after four weeks of the offensive, and being severely understrength were vulnerable if the German attack was continued. To assist in this situation General Foch agreed to send French divisions north to bolster the defence. To the south the German artillery drenched the village of Villers-Bretonneux with 12,000 gas shells, repeating the exercise the following day causing the defending battalions to lose a considerable amount of their men. A captured German confirmed that this gas bombardment was as a prelude to a coming attack on the village.
16th April 1918: Just to the north of the Australians in Flanders the Germans attacked in front of Meteren where two companies of the New Zealand reinforcements held out in front of the village but were cut off resulting in the largest capture of New Zealand prisoners during the war. That day the Germans also succeeded in capturing Wytschaete and with their success at Bailleul turned the attention of the British 2nd Army HQ upon the northern half of the battlefield, and the fear was now Mount Kemmel overlooking in almost all directions the plains of Flanders.
15th April 1918: The 18th Battalion attempted to re-take Hangard Wood but as with the earlier attempt by their sister battalions of the 5th Brigade they too failed with approximately half of the 180 men that took part becoming casualties. The French who were also attacking on their right had success taking and holding the cemetery.
14th April 1918: The first attack on the AIF 1st Division’s new front line at Hazebrouck was made shortly after midnight when a Company of Germans came marching up. Holding their fire until they were within twenty yards they were met with withering fire and the attacking survivors panicked and fled. At daylight more Germans were seen massing and marching forward for an attack. The seven brigades of the Royal Field Artillery covering the Australians effectively scattered the attackers, and the Lewis gunners and machine-gunners had rich targets albeit at long ranges of a half mile and more. The waves that got closer were met by rifle fire from the forward posts. With the exception of two posts of the 8th Battalion which were destroyed nowhere else did the Germans reach the Australian posts. Along with the 5th British Division, the Australians had completely stabilised the front between Hazebrouck and St.Venant, and furthermore the British First Army to the south had thrust back the Germans. For the Germans attacking from Merris, the battle of the 14th April was their third day in which they had come against a stubborn defence and the stress was beginning to take its toll, and with this set-back the offensive was suspended to the south and west of Armentieres.
Meanwhile on the Somme, raids by the 21st, 24th and 26th Battalions were launched on the bare slope above Dernancourt but failed in their objective to bring back prisoners and resulted in many casualties and prisoners.
 13th April 1918: At daylight battalions of the AIF 1st Division began to take over forward positions around Strazeele, having passed refugees with laden carts on the roads heading west, then entering into empty villages and abandoned houses. Six miles of the army’s emergency front line was being held by the 7th, 8th, 3rd & 4th Battalions from south to north, with their outposts behind hedges, in back-gardens, or orchards of farmhouses and cottages. Farmhouses became prime targets for the artillery of both sides, being reduced to ashes by incendiary shells within a matter of days. At dusk it was evident that most of the troops previously ahead of the Australians would have withdrawn to their rear before the next morning.
11th April 1918: As the AIF 1st Division began its journey back to Flanders, the German heavy gun and aeroplanes were shelling and bombing the main railway junctions and station at Amiens and St. Pol, delaying their progress north and causing casualties in the process.
 9th April 1918: As the 3rd & 2nd Brigades of the AIF 1st Division were marching to relieve the AIF 3rd Division in the Baizieux and Corbie areas of the Somme, a disturbing message was received at its headquarters that the Germans had attacked the previously quiet sector of the front held by the Portuguese troops between the La Basse canal and Bois Grenier and had penetrated four miles on a ten mile front. They later heard that the front had been extended north of Armentieres which the I Anzac Corps had just left. At 7.30pm came a message countermanding all moves previously laid down for the division and warning it to be prepared to entrain next day for the north. Unbeknown to the Australians at this stage, the Germans had on 9th April 1918 launched their next phase in the Kaiserschlacht – Operation Georgette , or the Battle of the Lys – with with the thrust towards the vital British rail-head at Hazebrouck and gateway to the Channel ports of Calais, Boulogne and Dunkirk. The belts of wire entanglements and concrete strong-points built so diligently by the Australians during the previous winter were overrun in just a few hours.
8th April 1918: As the AIF 2nd Division came into the line opposite Dernancourt they were subject to accurate enemy sniper fire. However in the coming days and over the next three week snipers from the Division claimed to have accounted for 127 Germans and the rate of casualties for the Australians had halved.
7th April 1918: In the early hours the newly arrived 5th Brigade were tasked with re-taking Hangard Wood to the south of Villers-Bretonneux. The attack by the 19th & 20th Battalions failed primarily because the northern half of objective in front of the 19th Battalion was not tenable on account of the spur of high ground just beyond which gave the Germans an unassailable advantage. The two Australian battalions lost 151 officers and men in the operation. To the north and during the afternoon the 12th Brigade was relieved by the newly arrived 6th Brigade of the AIF 2nd Division at Dernancourt. By this point it was apparent to the British and Australian troops that Ludendorff’s thrust in the Somme area had been, at least for the moment, suspended.
 5th April 1918: To the west of Villers-Bretonneux masses of Germans were seen apparently digging themselves in but the machine gun and trench mortar crews setting up their offered rich targets to the men of the 36th Battalion. At Dernancourt (photograph right) early morning patrols of the three front-line battalions of the 12th & 13th Brigades reported Germans massing to the west of the village into which a nearby Stokes Mortar Battery sent ten rounds. General Gellibrand ordered the artillery to fire on its S.O.S lines and then at 7am the German artillery opened up with an intensity on the AIF 4th Division and its artillery not witnessed since Pozieres two years previous. Fifteen minutes later German infantry could be seen moving down from the Morlancourt hilltop, but with all telephone lines cut and fog hindering observation no word of enemy action was received at divisional
  headquarters in the rear. Over the next few hours reports and rumours were coming in that the Germans had breached the railway embankment and were pushing up the slope with prisoners being taken. Section by section the 47th, 48th & 52nd Battalions began a rear-guard action as they with the exception of the flank platoon of the 48th on the Amiens road and the right of the 52nd still on the railway withdrew up exposed the slope. By 1pm the 49th Battalion had been ordered to counter-attack and moved forward from its reserve at Lavieville. The counter-attack supported by the withdrawing battalions on the flanks and accompanied by a heavy short bombardment was one of the finest undertaken by the Australians and despite facing heavy small arms and machine-gun fire as they rushed over the crest and down the slope, they regained the majority of the support line just failing to recover the most optimistic of objectives, the railway embankment. During the fighting at Dernancourt the 12th Brigade suffered 580 casualties, the 13th Brigade approximately 500 plus a further 153 in the field artillery supporting the AIF 4th Division, who during this engagement fired 27,558 rounds. At Hebuterne further north the 4th Brigade and the New Zealand Division, having endured one their most fiercest of bombardments of the war, beat off a strong German attack with the villages of Hebuterne and Colincamps their objectives.
South of the Somme the AIF 5th Division came into the line, relieving a Cavalry Division on a frontage of about 5,000 yards. Back in Flanders saw the relief of the AIF 1st Division at Hollebeke by the British 9th Division.
With the German offensive running out of steam Ludendorff called off Operation Michael on the 5th April and his attentions now moved to the next phase of the offensive. General Rawlinson, British Fourth Army Commander later said: “I feel that no mere words of mine can adequately express the renown that they have won for themselves, and for the position they have established for the Australian Nation, not only in France, but throughout the world”. French Prime Minister Clemenceau added: “We knew you would do well: we did not know you would astonish a Continent.”
4th April 1918: At 5.30am a German bombardment fell on all the villages in the area of Villers-Bretonneux southwards as well as the front line itself signalling an imminent attack. Fearing the strength in numbers of the attackers Capt. Coghill of the 35th Battalion gave orders to not fire until the enemy was close and therefore not able to skirt around their posts, and time after time fire was placed on the attackers who retreated, reformed, attacked and fled again. At 7am the whole German line was seen to advance – a resumption of the offensive across a 21 mile front now that the German engineers had laid new railway lines enabling artillery and ammunition to be brought forward – and with the S.O.S. flare fired the British barrage fell upon the advancing infantry and combined with an intense rifle fire sent them to ground. However on the 35th Battalion’s left flank the Germans had broken through the British 14th Division on the north of the Roman Road and began to appear in their rear. With the position becoming precarious and the retirement of the 7th Buffs on their right, Coghill, himself having been wounded twice during the attack, was also forced to withdraw.
 By 11.35am the troops of the AIF 3rd Division north of the Somme spotted German infantry entering the village of Hamel, but although British infantry were retreating the Cavalry in the area performed well to help secure a new defensive position to the north-east of Villers-Bretonneux up to Hill 104 which commanded observation both east over the Germans and west to Amiens. In the afternoon the Germans broke through the British to the south of the 9th Brigade. Seeing this happen the 35th Battalion ordered its right flank to withdraw and form a defensive flank, but seeing some men moving rearwards along with the withdrawal to the right, lacking Coghall’s leadership the rest of the right of the 35th and 33rd Battalions simply got up and retired. This event caused consternation at headquarters and the 36th Battalion was ordered to counter-attack. Moving at a jog-trot the 36th quickly passed the crest of the hill and came in view of the advancing Germans, who at once hesitated and turned back into the wood. During the successful counter-attack the 36th Battalion lost 150 men, a quarter of its strength. Meanwhile on the Roman road the 33rd Battalion leapt at the chance of counter-attacking with the Cavalry with their swords and lances drawn, while at the same time three cars of a Canadian motor machine-gun battery lent by the IX Corps roared into action.
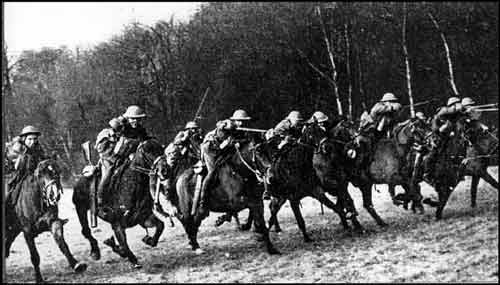 The German offensive of the 4th April, though it had failed in its objective, had driven back the British Fourth Army on its whole front and at some points for nearly two miles. To the south the French had too been forced back but with reinforcements arriving the danger was probably less than at Villers-Bretonneux. The defence of Villers-Bretonneux predominately by the 3rd Cavalry Division and the 9th Brigade, who lost 30 officers and 635 men during this period, had a major influence on the outcome of the spring campaign in this area. A continuous line, albeit a thin one had been re-established north as well as south of the railway. Meanwhile the 5th Brigade having just arrived from Flanders with the rest of the AIF 2nd Division was detached from its sister brigades and assigned to hold the reserve line (known as the Aubigny Line) behind the northern flank of the Fourth Army and with the 8th Brigade now also in reserve General Rawlinson was feeling happier about keeping the Germans out of Amiens.
3rd April 1918: Relief of the AIF 2nd Division at Ploegsteert by the British 25th Division for their deployment south and to join the other Australian divisions on the Somme. At Dernancourt the 46th Battalion manning the railway embankment were attacked and although they beat back the enemy suffered 51 casualties, mainly from the preceding bombardment.
 1st April 1918: The 16th Battalion assisted by the 13th carried out a small attack and captured a length of trench taking 71 prisoners and 4 machine-guns (photograph right). The front was advanced well down the slope and now lay 250 yards beyond the village. The crisis at Hebuterne had already ended, and the front now seemed to be settling down into trench-warfare. The 4th Brigade, now under the temporary command of the British 37th Division, was seen as the ‘saviour’ of Hebuterne and as a result was kept in the line far longer than normal.
31st March 1918: To the south of the Somme the 33rd Battalion were at dawn relieved by the 10th Battalion Essex Regiment and resumed their role as counter-attack troops within the 9th Brigade.
30th March 1918: The New Zealand Division on the right at Hebuterne made a sharp minor attack on a 1,200 yard frontage to secure the higher ground in front of its centre and in the process captured 230 prisoners and 110 heavy and light machine-guns and the news of this came as a great tonic to the whole of the British Army during these difficult days.
 To the south a German bombardment opened up south of the Somme and on the AIF 3rd Division holding the Ancre-Somme spur, accompanied by German aeroplanes swarming overhead. The Germans were spotted deploying for the attack but even despite being a distance away were met with intense fire leading to confusion in the attackers ranks. No Germans were able to get within 300 yards of the 44th Battalion’s outpost line. To their left the 40th Battalion on the hill crest were also able to pour heavy fire into the advancing Germans who were soon stopped. Several hundred men tried to take shelter on the Somme flats but the artillery was soon brought to bear upon this group. By 4pm the only visible movement in most of the enemy’s area was that of the stretcher-bearers working among the wounded. That day the 11th Brigade lost some 150 casualties, though the enemy’s was far greater. Actual German losses are difficult to verify – some Australian’s including General Monash – put the number of killed as 3,000. This is likely to be widely exaggerated but the historian of the German 8th I.R. that was involved in the attack stated the attack ‘was a miscarriage such as the division had never before suffered…. Spirit sank to zero…. Was this the end? …Was the offensive beyond our strength?’ During the night the remainder of the Australian 3rd Division’s Artillery came into the line, and with the British 35th Division relieved by the 13th Brigade of the AIF 4th Division the front between Albert and the river Somme was now held by two Australian divisions, each of two brigades with their third still under temporary deployment elsewhere on the front. At least for the present the British front line north of the Somme was fairly secure. Furthermore the preparations for the continuance of the advance were hampered by the wet and the lack of railway communications across the old Somme battlefields. After consultations regarding the sufficiency of ammunition Ludendorff ordered a postponement to the offensive for several days.
To the south of the Somme, the 33rd Battalion of the 9th Brigade was ordered to mount a counter-attack and with a cycle unit and the cavalry of the 12th Lancers moved forward passing stragglers that had been in the front moving to the rear. The attack began at 5pm through the surrounding woods in the direction of Aubercourt, with the cavalry driving the forward elements of the enemy back enabling the 33rd to get in position to mount the main attack. As the 33rd Battalion advanced, without artillery, they soon encountered the new German front line on the crest of the ridge where machine-guns were able to enfilade into the attackers. This action was only partially successful in its territorial gains and came at a cost of 200 casualties, but it did have the desired effect of giving a morale boost to the British troops that had hitherto been on the retreat and at the same time to diminish the morale of the enemy. Also that day the 35th Battalion were brought forward to man the defence line, of some 2,800 yards in length, immediately to the south and west of the vital town of Villers-Bretonneux. Although long in length, the recovery of abandoned Lewis Guns and panniers resulted in a total of 30 Lewis and Vickers machine-guns to give a formidable defensive fire-power. Being flat countryside and bereft of wire entanglements the men in the forward outposts were ordered to dig deep, and keep low and out of sight.
29th March 1918: Sensing the importance of closing the gap with the British 62nd Division at Hebuterne, parties of first the 14th Battalion and then the 15th & 16th Battalions bombed their way up their respective saps of the old trench system. Despite the assistance of a barrage by Stokes mortars and then artillery the enemy was found to be too strong for any headway to be made. In addition the muddy conditions of the old battlefield added to the problems.
For the men of Brigadier-General Gellibrand’s 12th Brigade who had now been moving, marching, digging and fighting for three days and nights almost without sleep, they were now exhausted but the rain now falling rendered the renewal of attack less likely. Furthermore good news was received that on the previous day some 15-20 miles farther north a major attack by the Germans on the British front at Arras (Operation Mars) had been defeated.
 To the south the situation on the Fifth Army’s front was becoming critical with the French continuing to withdraw in a south-westerly direction opening up a dangerous gap between the British and French armies, so Brigadier-General Rosenthal’s 9th Brigade, initially protecting the Third Army’s right flank at the River Somme (photograph right) was ordered south of the river immediately to the rear of Villers-Bretonneux and be placed under XIX Corps of the Fifth Army. To compensate for this loss and to guard the bridges Elliott’s 15th Brigade, the first of the AIF 5th Division to arrive on the Somme, were brought to Corbie and placed under Monash’s 3rd Division.
28th March 1918: During the day at Hebuterne the Germans made several half-hearted attempts to attack but were beaten back by the 4th Brigade. A number of prisoners were taken as they wandered unaware into their old strong-point at the cemetery. However to the Australians north a dangerous gap existed between the 4th Brigade and the British 62nd Division and the Germans probed forward in the direction of Gommecourt.
 To the south violent fighting took place as the Germans attempted to cross the railway line between Albert and Dernancourt held by the 12th Brigade, during which on one such occasion Sgt MacDougall (photograph right) of the 47th Battalion was awarded the Victoria Cross. At one stage and out of bombs the defenders could only throw stones in retaliation to the Germans on the other side throwing their grenades. Minenwerfers and shelling were also taking a toll on the exposed men firing over the rails. The 4th Division artillery supported by British batteries focused on the two German assembly points leaving the machine-gunners and riflemen to focus on the attackers that managed to get through the shell fire.
To their south the AIF 3rd Division faced a much lighter task in comparison to the 4th on their left, enabling Monash’s 10th & 11th Brigades to actually push forward into pretty much unclaimed land by a distance of about ½ mile towards Morlancourt, but at a relatively high cost of some 300 casualties. By the end of the day, the spirit of the German soldier had noticeably changed from that of supreme confidence to that of being depressed having been so definitely stopped and the attempt to cross the Ancre between Albert and Buire defeated.
27th March 1918: At day break the Australians of the 4th Brigade, now detached and under temporary command of the British 62nd Division, found themselves looking out over the old Somme battlefield, in many places utilising the remnants of the old 1916 support trenches along with their now rusting wire entanglements. Shortly after noon wave after wave of advancing Germans came on in a direction that would take them to the south of Hebuterne and the village of Sailly-au-Bois but the attack was broken by the 15th and 13th Battalions of the 4th Brigade pouring fire into their flank. At 4pm another column of some 150 men were seen advancing but were soon scattered by the joint efforts of the British artillery and the machine-guns of the 4th Company firing at almost a mile’s range. During the day the order came through to the 4th Brigade and all ranks that ‘no retirement’ from the present position was permissible. On the contrary the young Colonel Marks of the 13th Battalion seeing that the Germans holding the nearby cemetery could make their position precarious ordered its taking and the Germans taken by surprise in the turn of events relinquished this once important strong-point by the end of the following day.
To the south, by 2.30pm two battalions of the 12th Brigade lay across the eastern end of the summit of the Lavieville Down astride the Albert-Amiens Road, followed shortly by the 13th Brigade to their rear. In the confused state, troops of the 47th & 48th Battalion moving down the slope were both shelled by the Germans and attacked by British planes that had been told that any soldiers to the east of Lavieville were certain to be Germans. They took up positions along the western side of the railway. The divisional artillery had during the day reached the area of Acheux-Lealvillers-Varennes with orders to cover the front between Albert and Dernancourt.
 Meanwhile arriving in convoys of London buses the 38th, 37th, 43rd & 42nd Battalions of Monash’s AIF 3rd Division, now the right flank of the British Third Army, took up positions between the Ancre and the Somme (photograph right of the 3rd Division overlooking the Somme) in the now overgrown old French trenches, without wire, taking over their occupation from small parties, remnants of British battalions that had been over-run and had retreated as the offensive rolled on. Also in the vicinity of this green, farming land devoid of mud and shell holes were patrols of British cavalry that were in contact with the enemy, which by now had taken the village of Morlancourt. On the slopes opposite Dernancourt the old abandoned casualty clearing station became a hunting ground for men salvaging blankets, preserved food and other items. As the retreating rear-guard British soldiers of mixed units melted through the AIF 3rd Division, the newest of the Australian divisions for the first time on the Somme came into contact with the German skirmishers and numerous patrols pushing forward, and were met by well-directed rifle and Lewis gun fire causing heavy losses. Towards nightfall the attempts to continue his advance died away and as events unfolded this marked the furthest that the Germans went during this part of the offensive. To their north, the AIF 4th Division had had a similar effect on halting the German advance opposite Albert and Dernancourt.
26th March 1918: The stream of retreating British troops, tired and disheartened, were completely intermingled with one another and villagers. The Australians were the only ones in sight moving forward. Half eaten meals on cottage tables showed how hurriedly the people had left. The artillery of the AIF 4th Division which just three days earlier been in Flanders arrived by forced march and took up positions to cover the infantry. By nightfall orders were received to probe forward and to secure the village of Hebuterne which in turn was be probed by forward German patrols and my midnight the 13th Brigade had formed a defensive line through the village.
 However orders were received that the AIF 4th Division had to urgently march to a new destination south and towards Albert, and the 12th & 13th Brigades who had just reached their billets had to set off on a night march, accompanied by the sound of planes bombing and machine-guns rattling off to their left. Leaving the 4th Brigade at Hebuterne the column moved through almost empty villages, reaching their destination in the once familiar countryside between Warloy and Albert by dawn. The two Brigades of Gen. MacLagen’s 4th Division, plus the three of Gen. Monash’s 3rd Division would come under the command of General Congreve’s VII Corps and be tasked to deploy in a line across the German Army that had broken through his line between Albert and Bray, and now heading towards Amiens between the Ancre and the Somme. The Australians were now the most southerly of the British Third Army and given the task to protect its right flank. If the Germans were not stopped at about the line of the old French defences of 1914/15 to the east of Amiens then the German Army would be free to turn northwards behind the line of the British Third Army and southwards across the Somme and behind the Fifth Army.
Meanwhile to the north the AIF 5th Division were relieved by the British 19th & 21st Divisions at Messines in readiness for their move south.
 25th March 1918: News began to come in that the German Army were now fighting in High Wood, within a short distance of Pozieres where two summers previous I Anzac Corps fought its bloodiest battle. In fact the British front was broken with the Fifth Army driven back and the serious danger of the separation of the British and French Armies. The orders coming through to the two Australian divisions preparing to move were now in a tone reflecting the seriousness of the situation and that everything must be done to halt the Germans, for many, at last, the very job for which they had enlisted and gone overseas. As the troops crammed twenty-five in each lorry moved south, they carried their Lewis and machine guns plus their ammunition as they might have to fight soon after arrival. For the divisional commanding officers, trying to locate X Corps or British Divisional HQ’s was proving problematical as everything was in a state of disarray, illustrating the problem of communication and ability to create a chain of command needed to co-ordinate the defence across the various retreating units against the German advance. As the leading brigade of the AIF 4th Division arrived at St.Pol, the previously undamaged town having been twenty-two miles behind the front-line, the veteran 4th Brigade entered a town battered by the German long-range guns. The people of the village were loading carts with their possessions to beat a hasty evacuation, but their spirits were lifted by the sight and the reputation of the arriving Australians. Although in reserve the 12th Brigade whose billeting village was closest to the front picketed all roads leading from that direction into divisional reserve. For the AIF 3rd Division detraining at Doullens they entered a chaotic and rumour filled scene with the population preparing to evacuate en-masse and the exhausted British troops appearing from the east telling tales that the German cavalry and armoured cars were on their heals. With the arrival of the first battalions of the 3rd Division defensive dispositions were placed to the east of the town, and unit commanders stopped and directed hundreds of retreating but able bodied British soldiers to halt and join their defensive positions.
22nd March 1918: For the AIF 3rd Division in reserve instructions were issued for all units to prepare for a move, to dump unessential baggage, to fill up all mobile supplies, and to stand by in readiness to march at a few hours notice. The first orders received said that it was to move north and Ypres – and not south and to the Somme that it had hoped – to be placed in army reserve in case of a secondary attack. However within a day the order had been changed and they began their move along with the AIF 4th Division to head south and to join the British X Corps in reserve.
21st March 1918: The German Spring Offensive – Shortly before 5am on the 21st March 1918, the mighty German force comprising four armies of 27 divisions and supported by the biggest artillery barrage of the war with more than three million shells fired in five hours, fell upon the central Allied position between Arras and St. Quentin held by the British Third & Fifth Armies, in what was known as Operation Michael and the start of the German Spring Offensive, or ‘Kaiserschlacht’. Aided by the foggy conditions the German Stormtroopers were able to penetrate deep into the British lines. By the end of the first day, the British had lost 7,500 dead and 10,000 wounded and the Germans had broken through at several points on the front of the Fifth Army. After two days the Fifth Army was in full retreat. As they fell back, many of the isolated redoubts were left to be surrounded and overwhelmed by the following German infantry. The right wing of Third Army became separated from the retreating Fifth Army, and also retreated to avoid being outflanked. On the front held by the Australian Corps, the Germans as part of their increased activity that morning across the entire front attempted but failed in their raids against posts of the AIF 1st & 5th Divisions.
 Within days the ferocity and speed of the German Spring Offensive saw the advancing divisions achieve territory gains on the Western Front not seen since 1914 and the formation of the trench systems that ran the length of the front. [Map courtesy of Webmatters -click on image for detail.] News began to come in that the German Army were now fighting in High Wood, within a short distance of Pozieres where two summers previous I Anzac Corps fought its bloodiest battle. In fact the British front was broken with the Fifth Army driven back and the serious danger of the separation of the British and French Armies. The orders coming through to the Australian divisions were now in a tone reflecting the seriousness of the situation and that everything must be done to halt the Germans, and for many, at last, this was the very job for which they had enlisted and gone overseas.
19th March 1918: Statements from Alsatian and Polish deserters, a captured flying officer and other prisoners were all pointing to the principal point of attack on the British sector would be between Arras-St.Quentin in the coming days. The troops of the British 3rd & 5th Armies were told to expect an attack on the morning of either 20th or 21st March. However for the men in the front, warnings had been issued before and nothing had happened. In light of the intelligence Haig transferred four of his divisions from the 2nd Army in the north to the 3rd & 5th Armies expected to take the brunt. The triple defence system had been established along the British line, but the sector recently taken over from the French was in the poorest condition. Moreover the Fifth Army’s sector was the widest and most lightly held. For the purposes of harassing the enemy, 700 cylinders containing gas were fired from the AIF 5th Division’s front by a special company of the Royal Engineers. The history of the 226th RIR says that 21 of its men were gassed, nine fatally.
11th March 1918: With the expectation of the coming German offensive, the need to build intelligence on where the blow was most likely to fall increased. Patrols were sent out to capture and identify the opposing troops, such as by the 57th & 59th Battalions of the AIF 5th Division, but it was often the attempts by the Germans and the capture of their patrols that supplied the necessary information. Morale in the Australian Corps was high with the expectation that this time, as the defenders, they could do some serious damage to the enemy.
9th March 1918: Enemy shelling of the country immediately behind a considerable part of the British front began to noticeably increase. In the Australian Corps sector in Flanders this shelling fell mainly in the Douve Valley and in the battery areas which were bombarded with gas. Large Gotha planes also bombed Bailleul along with German long range guns shelling the town and the dumps and villages behind the lines.
8th March 1918: The AIF 2nd Division relieved the AIF 3rd Division and took over the southern section of the Australian Corps front in the vicinity of Ploegsteert, with the 3rd Division retiring to the Reserve in the countryside at Nielles-lez-Blequin not far from Boulogne. Once in the line a patrol of the 18th Battalion came across a German officer’s patrol reconnoitring the position at Pont Rouge, killing three and taking two prisoners.
4th March 1918: The 9th Brigade struck again at the same point and with the same strength. This time the Germans mounted a counter-attack which resulted in 32 casualties, three men missing and Captain Brodie mortally wounded.
3rd March 1918: A party of 10 officers and 225 other ranks from all four battalions of the 9th Brigade raided, killing 50 of the enemy and capturing an officer and a machine gun.
2nd March 1918: The AIF 1st Division relieved the AIF 4th Division and took over the northern section of the Australian Corps front in the vicinity of Hollebeke and Hill 60. During the relief several posts south of the Ypres-Comines canal was raided by a party of 5 officers and 120 others. Major Henwood of the 10th Battalion, having just taken over the position was killed, along with Lieut. Luscombe of the 13th Battalion. The Australians claimed to have killed 26 of the attackers and took a number prisoner, they themselves having 28 casualties and seven men of the 10th Battalion taken prisoner.
25th February 1918: Air reconnaissance and other intelligence picked up signs of a new German Army HQ being established between Arras and St.Quentin. By then GHQ estimated that the German forces in the West had grown to 181 divisions, and during the following fortnight signs of a pending attack became increasingly evident.
19th February 1918: 14th Brigade raided a post at Groenelinde Cabaret capturing seven German soldiers.
10th February 1918: Nine officers and 195 men of the 37th & 38th Battalions raided south-west of Warneton and penetrated to the second trench capturing 33 prisoners and claimed to have killed 102 of the enemy. The raiders had 39 casualties including Lieut. Crowe and Lieut. Dixon killed in action. The raid gained General Birdwood’s congratulations.
1st February 1918: The AIF 5th Division relieved the AIF 1st Division and took over the centre section of the Australian Corps front in the vicinity of Messines.
30th January 1918: The Germans laid down a gas bombardment on Fusilier Dugouts catching working parties and gassing two officers and 56 men of the 14th Battalion.
29th January 1918: The AIF 3rd Division relieved the AIF 2nd Division and took over the southern section of the Australian Corps front in the vicinity of Ploegsteert.
28th January 1918: To lessen the impact of the winter on illness, the poor discipline of the Australians in England, and to help with transportation to and from home, General Birdwood proposed to the Australian Government a move for the Australian Army Corps back to Egypt and replace British units in the Palestine campaign. Events later in March would see Birdwood telegraphing Senator Pearce to hold action on this proposal.
27th January 1918: A German patrol penetrated between two posts of the 3rd Brigade near Kiwi Farm. Their leader was killed and five wounded.
12th January 1918: The AIF 4th Division ends its temporary assignment to Fifth Army and moves north to join the other four Australian Divisions in the Australian Army Corps at the southern end of the Ypres battlefield, taking over the northern end of Corps frontage at Hollebeke and Hill 60.
4th January 1918: A German raiding party attacked some posts of the 3rd Battalion near Houthem leaving two defenders wounded.
 FIRST WORLD WAR TIMELINE