
 Background
Since halting the German Spring Offensive in April 1918 the Australian infantry had almost single handedly been on the front foot, putting strain on the German Army through its ‘peaceful penetration’ tactics. As a result there was nowhere more so than on the Australian frontage where the Allied forces had ascendancy over the enemy. As one by one the hammer blows of the German Spring Offensive fell and then dissipated against stiffening Allied resolve and defences, Marshal Foch and Field Marshal Haig began to plot their Allied offensive. The breakout at Amiens was the natural place to strike first, not just by relieving pressure on the city and its important railhead, but just to the south of the river Somme saw the junction between the British and French Armies. In addition the flat countryside was ideal for the tanks and mobile units for the breakthrough or exploitation phase of the battle, plus the Australians, one of the British Army’s elite Corps, were already in position and would soon be joined there by the fresh Canadians. Lieutenant-General Monash relished the opportunity for his Australian Corps to be at the vanguard of the attack, particularly after his July success at Hamel where his integrated approach to warfare was splendidly executed. His men too were in high spirits, despite their ranks being thinned by the front line exploits of the past four months and being subject to heavy gas bombardments through the summer. For the 22nd Battalion, their fighting strength had been significantly depleted following the successful attack at Ville-sur-Ancre in May and then the gas shelling in July, the joint effect of which resulted in some 450 casualties.
Combat
Somme 1918
 Lieut.-Gen Monash’s plan for the 8th August 1918 offensive was based upon four of his five Australian Divisions and their attacking brigades and battalions leap-frogging each other as each objective was taken. The 2nd Australian Division, along with the 3rd Division to their left was tasked with taking the first objective, the Green Line, with the 5th Division leap-frogging the 2nd and the 4th Division the 3rd to the second objective, the Red Line (see map above right). For the 2nd Division the attacking battalions came from the 7th and 5th Brigades, therefore the 6th Brigade including the 22nd Battalion were tasked with holding the outpost line from the 6th August enabling the attacking battalions to withdraw to the rear for rest and preparation. On the 7th August, the day prior to the offensive, a Special Order of the Day was issued by Monash for circulation to all ranks which dwelt upon the importance of the operations and their probable far-reaching consequences. Behind tanks were getting into position and fresh guns coming into the line and the roads were congested with traffic of all kinds causing inconvenience to the ration limbers. Three hours before zero the 22nd Battalion evacuated the outpost line, leaving only a few posts of one officer and ten men each. These kept an anxious watch through the very heavy mist until just before dawn when they too withdrew as the attacking battalions arrived. At 4.20am the British guns then put down a smothering and demoralising barrage and the great victorious attack of the 8th August 1918, the ‘Black Day for the German Army’ was soon in full swing. Following the 5th Brigade the 22nd Battalion moved forward into what had, earlier in the morning, been the German front line.
 The following day with the men carrying full battle equipment the 22nd Battalion advanced in artillery formation to Guillacourt where an enormous German dump sheltered all the companies. By the 10th August, a beautiful summer’s day free from shelling the Battalion was in carnival mood. The band was brought up and played while sightseers visited the giant railway gun (photograph left) captured by the 8th Brigade. With German resistance stiffening and the ground over which the battle was now being fought the more difficult terrain of the old Somme 1916 battlefield, the fourth day saw the end to this phase of the offensive with Field Marshal Haig’s attention turning to the next phase on the British Third Army front north of the river Somme. On the 11th August the 6th Brigade took over part of the firing line with the 22nd Battalion relieving portions of the 19th (5th Brigade) & 28th (7th Brigade) Battalions. Battalion Headquarters was positioned in an old German dug-out in the ravine to the east of the village of Framerville, which contained many interesting German documents left behind. The next few nights saw the Battalion pushing the line forward by three to five hundred yards each time by a series of ‘peaceful penetration’ advances. The ground was entirely free from trenches or other cover and after each advance new trenches had to be dug before dawn. By this time the Battalion mustered only 130 rifles and as the front line posts had to carry up their own rations, each man was called on to do the work of three.
 Through the efforts of the previous nights the line had been pushed up to within four hundred yards of strong German posts on the outskirts of the village of Herleville [click link for geo-referenced Trench Map, reproduced with the permission of the National Library of Scotland]. These were garrisoned, as later found out, by a portion of a German Guards Division specially brought from reserve with instructions to stay at all costs and repel any attack that might be attempted. They were supported by strongly reinforced artillery which was always active, and its fire rising frequently to
  barrage intensity. The 24th, 22nd and 23rd Battalions held the Brigade frontage from left to right, with the road leading to Herleville running between the 24th and 22nd Battalions (see map above and right). About four hundred yards in front of the 22nd Battalion was a crucifix, joined to the village by a sunken road and traversed in places by trenches and bordered on the far side by a high bank which served as a parapet for a strongly held trench. Around the crucifix there was a simple trench system. Orders were received to attack on the following morning, 18th August 1918 at 4.15am. So depleted was the Battalion’s fighting strength that the three attacking companies could muster only 90 bayonets between them for the attack, far too few to cover the ½ mile frontage allotted to them, and for ground that had no particular value. These facts were most strongly represented from Battalion HQ but orders were nevertheless issued that the attack would take place. Owing to the limited artillery available the barrage was arranged in lanes only on selected places.
 The attack by the three companies, B on the left, A in the centre and D on the right was met by heavy artillery and machine gun fire from the outset, but despite this D Company captured their objective. Advancing over open country D Company lost twelve men of its original thirty before reaching it, with the survivors holding on until assistance arrived later in the morning. D Company commanding officer, Lieutenant McCartin, MC, (photograph left, and Officers photograph below, middle row, second from left) was twice wounded in the attack but continued to the objective. When he found the crucifix on his left still strongly held by the enemy he made his way across the open and past the strongpoint to the headquarters of the support C Company where he was again seriously wounded in the face as communication was made with Lt-Col. Wiltshire’s Battalion HQ. C Company commanding officer Lieut. Braithwaite (Officers photograph below, middle row, third from left) took the telephone and told Wiltshire of the seriousness of McCartin’s wounds. McCartin was told to return to the rear, but instead he attempted to return to his men whereupon he was killed by a shell. McCartin, initially a Private and one of the original Anzac men, was one of the most popular officers and held in high regard by all that he came in contact with.
 A Company in the centre had been faring badly. They were only twenty-four in all, in five small sections, at about seventy yards interval when they commenced a bombing fight with the Germans in the trench beyond. Lieut.’s Fulton and Evans were both wounded and command fell to Lieut. Smith, MM. It was not until ten of the twenty-four had been killed or wounded and no more bombs were left that the impossible was abandoned and the little party withdrew to a communication trench by the crucifix. Amongst those killed from this company was Sgt Ellis (photograph right) who set a magnificent example to his men urging them on, throwing bombs and fighting desperately until he was killed. Lieut. Woods of the 7th Machine Gun Company rushed forward to help A Company that he was attached to, establishing his gun in full view of the enemy and did wonders working his gun until a bomb landed too close and in the attempt to throw it back it exploded inflicting wounds that he would succumb to back at the Casualty Clearing Station.
 On the extreme left B Company suffered severely. Under the command of Lieut. Westaway the thirty-three men set off under heavy artillery and machine gun fire, suffering many casualties before reaching their objective. The survivors joined forces in a large shell hole within fifty yards of the enemy and opened fire with a Lewis gun and rifle grenades. The gun was soon knocked out of action by a bomb and the grenades expended. Sgt Bregenzer, DCM, (photograph left) jumped into the open calling for the Germans to surrender but he was killed immediately. Neither the flares nor the SOS signal sent up for artillery support were responded to and the enemy worked closer firing a machine gun and grenades into the now defenceless garrison of the shell-hole. Lieut. Westaway and several men were killed and most of the rest wounded before being surrounded and taken prisoner. [Read the letters and notes from Lieut. Mallinson (Officers photograph below, back row, second from right) on his account in the shell hole, being taken prisoner, and the exchange of letters between Mallinson and Lieut-Col. Wiltshire (Officers photograph below, front row, sixth from left) on the futility of the attack]. The 24th Battalion party on the immediate left suffered a similar fate.
The task set for the men that day was a hopeless cause, and many a brave man gallantly lost their lives. Of the ninety men who took part in the attack, sixty were killed, wounded, missing or taken prisoner, including seven officers. Fifteen men from the Battalion were awarded for their bravery that day. With the British 32nd Division within Monash’s Corps replacing the 2nd Division that evening, all that was left of the 22nd Battalion, some seventy fighting men in all, were relieved by the 2nd Battalion of the King’s Own Yorkshire Light Infantry, some 670 strong. When the 22nd Battalion came out of the line, there were only nine members of B Company.
 Following the tragic Herleville attack by the 22nd Battalion of the previous day, the Germans delivered an attack and captured the front-line system, from which they were themselves dislodged by a strong counter-attack. These Germans were in every way superior to their ordinary infantry, refraining from the common practice of ‘ratting’ the prisoners they had taken, but they also buried a number of the Twenty-Second dead and erected a cross on their grave with the inscription ‘Six Unknown Australians’ [Lieut. Westaway, Sgt Bregenzer, L-Sgt Dolan, L-Cpl Jackson, Pte Hurst & Pte Kelly].
The remnants of the 22nd Battalion boarded buses for Vecquemont and then marched to bivouacs that were reached in the morning. Here they would remain for a week re-equipping, reinforced and re-organising. The Battalion’s continued existence as a fighting unit was made possible by the arrival of a good body of reinforcements that had arrived via New York, and were subsequently known as the ‘New York Anzacs’.
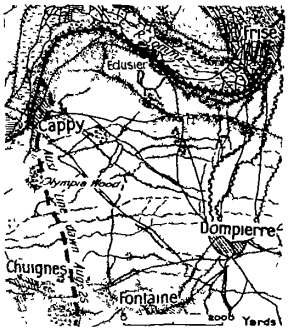 On the 26th August 1918 the Battalion relieved the 10th & 11th Battalions of the 1st Australian Division in freshly captured positions beyond the ruined village of Cappy (map left) with the 24th Battalion on the left and the 21st Battalion on the right. The enemy was fighting a rear-guard action centred mainly on isolated machine-gun posts established in some old abandoned trenches of the Somme 1916 fighting. The relief was completed at 2am and immediately fighting patrols went ahead, engaging the enemy wherever found with bomb and bayonet. By dawn the firing line had been advanced by 1,500 yards (in the direction left to right from the grid blocks G.33. to G.34.) at the cost of some twenty casualties of whom seven were killed in hand to hand fighting in the dark. [Click link for geo-referenced Trench Map reproduced with permission of
  the National Library of Scotland. Amongst those killed was Lieut. Wall, MC, held in high esteem by the men. The advance was continued until noon with the 24th Battalion passing through Dompierre and with the 22nd Battalion mopping up. The Battalion Lewis gunners intercepted an attempt to withdraw two German field guns, with the guns captured. The constant advancing was fatiguing as sleep was a luxury and the strain on the nerves was constant, not knowing what lay immediately ahead. The following day a further advance of 2,000 yards was made when Black Wood on the outskirts of Herbecourt was
  reached (location G.36.c. & d. in the above map and link). During the day an advance party of twelve under Lieut. Good, DCM (Officers photograph above, middle row, fourth from left) were vigorously attacked by a number of Germans of the Guards Regiment with L-Cpl Layburn (photograph right) shot by the German officer. L-Cpl Cannon, MM + Bar, took control of the situation with his Lewis gun, killing the German officer in the process. A steady supply of prisoners was taken, with increasing talk of pessimism and that the German Army was on the verge of collapse. At 2am the line again moved forward, this time with no opposition. By dawn on the 29th August the 22nd Battalion patrols had reached the outskirts of Flaucourt overlooking the River Somme, and the town of Peronne on the far bank.
Mont St. Quentin
 On the 31st August 1918 and with the attack by the 5th Brigade of the 2nd Australian Division at Mont St. Quentin in full swing a move was made by the 22nd Battalion to a position in support near Clery-sur-Somme. [Click on link for geo-referenced Trench Map reproduced with permission of the National Library of Scotland]. In the evening of the 1st September ‘A’ and ‘B’ Companies were in Gottlieb Trench (I.8.d. & I.14.b.), ‘C’ Company on the left of Haut Allaines junctioning with a British battalion on the Canal-du-Nord, while ‘D’ Company on the extreme right occupied Gott Mit Uns Trench (I.15.d.)., and in some sections as much shelter as possible was obtained from a high railway embankment there (photograph below). As a result of the attack the area was congested and enemy shelling caused some casualties including Capt. King and
  Lieut. Smith being wounded. The 22nd Battalion being the weakest numerically within the 6th Brigade would act as Brigade Reserve for the attack on the following day by the 21st, 23rd and 24th Battalions. As the 6th Brigade passed over the line gained by the 5th Brigade Pte Mactier of the 23rd Battalion was killed while silencing machine guns that blocked the way for which he was posthumously awarded the Victoria Cross. Sgt Lowerson of the 21st Battalion led a charge that overcame the centre of resistance on the left flank, and Lieut. Towner of the 7th Machine Gun Company provided continuous covering fire, actions for which both men were awarded the Victoria Cross. Ferocious hand to hand fighting took place, with the bayonet to the fore and as a result very few enemy prisoners were taken that day. After two attempts the summit of the Mont was taken and with it a commanding position over Peronne and the land to the east. The night of the final attack saw the men from the 22nd Battalion carrying tools, ammunition, rations, and water to the front line garrisons of the 7th Brigade through barrages of gas and high explosives, as well as acting as flanking support to the forward brigade. As a result ‘D’ Company, though nominally in support at times found they were close to active enemy posts and several patrol encounters ensued resulting in a number of prisoners being taken. Lieut. Thewlis was wounded during these operations. After the capture of Peronne the situation cleared and ‘D’ Company again passed into support.
 During the Mont St. Quentin operation, which British 4th Army General Rawlinson referred to as the finest single feat of the war, and by the time the 22nd Battalion had been relieved on the 4th September, they had lost another nine men killed in action or died from their wounds. Eight men were awarded for their gallantry including Sgt Batton of the 5th Reinforcements who received a Distinguished Conduct Medal to add to his Military Medal and Bar, and RSM Cadwell (photograph right, back row centre) a Military Medal to his Distinguished Conduct Medal and Belgian Croix de Guerre making them, along with Lieut.-Col. Wiltshire, the most decorated men in the 22nd Battalion during the Great War.
Beaurevoir & the Hindenburg Line
 Following their relief the 22nd Battalion left the trenches and after a two day route march westwards reached Cappy, the battleground of just eight days before, but now a comfortable and peaceful rest area. Here the Battalion stayed for three weeks enjoying rest and the pleasant weather on the banks of the Somme. Soon came rumours of another stunt and preparations were made for another move, including practice attacks with tanks at Herleville, scene of one the Battalion’s last attacks. The 22nd Battalion left Cappy at 7.15pm on the 27th September and a move towards the line re-commenced during the dark to avoid observation by enemy planes. By this time the 1st & 4th Australian Divisions had successfully taken the Hindenburg Outpost Line in preparation for the main attack by the British Fourth Army on the Hindenburg Line in the vicinity of the Bellicourt Tunnel on the St. Quentin Canal (map courtesy of the DVA Anzac Portal). It would be the 3rd & 5th Australian Divisions fighting alongside the American 27th & 30th Divisions that this initial task would fall to, with the 2nd Division held in reserve should the attack not succeed in all its objectives, the fourth and final obstacle being the Beaurevoir Reserve Line.
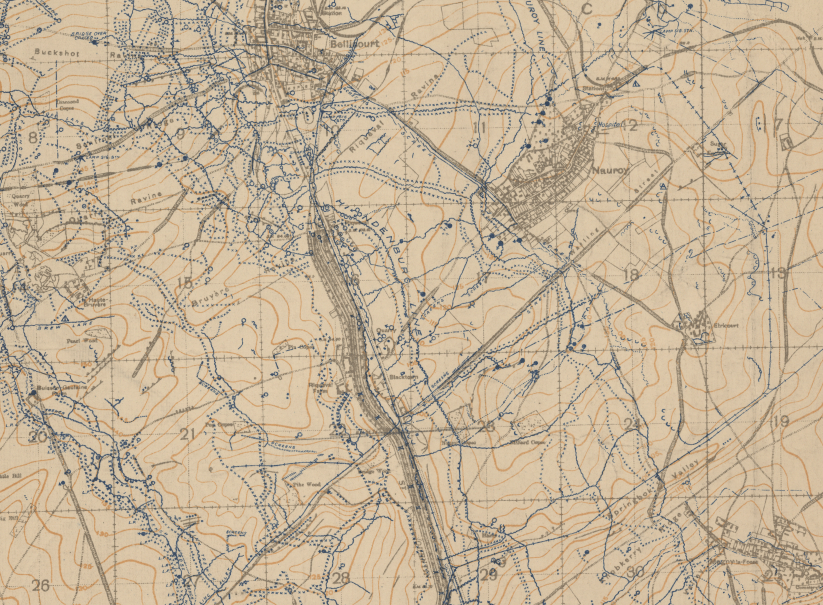 Problems caused in the initial attack on the Hindenburg Outpost Line on the 18th September to the left of the Australian Corps meant that the ‘land bridge’ over the tunnel could not be taken on the 29th September attack and Lieut.-Gen. Monash had to abandon taking the Hindenburg Line System in one blow. On the 1st October the exhausted 3rd & 5th Australian Divisions were relieved by the 2nd Australian and British 50th Divisions. During the evening the 22nd Battalion began its move forward to Billiard Copse (see map reproduced with permission of the National Library of Scotland plus click link for geo-referenced map, location G.23.b.&d.) near Nauroy. This final stage was made at short notice in intense darkness and without guides, with a compass bearing the sole aid to navigation. All the obstacles of the Hindenburg Line had to be crossed and the track lay across a deep canal and over difficult and entirely strange countryside. En-route the moving companies were bombed by a low flying German aeroplane, but no casualties resulted. The destination was reached soon after midnight and great credit was due to Lieut. Smith, MC, MM for his map and compass reading skills. Billiard Copse lay well within the Hindenburg Line and the village of Nauroy had been strongly fortified by the enemy. The trench systems here covered some thousands of yards in breadth and extended from the canal on the west to the Beaurevoir Line to the east. Here the 6th Brigade and the 22nd Battalion waited for orders to attack the Beaurevoir defences and bivouacked for the night.
 Supported by tanks and an artillery barrage the 5th & 7th Brigades were set the objective of taking the Beaurevoir Reserve Line including the village of that name with the attack commencing at dawn on 3rd October. However the wire in this area was thick, the tanks late in arriving plus the Germans were holding the strongpoint of Prospect Hill on the left so Major-General Rosenthal brought forward his reserve 6th Brigade. Orders arrived at 3pm for the 22nd Battalion to be prepared to move forward to the assembly trench (location B.27.a.& c. in map below reproduced with permission of the National Library of Scotland)
  in readiness to attack the German positions on the high ground to the right of the village of Beaurevoir, between the villages of Estrees and Geneve (click link for geo-referenced map). Though the weather was bright and sunny, sunken roads and banks provided sufficient cover for a careful advance to the ‘JOT’, an old trench system crossing the Estrees – Geneve road. The moving columns were almost in position when they were spotted by a hostile aircraft and the enemy immediately shelled the area with 5.9’s, but fortunately only causing slight casualties. The area was filled with enemy dead, the result of an attack earlier in the day by the 5th Brigade. At 4.30pm and while still making its way to the JOT our artillery opened up and put down a barrage, unbeknown to the men of the 22nd that it was to cover their attack. The message did not arrive until almost two hours later at 6.25pm! A new zero hour had been set for 6.30pm, and this message did not arrive back with Lieut-Col Wiltshire until just seven minutes before the off, passing the message ‘we attack in seven minutes’ to Lieut.’s Sutherland and Anderson. Fortunately the Battalion being both highly trained and with most of the men having great experience organised itself rapidly for the advance.
 The 22nd Battalion frontage of 1,400 yards had ‘A’ Company on the left of the Estrees – Geneve road with their objective a sunken road which ran between the road and La Motte Farm (location B.21.b.). ‘C’ Company’s objective was to push through this objective and with ‘D’ Company on the right to capture and consolidate the high ground overlooking Geneve about the trench line running from B.23.c. through B.22.d.. On the Battalion’s left flank was the 24th Battalion and with the 23rd Battalion on the right. After a not very intense 18-pounder barrage of six minutes duration the waves pushed on through the 18th Battalion in isolated outposts just beyond the JOT. Resistance was strongest along the Roman Road along which the 22nd battalion was attacking. From the men of the 5th Brigade near the road came a warning of ‘mind the quarry’, an excavation on the right of the road held by a strong garrison, all of whom were bayoneted once the position was reached. The attack was
  made with such verve and initiative that despite a strenuous resistance by enemy machine-gunners on the left flank all objectives were quickly secured along with 100 prisoners, thirty machine-guns, four 77mm guns and one 5.9 howitzer. This very decisive victory cost the Battalion only twenty casualties. However amongst the eleven killed were two very well-known and popular officers, Capt. Braithwaite, MC, (photograph above right) and Lieut. Paterson, MC, (photograph below right) commanding officers of ‘C’ and ‘D’ Companies respectively. Capt. Braithwaite along with Lewis gunner Cpl Bonnet were killed in the act of charging the troublesome machine-gun on the left flank. As Capt. Braithwaite fell those nearby heard his last orders ‘Go on C Company’, and as Lieut.-Col. Wiltshire later wrote, ‘on they charged, mopping up the position and fully avenging their Captain’s death’. Capt. Paterson was killed at a copse on the crest.
 The advance by the 22nd Battalion had enabled a timely relief for the 17th Battalion of the 5th Brigade who almost to a man were suffering from being half blinded with eyes streaming, and with swollen throats from the gas attacks of the previous night. At 10.30pm instructions came through that the attack was to be continued in the morning in conjunction with the 23rd Battalion on the right and British 7th Brigade on the left, the 22nd Battalion being separated by British battalion by the Torrens Canal, a small drainage channel which acted as a natural boundary. For the attack ‘A’ Company crossed from the left to the right of the road, with ‘C’ Company on the left of the road and ‘D’ Company forming a defensive flank along the Torrens Canal. That night the Transport and Quartermasters Staff again did great work delivering rations and stores right up to the men in the front line.
 On the left the 20th Manchester’s of the British 7th Brigade had to secure a number of objectives before the 22nd Battalion began its advance, requiring a wait of 25 minutes on the ‘JOT’ after the barrage had opened at 6.30am resulting in the area just to the rear receiving heavy shelling. The fight of the 4th October was much more severe than that of the previous day. The objectives lay about Geneve (click link for geo-referenced map, location B.18.a. to B.18.c.3.0.), just beyond the road leading from the village to Montbrehain and to the right of Ponchaux. [Photograph below showing the advance from left to right in the field alongside the Geneve road, with the Torrens Canal (left flank) in the near
  distance and the village of Beaurevoir beyond]. After advancing 1,000 yards the first objective (road running through B.16.d. to B.23.a.) was taken by ‘C’ Company without much difficulty but the second (a line running from the canal in B.17.a. through B.17.d. to B.18.c.3.0.) by ‘D’ & ‘A’ Companies was only captured after stiff opposition from machine-guns. It was not without still more costly fighting that the final objective was carried, the task made more difficult by heavy enemy fire from a factory just south of Geneve and the fact that the Manchester’s which had penetrated into
 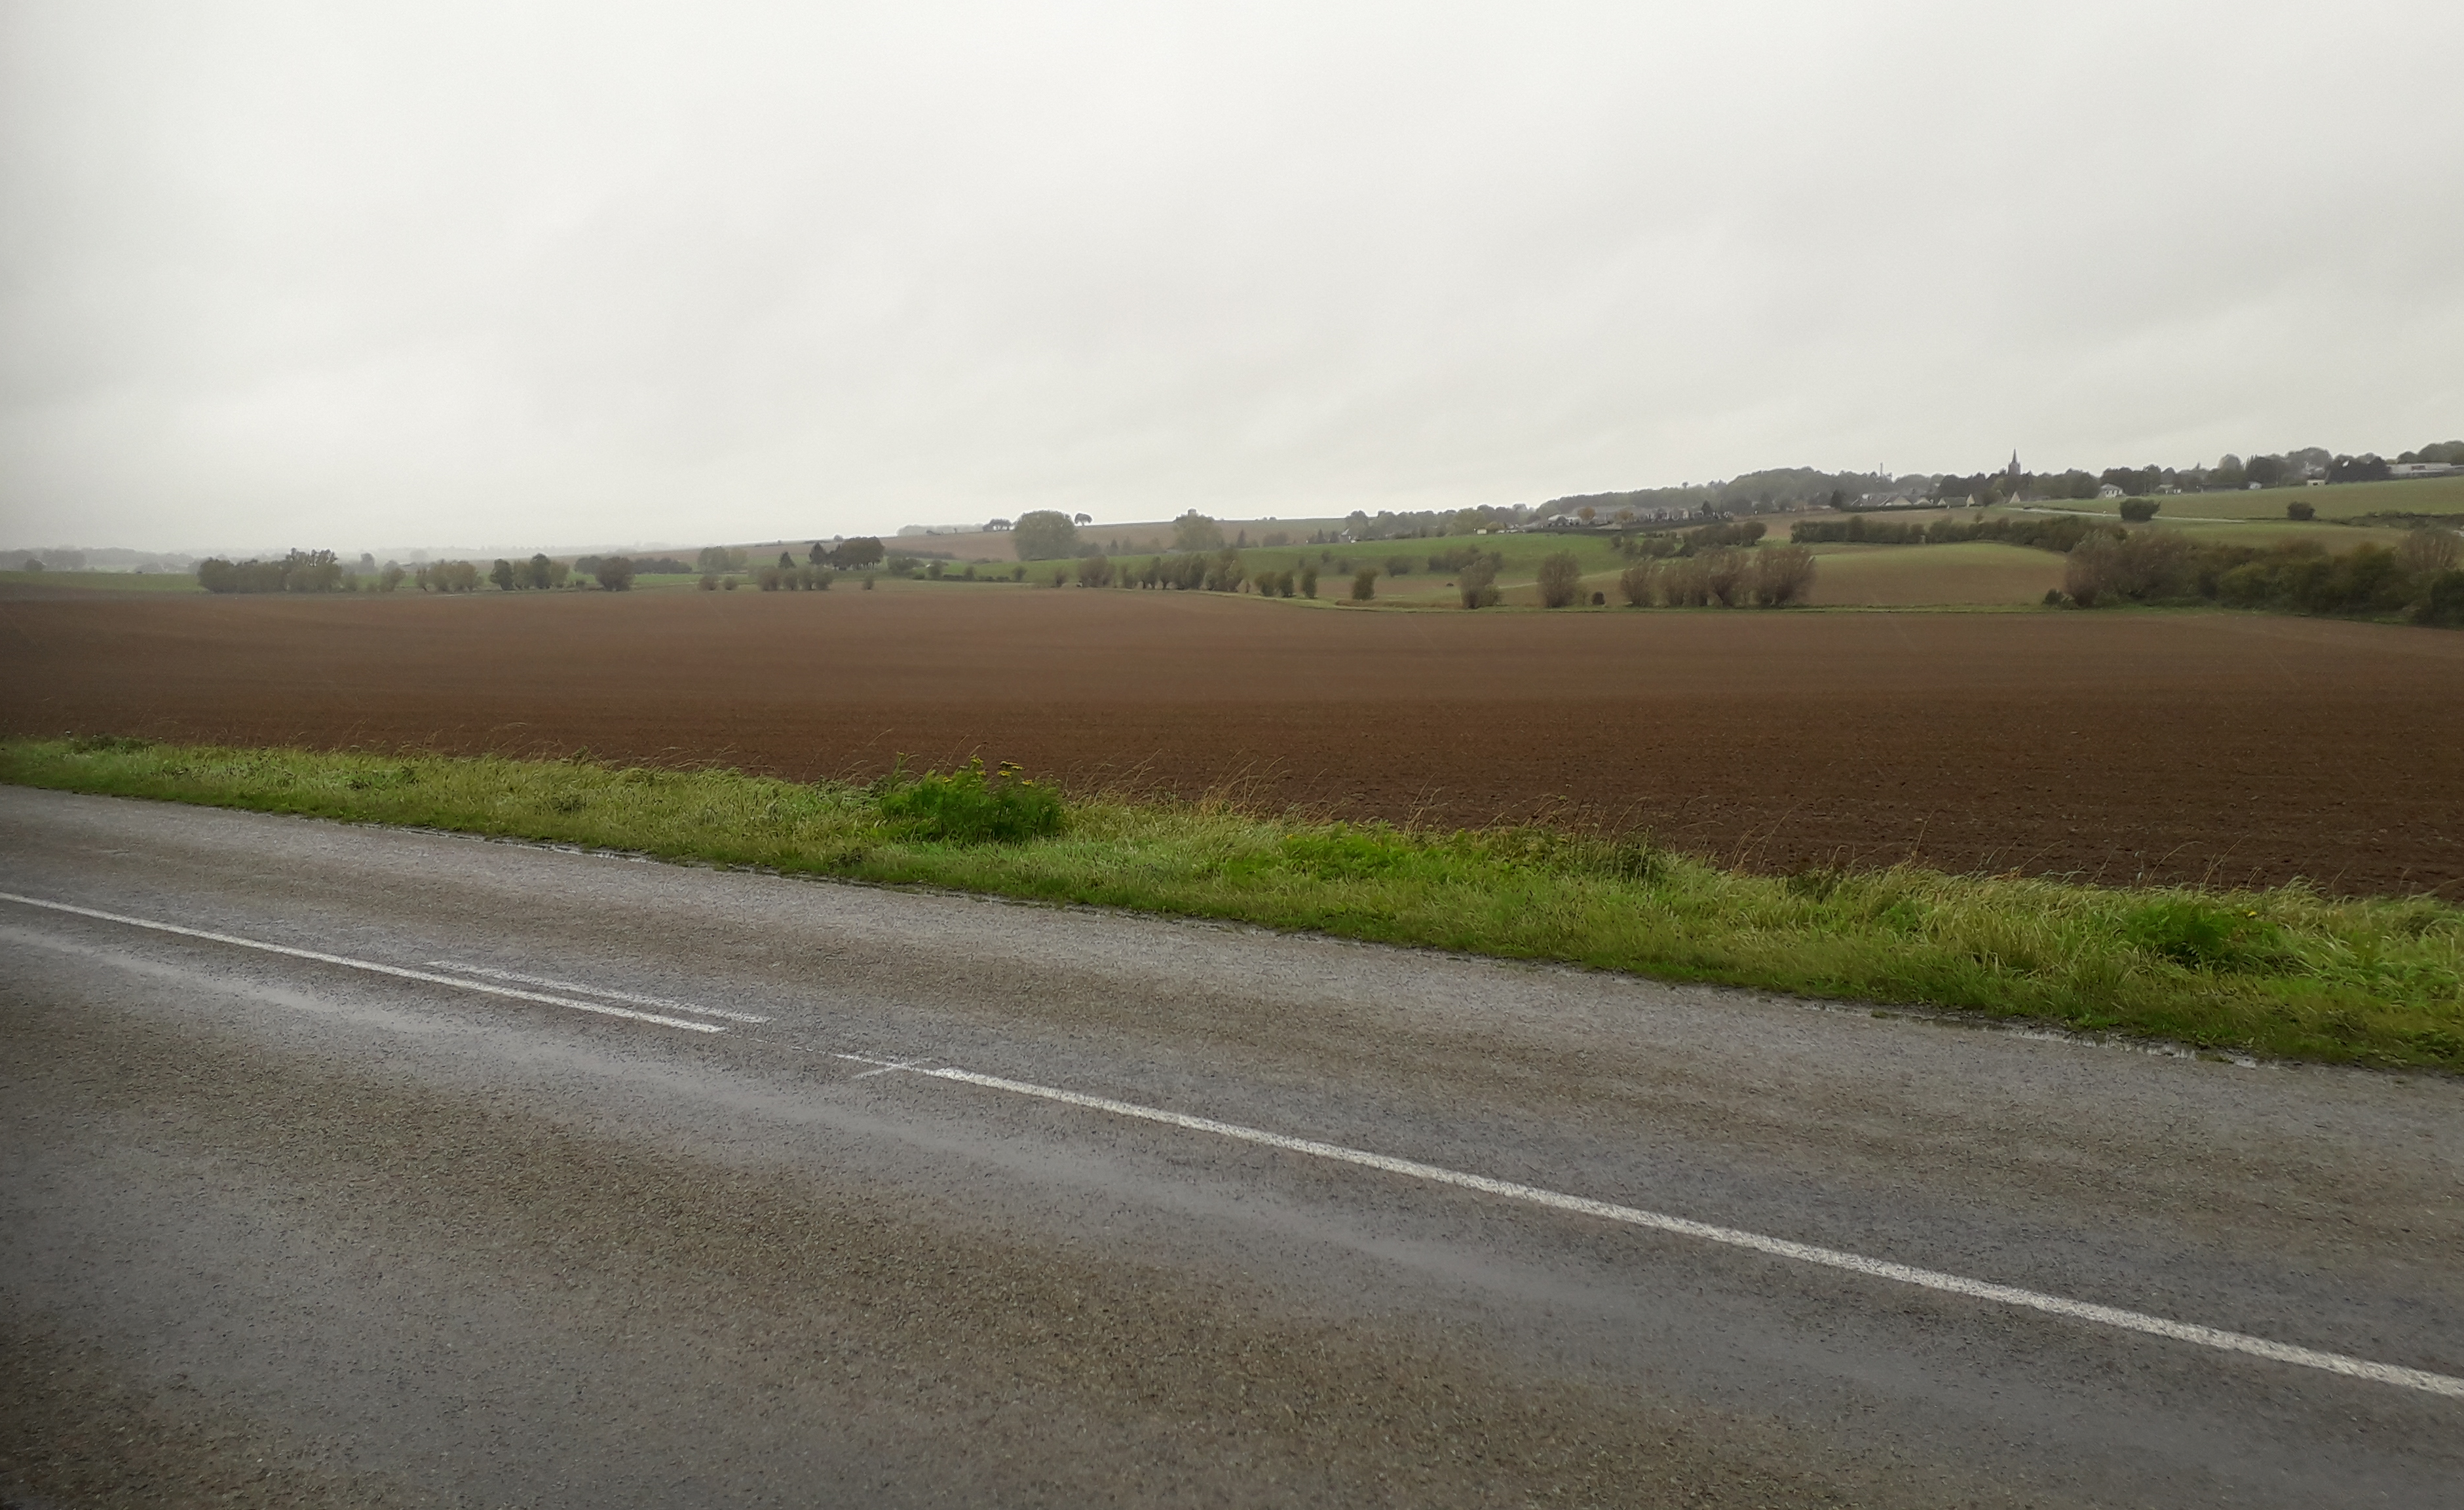 Ponchaux were unable to hold the village from which machine-gun and rifle fire were now being received. The 22nd Battalion’s left flank was thus exposed until secured by the left hand company. By 10am the Battalion had completely consolidated all its objectives but at a severe cost having lost twenty-two men killed in action, including 2nd Lieut. Dawsett who had just re-joined from Officer Training Class with his commission, and sixty-five wounded in this the Battalion’s final fight. A large number of prisoners were taken along with twenty machine-guns. Thirty-two men from the 22nd Battalion were awarded for their bravery and gallantry along with fourteen men from the previous days fighting of 3rd October.
 The 5th October 1918 was the last day spent by the 22nd Battalion in the firing line, holding the left flank of the 6th Brigade along with the 23rd Battalion as the 21st, 24th and 2nd Pioneers attacked at Montbrehain. During the early hours of the following morning the 22nd Battalion was relieved by the American 117th Regiment. A few of the experienced men from the Brigade stayed behind and were attached to the 117th including Lieut.-Col. Wiltshire, Major Matthews, Sgt Speechley and Sgt Hunt (5th/22nd), with both of the Sergeants being awarded the Distinguished Conduct Medal for their leadership in assisting the Americans take their objectives in the attacks of the following days. The delay of the relief into the small hours of the 6th October meant that at 2am the 22nd Battalion was one of the last Australian infantry battalions to be in the front line in France, returning back to the trenches that it had previously occupied at Billiard Copse. After a route-march to Roisel the Battalion entrained for Amiens where it then marched twelve kilometres to billets at St. Vaast, reaching the little Somme hamlet in the early hours of 8th October. The 22nd Battalion remained in the enjoyable and peaceful town of St. Vaast for six weeks, with news of Allied victories reaching the battalion daily.
Outcome
Prime Minister Hughes had promised that the tired, exhausted and by this time depleted Australian infantry would have a long and unbroken stay in the rest area, regrouping, training and keeping fit for the fight ahead. Field Marshal Haig and General Rawlinson agreed but on 6th November 1918 warning orders were issued for the 22nd Battalion to prepare once more to take its place in the front of the battle now progressing ever eastwards against a broken German 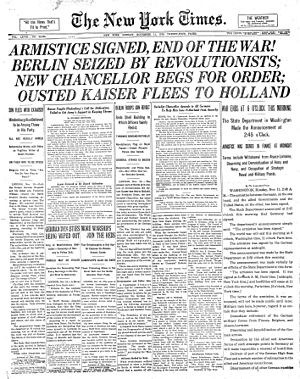 Army. The men of the 22nd Battalion did not know it at the time but at the very moment they were engaged in their last victorious fight at Beaurevoir on the 3rd/4th October Berlin had sent a message to Washington requesting peace talks based on the terms laid by President Wilson earlier in the year. The 11th November 1918 was a fine day as the Battalion formed up at 9am on the Parade Ground. After inspection ‘A’ Company reported for long range firing. One platoon of ‘C’ Company carried on with live bombing with the remaining men as per the training syllabus. At 10.30am the news of the Armistice was received at Battalion Headquarters and a runner was sent to carry the good news to the parade. The Battalion Band marched through the village playing national anthems as the Australian and French flags were hoisted on the spire of the St. Vaast church. The afternoon was devoted to sports.
 FIRST WORLD WAR TIMELINE