
 Background
Prior to the start of the great British offensive on the Somme in the summer of 1916, BEF Commander-in-Chief Douglas Haig had given orders that the British Army should conduct raids all along their front to act as a diversion to the main offensive, and as a consequence the 1st, 2nd and latterly 4th Australian Divisions conducted a series of night raids in the Bois Grenier sector in late June and early July 1916. When the three divisions of I Anzac Corps headed south to the Somme, this sector was handed over to General Alexander Godley’s II Anzac Corps, and so too the responsibility for continuing the raids. However as the Germans were becoming more familiar and predicting them, raiding was much harder than the series of raids conducted by I Anzac, and therefore not causing the German high command any undue concern. Therefore if the German battalions were to be pinned to this section of the line and not move to the Somme then a much bigger action was required. Lt-General Richard Haking  believed this was achievable and began to devise a plan using his XI Corps, at about the same time, on 10th July, as the newly arrived 5th Australian Division under the command of Lt-Gen James McCay began taking over the positions of the 4th Division as the most southerly of the British Second Army in the vicinity of Cordonnerie, with Haking’s XI Corps of the British 1st Army to their right.
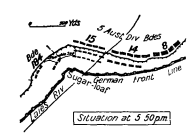
On the 15th July approval was given for Haking’s scheme of attack involving two British Divisions and the Australian 5th Division with the object to ‘prevent the enemy from moving troops southwards to take part in the main battle (Somme)’ with an attack towards the Aubers Ridge at Fromelles. The 5th Australian Division, having been the last of the AIF to arrive in France, would be the first Australian division in serious action on the Western Front. However at this point none of these three Divisions were considered fit for present use in the Somme offensive, raising questions over their readiness. Furthermore the attack was to be supported by two not three of the Divisions artillery, including the inexperienced Australians, plus they were short of the medium trench mortars, again the men of the Australian batteries considered too raw at this time for employment. As a result Haking decided to narrow the front of attack to 4,000 yards (3.6kms), with just the  British 61st Division and the Australian 5th Division attacking either side of a German stronghold known as the Sugarloaf. Each Battalion had an assault front of about 300 yards (270 metres). The total artillery would be 258 field-guns and howitzers, 64 heavies, 70 medium trench-mortars and two 12-inch howitzers on railway tracks and one or two of the long-range guns allotted by headquarters of the Armies. (Above photograph showing at the bottom the Australian front, from the narrow No-Man’s Land of the 8th Brigade on the left to the wider area crossed by the 14th Brigade in the middle and the 15th Brigade to the right towards the Sugarloaf salient, shown protruding from the German line.)
By the following day attitudes within the British GHQ towards the pending offensive were changing and Haig’s staff, far from pressing for the demonstration with the infantry, had deep misgivings. Haking gave his assurances that he had sufficient artillery and resources to succeed, though orders still stood that this action would still be limited and that if successful, the attacking Divisions should not press on to the ridge, however inviting.
 The two divisions were in position prior to launching the attack, initially ordered for the 17th July. Preparations had been rushed and exhausting, not helped by the 61st Division releasing a gas cloud some of which drifted back over the British lines, but also a strong German bombardment supporting a raid and which resulted in heavy losses for the 5th Division of 42 killed, 118 wounded and 4 missing, due to the front-line being heavily garrisoned in preparation for the attack. The British attack was postponed due to adverse weather conditions, much to the relief of the troops worn out by the hurried preparations, and the assault battalions were sent back from the front-line to the villages and the support line in the rear. Orders were received to proceed with the attack once the weather conditions were suitable, and Haking arranged for the seven hour bombardment to commence at 11am on the 19th July and the infantry attack at 6pm.
 The terrain over which the attack would take place was lowland drained by the River Laies which cut across both front lines and No-Man’s land, but a mile behind the German front line stood a low but abrupt Aubers Ridge that connected the villages of Aubers, Fromelles and Radinghem, offering a strong rear system of defence and good observation posts for the 6th Bavarian Division stationed there. The attack focused on the German stronghold of the Sugarloaf, held by the 16th Bavarian R.I.R. with the Australian Brigades attacking in a southerly direction and the British 184th Brigade south eastwards. [see above map and click link for geo-referenced Trench Map, reproduced with permission of the National Library of Scotland]. Of the three Australian Brigades making the attack, the 14th (53rd, 54th, 55th, 56th Battalions) and 15th (57th, 58th, 59th, 60th Battalions) contained about a quarter of their men that had fought in Gallipoli, but for the 8th (29th, 30th, 31st, 32nd Battalions) this was their introduction to fighting. For the six assaulting Battalions from these three Brigades, the 31st and 53rd Battalions had been in the firing line for just two days, whereas the 32nd, 54th, 59th even less, and as for the 60th Battalion this was their first venture into the firing line on the Western Front.
Combat
 The morning of the 19th July 1916 was bright and at 11am the artillery bombardment commenced as follows: 11-11.30am – registration by divisional artilleries and trench mortars; 11.30-1pm – registration and bombardment by 9.2-inch and 12-inch howitzers, and registration by 6-inch howitzers; 1-3pm – wire cutting by 18-pounders; 3-6pm – wire cutting by 18-pounders and medium trench mortars. Bombardment by 18-pounders, 4.5 inch, 6-inch, 9.2-inch and 12-inch howitzers; 6pm – artillery to lift to ‘barrage lines’, i.e. to provide a curtain of fire 100 yards beyond the objective, and to bombard communication trenches, support areas etc. As the afternoon progressed, observers could see that damage was being wrought on the German breastworks, but the Sugarloaf appeared mainly intact and certain parts of the wire entanglement, especially in front of the 15th Brigade where the 59th and 60th Battalions would be attacking, had not been cut.
For the assault battalions, in some units only those in the first two waves had been issued with helmets, those in the third and fourth would be wearing their felt slouch hats. At 2pm as the assault battalions moved forward through the communication trenches at the same time that the German artillery opened up upon these trenches and the support lines to the rear. This happened to both the 5th & 61st Divisions, which as it turned out, were being observed by the German spotters, not just during this day but the increased activity and bombardment of the previous days led the Germans to predict that an attack was imminent. In the Australian rear the ammunition and bomb dump of the 31st Battalion was blown up and many men were wounded including the Battalion Commander Lieutenant-Colonel Toll. Moreover on the left flank held by the 8th Brigade where No-Man’s Land was at its most narrow, casualties were being caused by their own shells from new artillery guns falling short. By 5.30pm as the 14th Brigades third and fourth waves moved forward in the open due to the communication trenches being inadequate, and the 61st Division started to move into No-Man’s Land the Germans were expecting the commencement of an attack, and poured artillery and machine gun fire into the assembly positions.
 At 5.43pm the men of the 5th Australian Division began to go over the parapet, the exact time varying depending upon the width of No-Man’s Land faced by each of the attacking Battalions. As the artillery barrage lifted at 6.02pm, the sound of gun fire from the German lines began to increase, demonstrating that the bombardment had not been as effective as it was hoped. The fragments of the first wave of the 15th Brigade sought cover in the shell holes or in the channel of the River Laies. Its later waves which followed in five minute intervals were under heavy fire from the moment they topped the parapet and by the time they reached the grassy undulations half-way across No-Man’s Land they were shattered by the machine guns. In the fourth wave went the battalion commanders and their staff, and in the 60th Battalion they fell almost immediately, including Major McCrae and his second in command Major Elliott. Communication between the front and the rear was chaotic, and at one stage Brigadier-General ‘Pompey’ Elliot thought that the attack had been successful, but by 6.40pm news came back that the 59th on the right flank and closest to the Sugarloaf could not get further than half-way across No-Man’s Land. However news also came back that the 60th to the left had been successful in reaching the second German line and as a result Elliot gave the command to press on with the attack by the 59th, but this too failed.
To the left of the 15th, the 14th Brigade was having greater success with the 54th Battalion taking the enemy trench and the following waves moving on to their next objectives. Throughout the attack, German defenders sought out and targeted officers leading their men, and both the 53rd and 54th Battalions suffered extraordinary heavy losses to their command with many of the officers killed, including Lieutenant-Colonel Norris, Commanding Officer of the 53rd Battalion, and the former Commanding Officer of the 22nd Battalion during its training in Egypt. Advancing on, it was not apparent where the second defensive trench was located, so after some 300 yards the remaining officers called a halt, and started to build defensive positions trying to fill the empty sandbags that they had carried with them with sticky mud from the ditches. On the far left side of the attack was the 8th Brigade that had suffered more heavily during the bombardment. A 1,200lb mine was exploded at 6pm in No-Man’s Land with the hope that, in addition to suppressing fire from the British 60th Brigade further to the left, the upturned crater rim would provide some protection from enfilade fire. The 8th Brigade was able to take and cross the enemy trench, and like the 14th to their right found themselves in grassy meadows beyond, with only minor ditches for protection.
At 8pm Haking understood that two-thirds of the Australian objectives had been achieved. He also believed that at this point part of the British 61st Division had penetrated the Sugarloaf, and an order was given to help the Australian right flank. However this was not the case and the only part of the German line penetrated by the 61st Division was on the far right by the 182nd Brigade, away from the beleaguered 15th Brigade. Furthermore, a German counter-attack on the 182nd Brigade resulted in the conclusion that it would be best to withdraw the entire 61st Division to its starting point for a renewal of attack the following day, and for the Australian 5th Division to endeavour to hold and consolidate the trenches captured. While this was happening, and hampered by the lack of or confused communications that was taking place, Brig-Gen Elliot, in response to an  earlier request to support an attack that night by the 184th and 183rd, had brought forward its third Battalion, the 58th, to mount a supporting attack. The verbal orders cancelling
the attack by the 184th and 183rd were not communicated via the 5th Division HQ in time to the Australian 15th Brigade, and as Bean describes in his official history ‘what followed was one of the most bravest and hopeless assaults ever undertaken by the AIF’. Led by the young Major Hutchinson (photograph right), the two companies of the 58th Battalion advanced across No-Man’s Land were met with withering machine gun fire and were practically annihilated, many lying undisturbed where they fell until the Armistice some two years later. By 12.30am Elliott reported back that the attack by the 15th Brigade had failed, with the men of the 60th Battalion that had entered the enemy’s trench either killed or captured and the two companies of the 58th Battalion wiped out. The 15th Brigade was therefore ordered to withdraw and prepare to support the 14th Brigade’s flank.
Elsewhere, with light fading the two other Australian Brigades came under intense bombardment and a counter-offensive was expected with enemy troops gathering particularly around Delangre Farm on the left in the vicinity of the 32nd Battalion, but limited support was afforded by their own artillery as they had been falling short and were now concentrated too far distant to be effective. To the rear of the 8th Brigade, working and carrying parties had to endure enfilade machine gun fire and constant shelling. The right flank of the 14th Brigade and that of the 53rd Battalion was also exposed and a working party of the 55th improving the communication line came under attack. Meanwhile the work of converting the frontline ditches into a defensible breastwork progressed, and behind the 14th Brigade engineers were able in connecting their communication trench through No-Man’s Land with the old German front line providing safer and easier communication, and the signallers established an unbroken telephone line across No-Man’s Land. As the men worked, water was rising around them as the drainage channels and the River Laies itself had become disrupted by the shelling, and appeals were constantly sent to the rear for dry rifles and Lewis Guns. Some men kept three of four rifles besides them, taken from the dead, in case their own weapon became choked with mud.
 At 2.25am news came through that the right front of the 14th Brigade defended by about 200 men in a number of separate posts was being counter-attacked. As the darkness started to gradually lift with the coming of the dawn, shapes were seen moving to the right, and despite some fire in that direction by the men of the 53rd holding this flank, they could not be certain whether this was part of 15th Brigade moving around or the Germans trying to out-flank them. Shortly afterwards as shots came in from the rear, it was now certain that the Germans had indeed out-flanked them and were now occupying the former German front-line trench to the rear of the 53rd. The fire from the rear was becoming deadly, and the 53rd running low on ammunition and short of bombs. With the situation now desperate, Captain Arblaster, who throughout had shown to be a cool and brave leader decided that the only remaining chance of restoring position lay to the rear and charging the Germans in their old trench. They were at once met by heavy fire, and with their leader mortally wounded the attacking line broke and retired to the defensive system, before working left to the forward trench occupied by the 54th. The Germans meanwhile were advancing so fast that the sole practicable line of communication for the 54th was under threat of being severed. Throwing their bombs like cricketers from the parapet the 54th was able to keep the enemy in check while Major Cowey hurried across No-Man’s Land to get reinforcements.
 By 4.20am the position of the 54th and 55th was desperate and if the remnants of the 53rd gave way then they were in danger of becoming surrounded. The 56th which had been in reserve and helping to dig the communication trench heard the call and hurried a constant supply of bombs forward. A massive bomb fight ensued with hundreds of bombs being thrown by both sides but the bombers of the 56th together with some of the 55th beat down the Bavarian attack. Meanwhile to the left of the whole attack the 32nd Battalion had been surrounded as the enemy had penetrated between the old German trench and the ditch that the forward 32nd was holding. Like the 53rd to the west, Captain Mills (photographed below after capture) gave the command to about 150 men to charge and cross the German front trench and despite machine guns firing at them from the front, rear and flank a considerable amount made it back to the Australian position. No such order was given to the machine gunners defending the Kastenweg and they were eventually overrun and captured or killed.
With daylight approaching concern was growing for the fate of the men in the open, particularly from attack from the Sugar-loaf which was still intact. With the 31st and 32nd Battalions of the 8th Brigade now back in their own lines, McCay reported the news to General Monro (1st Army) and Haking and the order was given to abandon the attack and withdraw the 14th Brigade. Instructions were given to Captain Gibbins to hold the old German front-line while the rest of the Brigade made its perilous way in small parties back to the Australian line. Gibbins was the last to leave the trench and followed his men along the sap, until approaching the Australian line, he found it blocked by the wounded  and left the trench in order to walk over the parapet when he was shot in the head and killed instantaneously. For the scattered groups, some tried to make it back and were either killed or captured, whereas others held out against bombing parties for as long as possible before enduring a similar fate. At 9.20am on the 20th July the Bavarian intelligence officer wrote ‘the last of the Englishmen (sic) who were defending themselves have been captured.’ (Photograph showing captured and wounded Captain R A Keay of the 32nd Battalion (left) and Captain C Mills of the 31st Battalion being interrogated by German officers.)
Outcome
 The attack was a failure and one of the worst disasters to face the Australian soldiers in the First World War. That night the 5th Australian Division suffered 5,533 casualties, the highest loss rate for the Australians during the War, and indeed ever since. Casualties amongst the attacking Battalions were huge: 32nd Bn – 17 officers + 701 other ranks; 31st Bn – 16 + 528; 54th Bn – 19 + 521; 53rd – 24 + 601; 60th – 16 + 741; 59th – 20 + 675. Of the 887 officers and men from the 60th Battalion that went into the fight, only one officer and 106 men answered the roll call. Amongst those that fought at Fromelles were three former members of the 5th Reinforcements 22nd Battalion that were transferred to the 60th Battalion during the great re-organisation in the Egyptian desert in February/March 1916. Being part of the battalion that attacked the Sugar-loaf and subsequently suffered the most casualties of all the AIF Divisions, all three were casualties – 2390 Pte Silver and 2477 Pte Sheldrick were killed in action and commemorated on the Memorial wall in the VC Cemetery, and 2496 Pte Kendall was wounded.
The British 61st Division had 1,547 casualties, whereas the German losses were estimated at just fewer than 1,500. The Germans took 481 prisoners of which 400 were Australian, and captured 16 machine guns. 140 German prisoners were taken, 100 by the 5th Australian Division. In addition the Germans found a copy of Haking’s orders which told them the true object of the operation, which meant that the German’s instead of fearing an attack somewhere else along the front could now confidently move troops to the Somme, i.e. the exact opposite of what this operations was supposed to do. However, even if the plans had not fallen into enemy hands and the operation had succeeded, by virtue of the offensive coming to a halt due to its limited objectives the German High Command would have known in a matter of days that this was in fact just a feint and that they would be free to re-deploy troops south if they so desired.
Many of the wounded lay beyond the front-line, particularly in the four new trenches that had been dug in No-Man’s Land. Wounded men were also seen in the open especially in front of the 15th Brigade around the Laies and for many of the soldiers in the Australian line this proved to be too much and they risked their own lives by venturing out to tend to the wounded. Eventually an informal truce spread along the entire battle-front enabling stretch-bearers to bring back the wounded, with the Germans collecting those Australians closest to their line. This was against GHQ orders and was soon stopped by McCay, though for the next three days and nights individuals and small parties would risk wounding or death by going out to help their mates. In 26 hours 2,357 patients had been evacuated through the 2nd Australian Casualty Clearing Station at Trois Arbres. By July 21st July 3,984 had been cleared.
 Haking later attributed the Fromelles failure solely on the newness of the infantry, and indeed the whole action was a severe test of the new officers of an untried division. However this grossly ignores many other important factors: the artillery failed to reduce the German riflemen and machine-guns particularly in the Sugar-loaf and it is doubted whether any infantry would have succeeded where the 15th Brigade tried; the Australian artillery was itself raw and in the flank area on the left where No-Man’s Land was narrow the barrage was not as effective as it could have been due to the range being increased to protect from shells falling short on to their own troops; the objectives that Haking set were in fact no more than abandoned or water-filled ditches therefore offering scant defence against the expected counter-attack; the ground was very flat offering little protection to grazing fire from machine-guns. Even if the first day had succeeded the whole Australian position lay directly under the enemy observers on the Aubers ridge, plus the German High Command had in position two additional heavy batteries and two battalions of infantry that were not used before the Australian withdrawal. However many Australians blamed McCay for the Fromelles fiasco.
In accordance with British GHQ policy at this time the severity of this defeat was concealed from the British public in the official communique which mentions a British raid and that 140 German prisoners were taken. Once the main facts became known in Australia, it had the effect of shaking the confidence of the public in the reports that they had previously read in the past which they had taken as undoubtedly being true. Confidence was also shaken in the Australian soldier as to the effectiveness of the British ‘Tommie’ and a wariness of having them protect their flank in the future.
Thus saw the introduction of the Australians on a major scale on the Western Front. The bravery and courage of the Australian soldier was not lost on its opponents, and was reported so in the German press, particularly in the way they faced bombing skirmishes unlike most raw recruits.
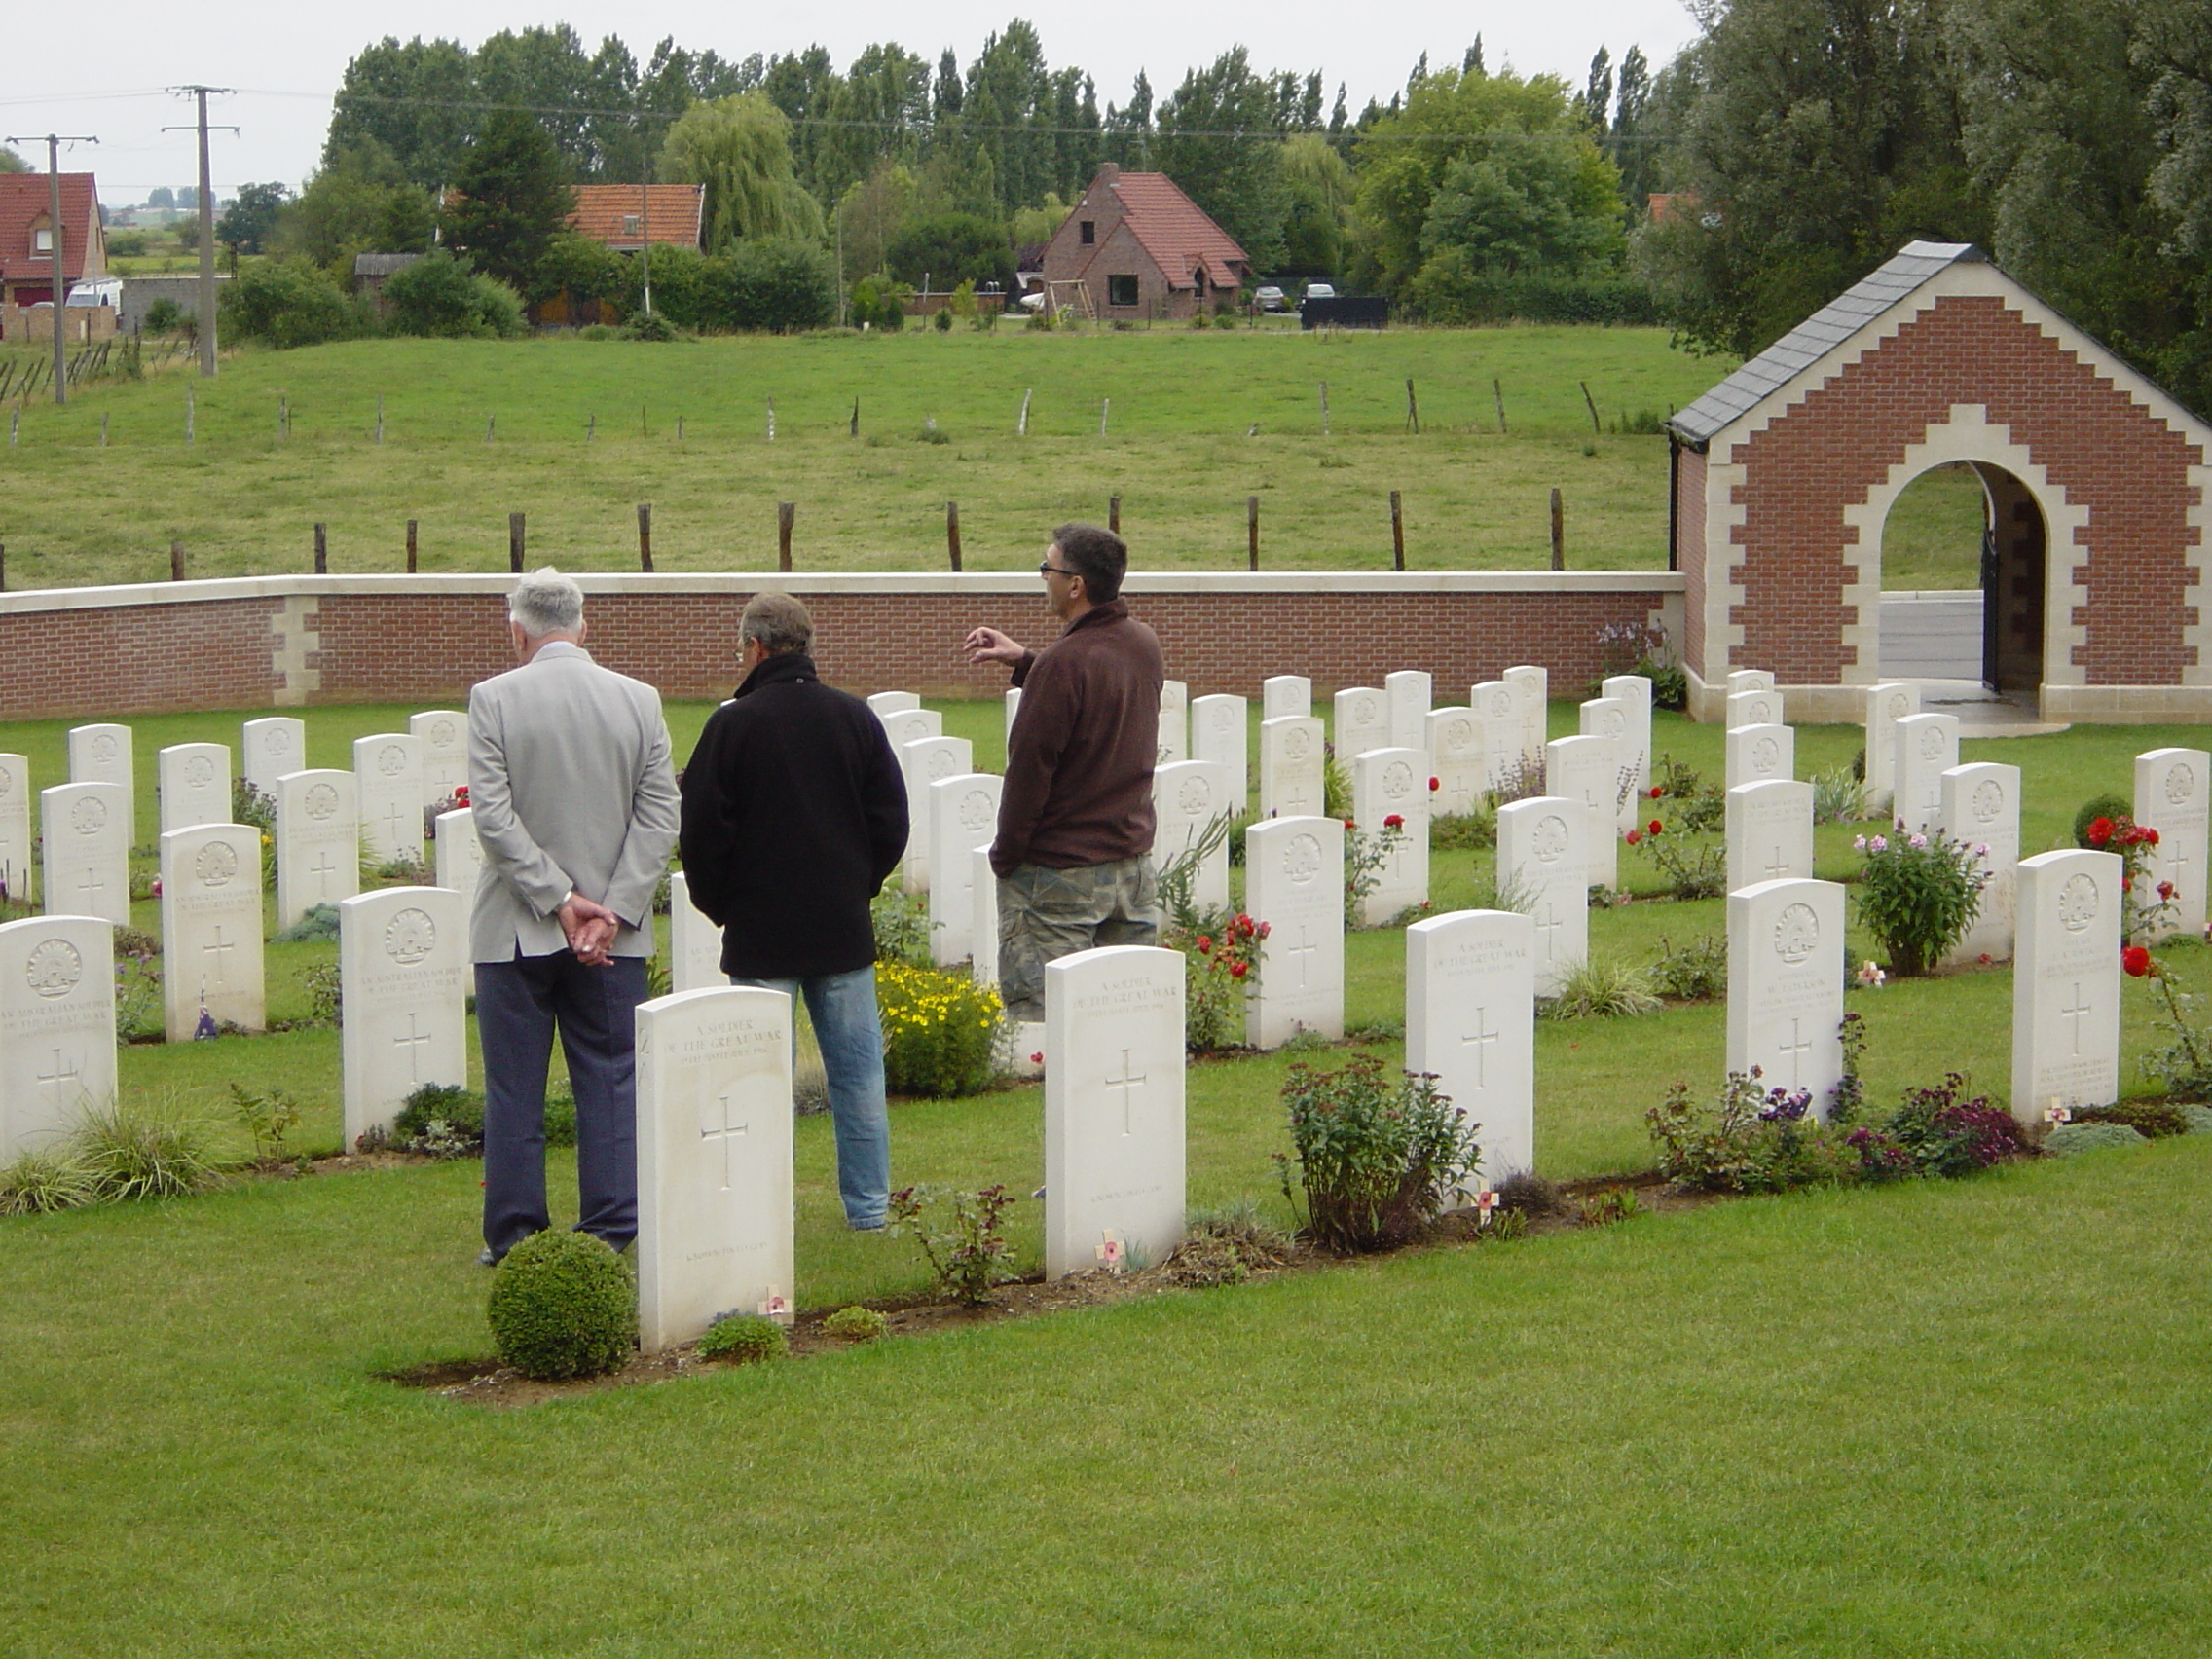
Of the 1,917 Australians that were killed, 1,299 had no known grave, many having lain undisturbed in No-Man’s Land until the end of the War, and their names are inscribed on the wall in the VC Corner Cemetery Memorial (photograph above). In the cemetery, which is situated in the old No-Man’s Land that the 14th Brigade crossed, it uniquely does not contain any headstones. After the war the remains of 410 soldiers were recovered but as they were unidentifiable they were interred in two large graves marked by a white cross.
 Immediately after the battle the Germans recovered and then buried many Australian soldiers in large graves at Pheasant Wood on the edge of Fromelles. Following the discovery of the pits, a major project was undertaken in 2009 to exhume and try and identify the remains through DNA testing then re-bury the soldiers in the new Fromelles (Pheasant Wood) Cemetery (photograph right). To date of the 250 soldiers that have been re-buried, 144 have positively been identified, including Lt-Col Norris Commanding Officer of the 53rd Battalion mentioned previously.
Being one of the major sites of Australian fighting and sacrifice within the First World War, the battle of the 19th/20th July is commemorated with the Australian Memorial Park (pictured at top) situated on the former German front line lined with blockhouses, probably constructed after the battle in 1917. At the centre of the Memorial Park is the iconic ‘Cobber’s’ sculpture which depicts the Australian virtue of looking after his mates. More recently, a new museum has opened in 2014 next to the Fromelles (Pheasant Wood) Cemetery, with a focus on the Pheasant Wood project and the stories behind the men that were identified.
Published as ‘news’ 100 years on to the day, follow the 22nd Battalion on the project website and via Facebook and Twitter
 FIRST WORLD WAR TIMELINE
1914 1915 1916 1917 1918 1919
