

 31st December 1917: Another cold and frosty day with the ground frozen. Working party at Romarin siding plus salvage work in Ploegsteert Wood.
26th December 1917: On Boxing Day the men from the 22nd Battalion continued with fatigues and the main work at the time, namely the construction of the second or Corps Defence Line, with 90 men loading and unloading stores at Romarin siding (top photograph). This building of defences was in response to Field Marshall Haig’s orders that predicted that the Germans would go on the offensive in early 1918, deploying the thousands of  men and equipment now released from the Eastern Front following the Armistice with Russia, and before the Americans arrived in strength and tip the balance in favour of the Allied forces. For the men of the 22nd Battalion and 6th Brigade this meant utilising the strong natural features afforded at Hill 63 and the natural obstacle of Ploegsteert Wood (click link for geo-referenced map), a task conducted under the supervision of Major JS Dooley, MC. [AWM photo E01457 (above) showing a fatigue party bringing up barbed wire, and E04488 working on the construction behind Ploegsteert Wood]
25th December 1917: Bonus Christmas dinners were held, and the festivities on Christmas Eve extended well into the night, particularly in ‘C’ Company where 3999 Pte Monar and party entertained their friends at a rum supper. For his endeavours Pte Monar was charged with ‘Conduct to the prejudice of good order and military discipline, creating a disturbance in camp and drunkenness’, and was awarded forfeiture of 2 weeks pay by the CO. Also charged and fined in ‘C’ Coy and from the 5th/22nd was 2451 Pte Walton.
21st December 1917: During the afternoon the men marched to Neuve-Eglise and attended a concert given by a troupe of the Division artists.
17th December 1917: Work and training as per the syllabus, and the commanding officers reconnoitered the forward area up to the Support System. While the Battalion was at Kemmel, Captains Bunning and Alderson left to join the Indian Army, with Captain Cawthorn leaving a month later, carrying with them the good wishes of all ranks.
 15th December 1917: The 22nd Battalion left camp at noon and route march for Camp No.2 at Kortepyp close to Ploegsteert via Drancoutre and the nearby Neuve Eglise (click link for geo-referenced map, location T.26.b.8.3.). Arrived in camp at 2.30pm, with no men falling out. The new camp consisting of huts was in fair repair. The 41st Battalion took over the camp at Kemmel with the 22nd relieving the 42nd Battalion. On arrival at Kortepyp Camp the Battalion became part of the 6th Brigade in Reserve to the 5th & 7th Brigades in the front line from the River Douve to a point near Armentieres. The 6th Brigade was ordered to be prepared to move forward at short notice in case a counter-attack is launched. The officer’s Christmas dinner was held at Kortepyp Camp. Here the Battalion remained for a month, training or working on reserve lines in the morning, with sports in the afternoon.
14th December 1917: Muster parade held and the whole Battalion turned out in full marching order. Close order drill, and musketry training carried out. The Camp was cleaned up in preparation for moving.
11th December 1917: ‘C’ Company held the last of the company Christmas Dinners held in the evening after the fatigues and training of the day.
10th December 1917: Working party of 200 men pipe laying at Mount Kemmel. 440 men went to the baths at Locre.
8th December 1917: The Battalion marched to the Brigade Sports Ground near Locre to compete in events for the Brigade Cup. The cup was jointly won by the 23rd Battalion with the 22nd Battalion, and had the benefit of producing a better relationship between the battalions.
 7th December 1917: ‘A’ Company was the first of the four battalion companies to hold its Christmas lunch in the Recreational Hall, held in advance of the Battalion returning to the front line. Elaborate menu cards were provided for the well provided meals, ably enhanced by the efforts of ‘salvagers’ in each Company as well as a generous donation of £100 from Mrs Craig, wife of Major Craig, DSO, the Battalions popular medic. At the dinners a silent toast was drunk in memory of the fallen comrades. [Example of 1918 menu card with space for signatures – courtesy of Jennie Marshall and the Lieut. Harricks collection].
5th December 1917: Fatigue party of 200 men from the battalion working on water pipes near Mount Kemmel. The 23rd Battalion beat the 22nd by 1 point in an exciting Brigade football match.
4th December 1917: Cold day with snow in the morning. Work as per the syllabus followed by a football match with D Coy beating C Coy after a strenuous game.
3rd December 1917: Weather was clear and bright with the cold night temperatures leading to frozen ground in the morning. Baths were held in the morning, followed by kit inspection.
2nd December 1917: Splendid and well attended Battalion concert held in Cinema Hall in the evening.
30th November 1917: The 22nd Battalion won their football match against the 22nd Machine Gun Company in the Brigade fixture, 16 points to nil.
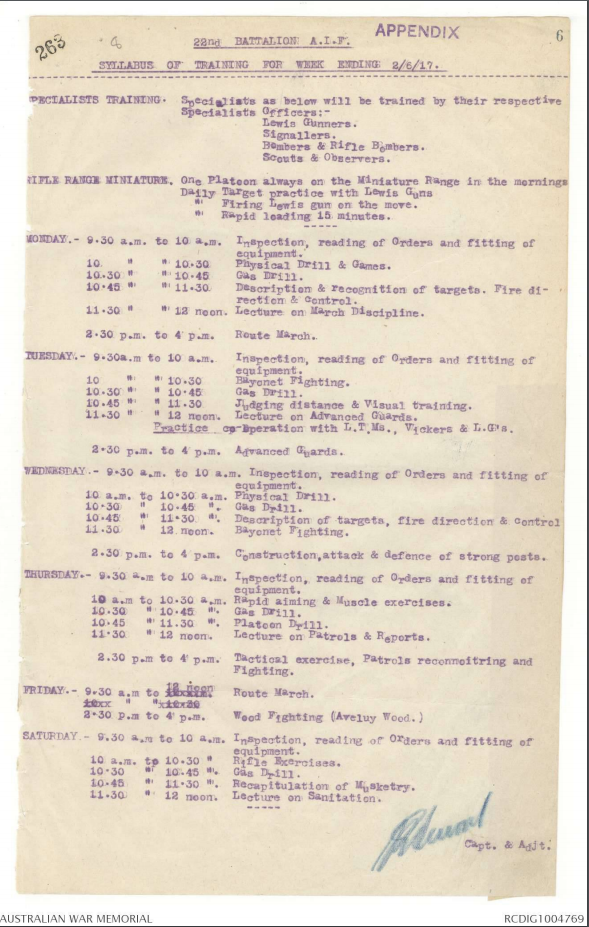
 27th November 1917: Men at baths in the morning, thereafter as per the training syllabus (see attached).
25th November 1917: Church parade was held in the cinema hall, and with a cold gale blowing in the cloudy conditions, the men were appreciative of being inside. Battalion strength now up to 31 Officers and 700 other ranks.
21st November 1917: Departure of the 20th Reinforcements from Melbourne on the A71 HMAT Nestor containing servicemen 6761 to 6921A.
20th November 1917: Work and training as per the syllabus for the next few days.
18th November 1917: The 22nd Battalion crossed the border from Whippenhoek and into a part of Belgium that was new to it, Mount Kemmel from whose summit a magnificent view of the Ypres battlefield could be obtained. The Mount itself had protected the little hamlet of Locre from the ravages of war, and while at the Kemmel Huts (click link for geo-referenced map, location N.19.c.9.2.). Capt Gorman in the history of the battalion writes ‘the battalion enjoyed its happiest times during the war.’ The winter of 1917-18 was not nearly so trying as that of the previous year on the Somme, as the weather was milder, the demands on the men far less exacting, and the camps and bathing facilities were close to the line. The huts were the best since the battalion arrived in France and Belgium, comfortable and warm with plentiful supply of coal pilfered from neighbouring dumps. On one night however the camp was visited by a German aeroplane that dropped six bombs damaging some of the huts but not causing any injuries.
16th November 1917: Bayonet fighting plus training of specialists
15th November 1917: Assault training, gas drill, musketry (rapid loading and firing), close order drill.
13th November 1917: A fine day in which the men were employed in cleaning up and improving the camp. Reinforcements arrived from 2nd ADBD at Le Havre, bringing the battalion up to 30 Officers and 640 other ranks. 110 had returned from hospital, 10 from camp and 32 from the 19th Reinforcements. Many of the men were taken back on strength having been assigned to battalions within the 6th Australian Division which was subsequently disbanded in order to reinforce the veteran five divisions. Sports and recreational activities were organised for the following afternoons while in camp.
12th November 1917: As the Battalion marched on the Vlamertinghe-Reninghelst Road General Birdwood inspected the Brigade. The men’s boots did not stand the march very well as they had become sodden in the support area during the past few days. The battalion strength stood at 23 Officers and 517 other ranks.
11th November 1917: Heavy rain fell and flooded all the shelters before the 22nd Battalion was relieved by the 8th Battalion West Yorks of the British 49th Division. One night was spent at Dickebusch before marching the following day to Wippenhoek Camp (click link for geo-referenced map, location L.34.b.5.4.). During the day the enemy shelling was more active than usual, causing one killed, 1224 Cpl Blondett, and two wounded.
9th November 1917: The men were employed in collecting salvage and taking to the Salvage Dump at Garter Point. Intermittent shelling during the day with no casualties.
8th November 1917: During the day the men employed themselves in improving their shelters which were not even shell-splinter proof. Intermittent shelling occurred causing three casualties, one of which, Sgt Marshall, died of his wounds the following day.
7th November 1917: The first week of November was cold and cloudy with sharp biting winds, when on the 7th November the 22nd Battalion received orders to move to Westhoek to relieve the 20th Battalion in the support line. The relief was carried out that night without incident. There was intermittent shelling throughout the tour in the vicinity of Polygon Wood racecourse (click link for geo-referenced map, location J.9.a.30.65.).
6th November 1917: Battalion on fatigues, and also went through baths at Halifax Camp.
5th November 1917: Fatigue party of 5 Officers and 200 men supplied to 6th Field Company for erection of stables. Remainder of men engaged on work about the Camp laying duck-boards, making covers for cookers, digging latrines, and making a road into camp.
4th November 1917: A miserable misty and cold day. Voluntary church parade held in a Nissan hut.
2nd November 1917: The 22nd Battalion moved to a new camp (click link for geo-referenced map, location H.24.c.4.4.) as part of the support Brigade, relieving the 5th Brigade which had in turn relieved the 7th Brigade in the front line. The sub-standard camp consisted of huts in a sea of mud, poor latrines, only a few duck-boards, no stoves, no shelters for cookers and the surroundings filthy.
1st November 1917: Very cold with sharp biting wind. Close order drill carried out in the vicinity of the camp. Strength 20 officers and 549 other ranks.
29th October 1917: Specialist training carried out, plus sand bagging of huts commenced to help protect against the bombs being dropped from German planes which were now visiting the camp nightly.
27th October 1917: After a restful two weeks at Steenvoorde the 22nd Battalion left billets at 7.30am and marched via Abeele to Dominion Camp in the Ouderdam area. The next day they then marched to a poor camp at Dickebusch (click link for geo-referenced map, location H.26.b.6.7.) where the Battalion formed part of Brigade Reserve to 2nd Australian Division. The strength of the Battalion in the field at the end of the month was 16 Officers and 486 other ranks.
 12th October 1917: The 22nd Battalion left camp at 7am and entrained at Ypres Station for Abeele and marched to Steenvoorde (click for geo-referenced map) to the billets previously occupied where they remained for the next two weeks. The Companies were now organised as three platoons per company on account of the weak strength of the Battalion, with only about 75 men per company available for the next tour of the front line. Necessary refitting began, with training of the Lewis Gunners, Signallers, Scouts and Observers receiving priority, but also with sports events and concerts (see attached Brigade Orders with syllabus for the following week). Here Lieut. Miles received his Captaincy, and commissions were granted to CSM Dundas, and Sergeants Bourke, Hutton, Howell and Barker. Men began returning to the Battalion from the depots in England, including many that had been assigned to the newly forming 6th Australian Division, now disolved on account that the veteran divisions were short of men following the Ypres fighting. The list of decorations for work at Ypres was also published [see Medals & Awards].
10th October 1917: The 49th Battalion relieved the 22nd at 4am in the forward posts on the firing line and moved back to the old Red Line, now the Support Line. At 7pm the worn out remnants of the Battalion made their way slowly back to the dug-outs on the Ypres-Comines canal (click for Geo-referenced map) near Ypres.
 9th October 1917: II Anzac Corps & I Anzac Corps of the British 2nd Army were to support the main attack by the British 5th Army in the Battle of Poelcappelle. The most southerly brigade of Gen. Birdwood’s I Anzac Corps was the 6th Brigade and as the 22nd Battalion was the right hand battalion, its junction with the 8th Battalion on its right therefore formed the pivot point for the whole attack. The orders received required the capture and consolidation of a line from D.29.a.00.10. to D.23.d.40.50. Prior to the attack the garrison in the forward posts withdrew to the JOT and when the barrage opened C and D Companies on the Battalions right simply re-entered the forward posts whereas A and B Companies on the left moved forward against the enemy strong posts. The supporting artillery was not able to move forward due to the mud and as a result the barrage was not good and though the German outposts were taken, the Battalion came under heavy machine gun fire from other posts to the rear. Two detachments of the 22nd under Captain Bunning and Lieutenant Anderson attacking the area of the old German headquarters at the sandpit reached their objective but suffered heavily in the fighting with the nearby German posts. The southern party under Captain Bunning, MC, reached its position under cover of rifle grenades, but Lieut. Campbell of the 6th Machine Gun Company was killed by a shell that caused casualties amongst the entire Vickers Gun crew. While digging in Lieut. Skene-Smith who had only just returned to the Battalion was wounded then sniped and killed while on a stretcher. The northern party under Lieut. Anderson, MC, had only gone 20 yards when it was nearly wiped out, severely wounding Lieut. Anderson and Lieut. Dooley, but eight survivors under Lieut. Chalmers pushed on. There was no communication trench to the rear and as result German snipers took a heavy toll. Twenty men from the Battalion were Killed in Action or Died of Wounds, a high number given that the strength of the Battalion was only about 150 men at this stage.
8th October 1917: The 22nd Battalion were now back in the front line trenches, and orders for the following days attack communicated to all concerned and final preparations made. The main thrust of the attack by nine British, Anzac and French divisions would be towards the village of Poelcappelle. The 22nd Battalion would be on the far right flank, with the junction with the 8th Battalion on their right the southerly pivot point for the whole attack.
7th October 1917: Despite being exhausted and expecting relief, orders were received to move forward and relieve the 18th Battalion. The fighting strength of the Battalion at this stage was now little more than 100, and it was necessary to bring up the men that had formed the Battalion nucleus at Caestre.
 5th October 1917: During the day the Battalion remained on the Red Line which had been consolidated by a continuous trench system, in support to the 21st & 24th Battalions. Enemy shelling was fairly heavy but casualties during the day were light in comparison. During the night the Battalion was relieved by the 20th Battalion as the 6th Brigade went into reserve. Battalion Headquarters and ‘D’ Coy were at Hannebeke Wood, ‘C’ Coy at Muhle, and ‘A’ & ‘B’ Coys in the vicinity of Anzac House. The days in reserve were miserable with the regular downpours making the battle ground a quagmire. The only accommodation consisted of shell holes, half filled with mud and water, and all available men worked long hours burying cables and on fatigues.
 4th October 1917: The Battle of Broodseinde (map right courtesy of Australians on the Western Front 1914-1918). Click on the following link to see geo-referenced Side-by-Side Trench Map of the map below, reproduced with the permission of the National Library of Scotland.
The 22nd Battalion lined up on the JOT (D.28.c.5.5. to D.28.a.15.25.) without incident (photograph below of the shell holes at the JOT to the right of Zonnebeke Lake), with the four companies A-D from left to right and at 4am were lying in shell holes waiting for zero hour at 6am. From 4am to 5.30am the enemy provided intermittent shelling which ceased for five minutes but then at 5.35am a furious German barrage fell around the waiting men and the 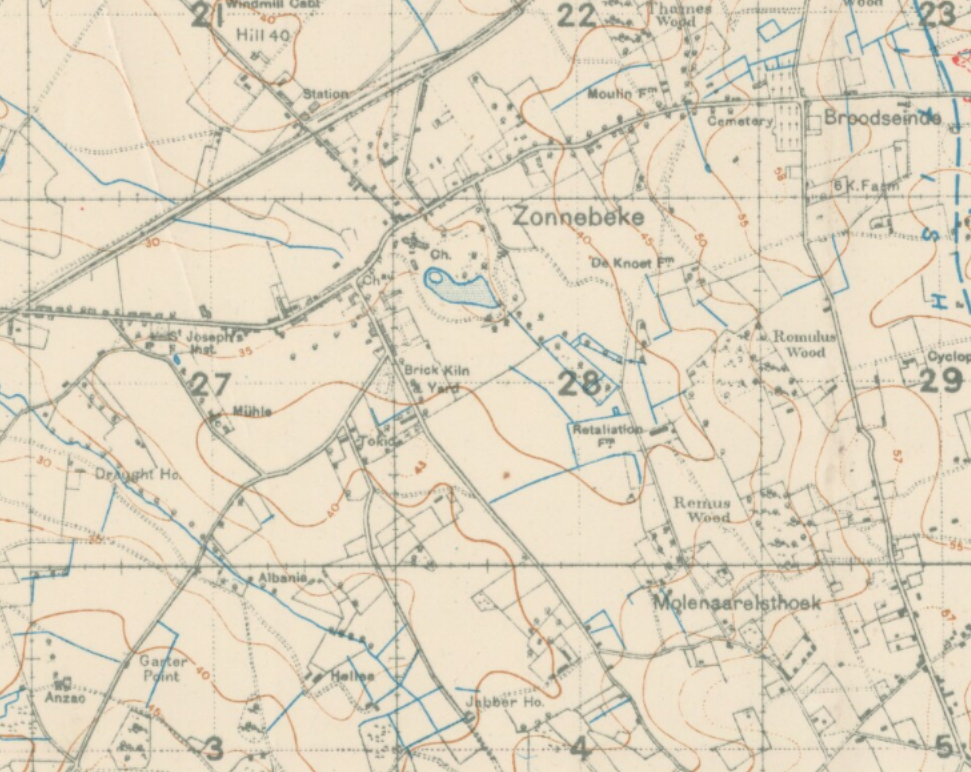 evacuated outposts, increasing in intensity as zero hour drew near. When our own barrage crashed out at 6am, the men covered with earth and debris rose and pushed forward under what was the densest and best barrage that the Battalion had ever advanced behind. The German barrage, which had in fact been lain as the prelude to their own advance, ceased almost entirely and the German attack scheduled for the same time dissipated under the weight of shells falling on their own JOT and the effectiveness of our machine gun barrage which even eclipsed that of the Germans at Bullecourt. The advancing wave almost at once encountered German infantry in force and considerable casualties were inflicted on the enemy by the Lewis Gunners firing from the hip. Faced with these altered circumstances the Germans did not attempt a serious struggle and surrendered freely. At 7.23am and almost without opposition the Battalion gained its objective – the Red Line, see map below of 30th September – on the reverse slope of the Broodseinde Ridge and immediately commenced its consolidation and the construction of a continuous trench system. The 21st and
  24th Battalions waited on the Red Line until the barrage moved on with great accuracy which enabled them to take the second objective – the Blue Line – 400 yards on the forward slope of the Broodseinde Ridge. They accomplished their mission with great success and the German Staffs who waited in pillboxes for news of their own attack, were taken by surprise. One party of thirty, including a Colonel and his Staff surrendered to Pte Drury of ‘C’ Company when he entered their pillbox. The Adjutant Capt. Stewart and RSM Cadwell picked up another party of twenty-five. Battalion Headquarters moved forward to De Knoet Farm almost immediately, in part to avoid the heavy shelling that had befallen their original position. In one German dugout in the vicinity of the Farm a party of twenty-three Germans refused to surrender and were killed by bombs dropped through the ventilator. Amongst the killed were Lieut Blanchard – leading a party around Zonnebeke Lake to connect with the 25th Battalion – , Lieut. Kellaway and 2nd Lieut. McIntyre, shot while leading his men against a party of Germans advancing with fixed bayonets, several having been killed by Lieut. McIntyre’s revolver.
 Many of the missing were killed during the half-hour barrage that preceded the attack. Major Craig, the medical officer of the Battalion, was severely wounded and would not return to the Battalion (photograph right of the Brick Kilns just behind the front line – see above map – which acted as the Battalion RAP). Two German carrier pigeons were captured, and resisting the temptation to supplement their rations, a derogatory message was sent back to their lines! With the success of the 3rd Australian Division on the left and the 1st Australian Division on the right, the 4th October was one of the most successful in the history of the Australian Army. Being taken by surprise, the German Staff failed to destroy their papers and many maps were captured. Two artillery pieces were also captured but soon put out of action by incoming German 5.9 shells. Both sides continued with a fierce bombardment through the night. The 22nd Battalion had 162 men killed or died of wounds during the 3rd Ypres campaign, 93 during the Broodseinde attack.
3rd October 1917: During the day our artillery caused about 20 casualties and two Lewis guns were destroyed by shorts. Just before midnight the ‘Jumping Off Tape’ for the attack was laid by the 6th Field Company. It ran about 100 yards in rear of the outpost lines whose garrison withdrew to the ‘JOT’. All night there had been drizzling rain, the morning was cold and raw, and the going heavy.
2nd October 1917: ‘A’ Company at Muhle under Capt. Bunning lost heavily during shell fire, with four killed. That evening ‘B’ & ‘D’ Companies under Capt. Rodda and Capt. Davis respectively relieved the 23rd Battalion in the front line near Zonnebeke Lake, with the 8th Battalion on the right and 25th Battalion on the left. Final preparations were made for the attack.
1st October 1917: From Dominion Camp the Battalion moved to the ruins of Ypres and then during the night relieved two companies each of the 34th & 47th Battalions in the support line along the Zonnebeke Ridge. The disposition of the Battalion: 2 Company’s at Anzac House (location J.3.a.2.3. – click link for geo-referenced map), 1 Company at Zonnebeke Redoubt and 1 Company at Muhle (location D.27.d.0.8. – same map). Capt Woolf was wounded during the relief and Lieut. Braithwaite took charge of ‘C’ Company. The strength of the Battalion at the beginning of October was 34 Officers and 812 other ranks.
 30th September 1917: Capt Cawthorn received orders for the forthcoming Broodseinde attack:
Operation: On a day to be notified, 1st Anzac, simultaneously with Corps on each flank will continue its advance. On the 2nd Division front the 6th Brigade attack on the right, 7th Brigade on the left. Before midnight prior to the attack the 22nd Battalion in support will change places with the 23rd Battalion in the line. The 22nd Battalion will carry and consolidate the Red Line (first objective). The Blue Line will be captured by the 24th Battalion on the right and the 21st Battalion on the left after passing through the 22nd. The Battalion will attack on a 4 Company frontage, each Company on a Platoon frontage. The 3rd Platoon of each Coy will be moppers up.
Artillery: At zero hour a barrage will be put down 150 yards in front of our front line. At plus 3 minutes it moves 200 yards at the rate of 100 yards every 4 minutes, thence to the Red Protective Barrage (200 yards beyond the Red Line), it moves 100 yards every 6 minutes. At plus 130 minutes it moves 100 yards every 8 minutes, finally resting on the Blue Protective Barrage (200 yards beyond the Blue Line). One smoke round per gun will be fired when the Barrage reaches each of the Protective Lines. A number of Batteries of FA, at the disposal of the Divisional Commander, can be switched on to any point holding up the attack, on particulars being furnished.
Consolidation: About 150 yards behind the Red Protective Barrage, shell holes are to be linked up. If sufficient men are not available to complete a continuous trench, sections of trench are to be dug so that a continuous line may be completed later.
23rd September 1917: During the night the 13th Brigade relieved the 6th Brigade and the Battalion moved back to Dominion Camp (click link for geo-referenced map, location G.23.b.). Here the Battalion stayed for a week where they, as part of 6th Brigade, formed part of the Corps Reserve to the AIF 4th & 5th Divisions for the forthcoming attack at Polygon Wood. German bombing planes were very active and visited the area nightly. Throughout the Ypres campaign the aerial activity was intense, with on occasions some eighty to ninety machines in the air at any one time.
 21st September 1917: The Battalion left their bivouacs at 5pm and headed back to the front to relieve the attacking battalions from the successful Menin Road attack. The 6th Brigade took over the newly captured ground on the Becelaere Ridge from the 5th & 7th Brigades, and during the night the 22nd Battalion relieved two battalions of the 7th Brigade near Hannebeke Wood in what was now the support line (frontage J.8.b.7.1 to J.2.d.6.2 in the map below of 16th September), in an area littered with German dead (photograph right). Enemy shelling was heavy and continuous and the Battalion suffered close to 100 casualties, including fourteen killed or died of wounds. ‘A’ Company alone lost almost forty men during this tour of duty. Lieut. Thwaites was seriously wounded and as a consequence invalided home to Australia.
 20th September 1917: During the successful battle of the Menin Road, the Battalion was in reserve at Belgian Chateau – photograph right of members of the 22nd Battalion taking a meal in the trenches on Westhoek Ridge on the night before the opening Australian attack on the Third Battle of Ypres on 20 September 1917. Identified, left to right: Mundie; Gilbert; Peach; Robinson; and two unidentified soldiers. During the day the men witnessed an extraordinary aeroplane accident when two British machines collided and crashed with propellers locked together.
19th September 1917: The Battalion moved from Halifax Area to bivouacs in the Canal Zone (location H.23.b. – click on link for geo-referenced map) as reserve to the AIF 2nd Division. Meanwhile back in England, following the decision to disband the newly formed AIF 6th Division, men including 2369 Pte Simkin, 2419 Pte Skeggs, 2480 Pte Gall, 2481 Pte Fenwick & 2493 L-Sgt Batton of the 5th Reinforcements were transferred back to the 22nd Battalion.
 18th September 1917: Nine men in ‘C’ Company were sheltering in a block house when it took a direct hit from an enemy shell killing them all outright, including 1090 Pte Twist [click to watch the film of his personal story, plus visit the Family Stories section of this website. Photograph of the grave of Pte Twist and Pte Mitchell killed by the same shell, courtesy of Joe Mitchell]. On the night of the 18th /19th the front was handed over to the 5th & 7th Brigades in preparation for the attack, and after being relieved by the 19th & 25th Battalions the 22nd Battalion moved back by platoons to Halifax Area (location H.14.b. – click on link for geo-referenced map). Hot coffee and rum were then provided followed by a rendezvous with a convoy of motor buses that enabled the Battalion to make a speedy journey to Winnipeg Camp.
17th September 1917: On the night of the 17th/18th September 2272 Sgt Day, DCM, led a successful patrol which despite being engaged by an enemy patrol, managed to fight them off, taking a prisoner and thus gaining valuable intelligence for the pending Menin Road attack.
 16th September 1917: The 22nd Battalion moved in buses from Dominion Camp at 3.30pm, debusing at Ypres. On the night of the 16th/17th September the 22nd Battalion entered the front-line in a sector on the Westhoek Ridge, taking over from the 17th & 19th London Regiments (frontage from J.8.c.6.1 to J.2.c.3.4). [Click on the following link to see geo-referenced Side-by-Side Trench map of map right, reproduced with the permission of the National Library of Scotland]. The 6th Brigade held a double frontage, for the 5th & 7th Brigades were preparing for the attack on the 20th September. During the 48 hour short tour of the
  front-line valuable reconnaissance and preparatory work was undertaken, but heavy German shelling in response to the Menin Road preparatory bombardment took its toll with 33 men being killed or died of wounds, including Lieut. Greig (photographed 10 days earlier with his V Platoon) from the Gallipoli contingent. Capt. Millar, Divisional Bomb Officer, transferred from 23rd to 22nd Battalion.
13th September 1917: After a wearying march on account of traffic on road and numerous holds, Dominion Camp (located at G.23.b – click on link for geo-referenced map) was reached where the Battalion stayed for two days. Battalion strength 39 Officers and 919 other ranks.
12th September 1917: Having spent a six cordial weeks in Campagne, the 22nd Battalion along with the 1st & 2nd Australian Divisions began its march via Ebblinghem to billets near Abeele outside of Steenvoorde, and once more to the battlefield of Ypres.
 8th September 1917: Movements carried out on training ground through gas cloud. Men allowed to ‘sniff’ mustard and phosgene from samples for familiarisation. Training as per the syllabus (picture right).
7th September 1917: Carried out tactical exercises with special reference to wood fighting. Lieut. Kellaway, MC, is taken on strength from 6th Training Bgde, while Lieut. Harricks, MC, struck off strength on being posted to duty with 6th Training Brigade. Strength of Battalion 39 Officers and 978 other ranks (including 10 Officers and 89 other ranks away from Unit).
6th September 1917: A Divisional exercise observed by General Plumer (Commander British 2nd Army) carried out in Clarmairis Forest. Advanced through forest in small columns with 5th Bgde to first objective and 6th & 7th Bgdes leap-frogging to 2nd and 3rd objectives respectively.
5th September 1917: Carried out attack practice in conjunction with 23rd Battalion on trenches and series of shell hole positions occupied by 24th Battalion representing the enemy. Practiced new attack formation in the presence of British 2nd Army General Plumer.

 4th September 1917: Attack practice at dawn, with enemy represented by D Company, followed by lecture on mustard gas and new system of German defence that affected both the depth of the offensive and the tactical dispositions for attack (see Brigade orders, right). Instead of having to attack the enemy in definitive lines of trenches, from now on the expectation was to find him irregularly disposed. Troops must now advance in a fighting formation behind a barrage which will move slowly enough to allow them to fight in areas behind it – a form of semi-open warfare wherein troops in depth are protected by a slow barrage. The rifle will again become the principal weapon. The focus turned to attacking in columns as opposed to waves to deal decisively with any hostile strong point, fortified shell hole etc. Officers and NCO’s of the 6th Brigade attended lecture at Wardrecques on wood fighting.
 3rd September 1917: Musketry, bombing, bayonet fighting in the vicinity of billets. Baths at Renescure in the afternoon followed by lecture on trench feet.
1st September 1917: During the afternoon the 6th Brigade held aquatic sports in Neuf-Fosse Canal
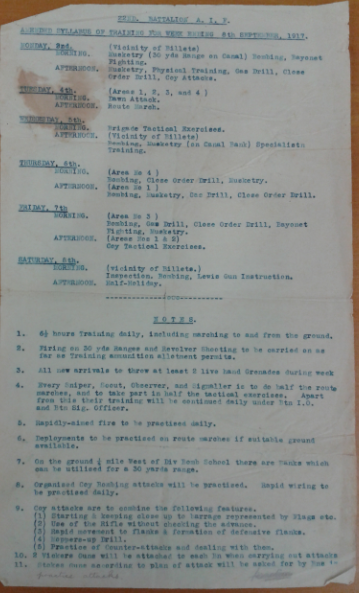
30th August 1917: Memorandum received (photograph right) on the importance of rapid aimed fire in response to enemy counter-attacks.
29th August 1917: The 2nd Australian Division formed up en masse for inspection by Field-Marshall Sir Douglas Haig. The Field Marshall’s favourable impressions were reflected in his remarks afterwards. At this time members of the Battalion helped the local farmers gather in the crops, though were not impressed by the antiquated methods used.
 22nd August 1917: Inspection of the whole 6th Brigade by Gen Birdwood as it marched in column from Wardrecques to Campagne. The weather was showery and detracted from what would have been an impressive spectacle.
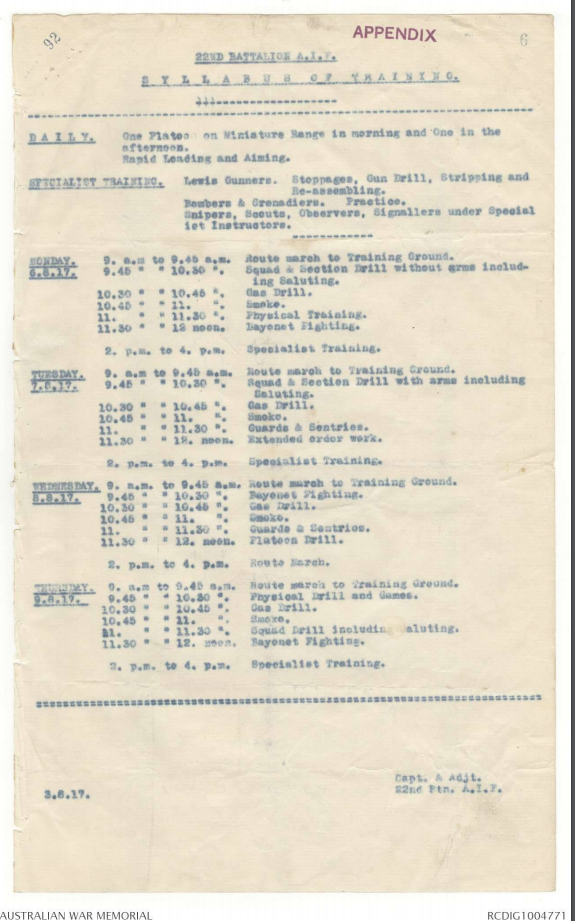
6th August 1917: Training continued as per the Battalion Syllabus (attached right) and General Officer Commanding addressed all officers within the 6th Brigade. The latest German tactics and the importance of initiative on the part of the junior officers were the chief points dealt with. Training area at A.9.central, A.10.c, and A.16.b (click here to see geo-referenced version of map below reproduced with the permission of the National Library of Scotland).
 29th July 1917: In the early hours the 22nd Battalion reached the village of Arques near St. Omer. A further march of two miles brought it to the village of Campagne-les-Wardreques around which the Battalion found home in scattered billets for the next six weeks where training continued. It was near this spot that the Battalion had billeted on its arrival from Egypt and Renescure and Roquetoire was accessible for those that deemed to venture out after long daily route marches. Paris leave also became more general. Maj-Gen Paton took over command of the 6th Brigade.
28th July 1917: After an early reveille, the Battalion entrained at Aveluy station close by and commenced their journey north via Amiens, in the horse boxes frequently used in France.
 24th July 1917: After a month in Divisional Reserve at Beaulencourt, the Battalion struck camp at 5am and at 7am marched out for Aveluy, passing through Le Sars and Pozieres, exactly a year on from the fighting. The two memorials erected to the AIF 1st and 2nd Divisions (photograph right) were passed and, where every spot revoked reminiscence, the journey north and to Belgium began. The arrival at Aveluy (see map of 30th May) and the Ancre afforded the opportunity of a swim and relief from the hot summer sun. While at Aveluy Maj-Gen Gellibrand was transferred to England to command the AIF Depots.
23rd July 1917: Divisional exercise. The 22nd Battalion in reserve but at 5.30pm moved through existing front lines and advanced to attack of further objectives.
22nd July 1917: Church parade and presentation of medals and ribbons by Lieut-Gen Birdwood. After the march past Gen Birdwood met the junior officers.
21st July 1917: Attack practice in cooperation with tanks which were represented by hessian mounds.
20th July 1917: Bombing practice by the battalion under inspection by Divisional General Staff.
16th July 1917: Route march Reincourt – Villers-au-Flos
11th July 1917: Lecture on Venereal Disease.
9th July 1917: Divisional attack practice Bancourt – Thilloy with the 22nd Battalion operating as right battalion of the Division.
8th July 1917: Church parade cancelled owing to wet.
5th July 1917: Open attack practice (grid blocks O.13 to O.20 in map below)
3rd July 1917: Skirmishing and open attack as a drill. Inspection by Brig-Gen. Gellibrand. Twenty-six other ranks reported from 2nd ADBD, Le Havre.
2nd July 1917: Attack practice against Le Transloy (see map below) defended by 24th Battalion.
1st July 1917: Church parade and inspection by General Smythe, Commanding Officer AIF 2nd Division.
 27th June 1917: Field firing, battle practices at N.23. with ball ammunition, capture of strong posts.
25th June 1917: Attack practice, capture of copse and trenches at N.13.c. Thirty-six Other Ranks reported from 2nd ADBD.
23rd June 1917: Practiced village fighting at Beaulencourt (N.17.b.). [click on link for geo-referenced Trench map reproduced with the permission of the National Library of Scotland].
19th June 1917: Practiced wood fighting at the village of Villers-au-Flos (O.8.c.) in map above
15th June 1917: The AIF 2nd Division relieved the AIF 5th Division, with the 6th Brigade relieving 14th Brigade. The 22nd Battalion entrained at Varennes for Bapaume, and then marched south to Beaulencourt (see above map) where it formed part of the Divisional Reserve for the I Anzac Corps in the front area.

10th June 1917: Major ARL Wiltshire (front row, sixth from left) was promoted to Lieut-Colonel and assumed command of the 22nd Battalion, a position he held for the rest of the war. Major Matthews returned to the Battalion and became second in command
6th June 1917: General Birdwood and the Hon Andrew Fisher were present at a Brigade Church Parade, followed by a march past. Numerous promotions were made following the Bullecourt losses, including Lieut Rodda receiving his Captaincy. Battalion strength 25 officers and 731 other ranks.

4th June 1917: Specialist training, and instruction in rapid wiring and construction of strong posts from the Field Company Engineers. Honours and Rewards were awarded to a number of the men including Military Crosses for Lieut. Braithwaite and Lieut. Gorman
1st June 1917: During 6th Brigade mortar training the premature bursting of a Stokes bomb caused 20 casualties – 4 killed and 16 wounded – including 5058 Pte Mills (photograph above right) of the 22nd Battalion who died a day later from his injuries. The accident was probably caused by a faulty shell which burst about three feet from the nozzle of the gun.
 30th May 1917: A successful Brigade sports meeting was held at Henencourt (grid block V.27.), finished by a series of spirited boxing matches. [click on link for geo-referenced Trench map reproduced with the permission of the National Library of Scotland].
29th May 1917: The Battalion marched to Millencourt (grid block V.29.) and practiced a bombing attack on a set of trenches along with the 6th Light Trench Mortar and Stokes Mortars.
27th May 1917: Church parade.
25th May 1917: Route march and gas demonstration at Divisional Gas School; Battalion sports in the afternoon.
 18th May 1917: Having been their Commanding Officer since February Lieut-Col. DM Davis left the 22nd Battalion to take command of the 6th Training Battalion in England, leaving Major Wiltshire in temporary command.
17th May 1917: Leaving Mametz Camp the 22nd Battalion marched via La Boiselle then to Aveluy just outside Albert and finally to Bouzincourt (grid block W.7. in map of 30th May) where in this pleasant village and countryside the Battalion stayed for a month. Marching, musketry, close order drill and training of specialists took place (see example training syllabus, right). A number of men were sent to a seaside camp to recuperate, and football and sports provided recreation.
 11th May 1917: HMAT Ascanius (A11) set sail from Melbourne on the last of her nine transport trips from Australia, and on this final voyage with the 19th reinforcements of the 22ndBattalion on board. In addition to the trips to and from Australia she picked up and transported the 22nd Battalion that had were waiting in Mudros Harbour, Lemnos, following the evacuation of Gallipoli, bound for Egypt where at the time the AIF was re-grouping.
10th May 1917: Brigade resting and re-organising. Kits of deceased men being dealt with.
 9th May 1917: After a night under canvass at Le Sars the 22nd Battalion moved on to Martinpuich and Contalmaison and finally to Mametz camp (grid block F.4.d., Trench map reproduced with the permission of the National Library of Scotland]. Here the Battalion spent the next week refitting, reorganising and training specialists.
8th May 1917: Upon reaching Bapaume the men boarded trucks on a trench railway to Le Sars.
7th May 1917: The Battalion moved to Favreuil where in the pouring rain camp was made in bivouacs in the open (grid reference H.10.c.5.4. in map of 17th March).
6th May 1917: The 22nd Battalion performed carrying parties to the front line.
5th May 1917: The 22nd Battalion was relieved by the 2nd Battalion and moved in small parties to the sunken road between Noreuil and Longatte. Owing to the severity of the losses, the Battalion was acting as a Company, with each Company as a Platoon.
4th May 1917: The relief of the 6th Brigade by the 1st Brigade started from midnight (the 22nd Battalion relieved by the 3rd Battalion), and was completed by 4am. For the next 24 hours the Battalion rested by the railway embankment. In 24 hours the 22nd Battalion had lost sixteen officers and 422 other ranks of whom over fifty percent were killed or missing. Though no other battalion lost so heavily, overall the 6th Brigade lost 58 officers and 1,422 other ranks.
3rd May 1917: The Second Battle of Bullecourt. “The Battle of Bullecourt occupies a unique place in the Battalion’s annals. For no other struggle had the preparations been so complete, the rehearsals so thorough, or the general organisation so apparently perfect. Yet within a few minutes of its commencement, the combat developed into a pell-mell of violent hand-to-hand struggles, where the 6th Brigade met the flower of the German Army, and beat it into quiescence.” Capt E.Gorman, With the Twenty-Second.
The Hindenburg Line was a formidable defensive system on ground specifically chosen, with intersecting arcs of machine gun fire, and shell proof dugouts to withstand losses from the preceding barrage with easy access and exit for their garrison. Furthermore German intelligence had learnt of the impending attack and by whom and as a result the Kaiser hand-picked the defending battalions to repel the attacks by the Australians. Bullecourt was a key defensive position for the Germans where the line bent or pivoted.
 Zero hour was fixed for 3.45am with the AIF 5th Brigade to the right of the 6th Brigade and the 185th Brigade of the British 62nd Division on the left (map right, courtesy of Webmatters). The moon had provided some light earlier in the night, but the 10 minutes immediately preceding zero hour were intense darkness. The JOT was parallel to the enemy lines and 500 yards in front of a steep railway embankment. Brig-Gen Gellibrand established his forward HQ in this embankment and through his leadership and active command and despite heavy shelling from the direction of Queant, the success of the operation may be largely attributed. This was in every sense a Brigade not battalion battle where men of all four battalions were often joined in one bombing party.
 As the formations filed over the railway embankment to form up on the JOT – the men were in position at 3.25am – the moon light revealed them to the enemy and the barrage opened up causing casualties. At zero hour our artillery opened up and the advance in waves began towards the enemy line at U.22.d.6.0. to U.23.c.2.0. [click on link for geo-referenced Trench map reproduced with the permission of the National Library of Scotland – note trench map is dated after the battle in September 1917, so London Support = OG1]. Very little distance had been traversed before a concentration of shells, minenwerfers and machine gun bullets fell upon the 22nd Battalions centre, and caused its casualties to substantially exceed those of any other in the Brigade. The intensity of the machine gun fire was not equalled in any of the Battalion’s other experiences. Many of the Battalion fell in No-
 Man’s Land and at the German wire, including Capt. Hogarth (C Company, 2nd in Command of the 22nd Battalion, photograph left), Capt. Slater, and with Lieut. Fraser being shot as he approached OG1. For many of the others on the left they were pinned down by fierce rifle and machine-gun fire.With the 21st Battalion also suffering heavily, the survivors pushed forward no longer in systematic waves but a blending of the battalions. On the extreme left of the Brigade the left encountered severe resistance and did not completely attain their objective, and to their left the 62nd Division had failed to progress. In this critical position they received enfilade and frontal fire but established themselves in shell holes just short of their objective. The right and main body followed closely on the barrage and finding the wire well destroyed gained the German line, but there was considerable opposition and then commenced a bombing action which lasted 24 hours. Capt. Kennedy upon reaching OG1 with a fraction of the men and turning left to make good the position was met by German bombs. A bomb fight followed in which the 22nd won 200 yards of trench. Lieut. Greig pushed on with his wave to OG2 and likewise turned left and with Lieut. Braithwaite, Military Cross, (wounded in both arms) and Lieut. Thwaites began a bomb fight to secure the objective and a long drawn out bomb fight ensued. Supported by Stokes Mortars of the 6th Light Trench Mortar Battery and the Lewis gunners pushed back the defenders, but only to another dugout. A party led by Corporal O’Neill, Military Medal, with Sgt Arblaster of the 21st rushed the strong-point, but the Germans were fighting hard and none but the wounded were found in the dugout.
 The remaining waves in conjunction with the other battalions continued the advance to the second German Line from where the success signals were fired at 4.26am. Within the first two hours the 6th Brigade had established itself in both the first and second systems of the Hindenburg Line and for some distant further forward. On its left the German positions were entirely maintained. On its right, all but a portion of the first German trench was still in the enemy’s hands. Throughout the day counter-attack followed counter-attack, thirteen in all, with Capt. Kennedy and his handful from the 22nd involved in bomb fights in OG1, but the situation of ammunition became serious. One carrying party of thirty under Lieut Filmer (photograph right) was reduced to four when he led its remnant to the objective. Within a few minutes and looking over the trench he himself was killed.
The casualties among the stretcher-bearers were extremely heavy. At 8am the situation was most critical, as the Brigade was hemmed in and supplies limited. By midday some successes had been made on the flanks, but the 22nd Battalion was subject to more counter-attacks, with the supply of bombs diminishing against the continued counter-attacks. However by evening the enemy, despite being hand-picked battalions with special training, had pretty much been beaten to a standstill.
2nd May 1917: During the evening at 7pm the Battalion moved to a gully in rear of the front line, to the right of Bullecourt, with an attacking strength of 21 Officers and 618 other ranks, the remainder proceeding to the Divisional Details Camp. The articles for the next morning’s attack were drawn by platoons, and some hours were available for sleep before the Battalion was awakened to line the Jumping-Off Trench.
1st May 1917: The Battalion was in camp (grid reference H.10.c.5.4. in map of 17th March) where the companies and platoons were informed of the attacking sections and waves for the forthcoming attack on the Hindenburg Line at Bullecourt. The 22nd Battalion would be leading the attack on the far left of the 6th Brigade, in four waves and two sections [see Brigade orders of 23rd April below], with a further four waves following behind from the 21st Battalion, and with eight similar waves of the 24th & 23rd Battalions to the right.
30th April 1917: A second Divisional attack practice on practice ground near Bihucourt (grid block G.18. – see map of 17th March), and improvements were made in assembling and direction during the hours of dark. At no other time were the rehearsals as complete then as at Bullecourt. By the end of the month, with the first warmth and signs of Spring, the fighting strength of the Battalion was 33 Officers and 842 other ranks.
28th April 1917: At midnight the alarm sounded with the call for the Battalion to ‘man the Corps line’ (battalion right flank resting on road at H.11. – see map of 17th March) Once the last man was in place the order was given to dismiss, as this was just a drill to time the response rate.
27th April 1917: The 22nd Battalion along with the battalions of the 6th and 5th Brigades carried out battle practice at Bihucourt (grid block G.18. in map of 17th March). Attacking waves were waiting on jumping off line at 3.30am. At 4am barrages represented by lights commenced and battalion jumped off. Operation completed at 6am. In the afternoon companies practiced in passing of obstacles in their attacking waves and the negotiation of barbed wire by means of traversing mats. Also successful demonstration of blowing gaps in wire entanglements using Bangalore Torpedoes.
26th April 1917: The artillery commenced a preparatory bombardment of the German lines.
25th April 1917: Anzac Day observed as a holiday, with battalion sports during the afternoon.
24th April 1917: Attack practice as of 22nd April.

 23rd April 1917: Capt. IP Stewart, Adjutant of the 22nd Battalion, issued the operation memo for the attack at Bullecourt (with amendment 1st May) which included attack formations and which would also provide the template for their rehearsals. [See Combat Areas > 22nd Battalion > Bullecourt (Preparation) to read the memo]
22nd April 1917: The Battalion carried out attack practice in conjunction with two battalions of the 5th Brigade. For the purpose of the practice the village of Bihucourt represented Bullecourt (grid block G.18. in map of 17th March).
 19th April 1917: On the last night of the tour everyone was drenched by the heavy rain. The 5th & 6th Brigades were relieved by the 7th Brigade, with the 22nd relieved by the 25th Battalion. During this stint on the front-line the Battalion had 7 killed and 29 wounded, plus 19 sick. The Battalion went into Divisional Reserve occupying tents and bivouacs at Favreuil (grid reference H.10.c.5.4. in map of 17th March) for training and relaxation including sports. The Divisional canteen was also stationed close-by.
17th April 1917: Enemy high explosive shell hit a dugout in the support lines containing Ptes Vass, Fry and Summersford of C Company, killing all three. L-Cpl Anderson of D Company also killed, and along with Ptes Groves and Fowles on the previous day makes this the worst period for the Battalion since the attack at Warlencourt towards the end of February.
 15th April 1917: The Germans launched an unsuccessful and costly attack on Lagnicourt, manned by the 1st Australian Division and with the 5th Brigade now under the command of the Battalion’s former Commanding Officer Brig-Gen R.Smith holding the left of their position. Fourteen German battalions took part in the main attack, and it was estimated that 1,500 were killed and 300 prisoners. The village and the attack lay beyond the right flank of the 22nd Battalion but in range of the Lewis gunners, including L/Cpl 1187 Tourrier who estimated that his gun accounted for 40 Germans and became ‘the envy of the battalion gunners’. A party of one officer and eleven other ranks attempted a raid on one of the Battalion’s posts and were all killed, and for his work 2nd Lieut. F.Gawler received a Military Cross. Sentry 5111 Pte Winter was shot dead by the raiders, and Major JS Dooley, MC, was wounded.
 14th April 1917: The 22nd Battalion moved via Vaulx – Noreuil took over the front line from the 18th Battalion, extending from (map right) U.27.d.7.4. to C.4.b.6.8. with the 5th Brigade on the right flank and British 168th Brigade on left. The front line was a railway embankment with the village of Bullecourt beyond. [click on link for geo-referenced Trench map reproduced with the permission of the National Library of Scotland].
13th April 1917: The Battalion moved via Sausage Valley to Albert, then to Pozieres and Bapaume before arriving at Beugnatre and occupied trenches (grid block H.12.d in trench map of 17th March) where the night was spent.
12th April 1917: The battalion moved to Becourt Camp in preparation of the relief of the 4th Australian Division (that had just suffered heavily at the First Battle of Bullecourt) by the 2nd Australian Division.
9th April 1917: Training including trench to trench attack practice, and a Brigade attack practice took place at Tara Hill.
6th April 1917: Firing practice on the range followed by ½ day holiday on account of it being Good Friday.
5th April 1917: Orders from the previous day cancelled and Battalion returned to D Camp, Mametz (see map 9th May).
4th April 1917: Orders received for the 22nd Battalion to be held in readiness to work on railway construction, and an advance party proceeded to Bapaume.
1st April 1917: Church parade at Becourt. Presentations of Military Medals and ribbons by Lieut-Gen WR Birdwood, Commanding Officer AIF.
31st March 1917: Brigade church parade. 85 other ranks reinforcements joined the Battalion.
28th March 1917: Parades were resumed and Battalion drill was performed over shell-holes, roads and barbed-wire entanglements.
27th March 1917: The 22nd Battalion was relieved from Bapaume and rejoined the Brigade in Mametz Wood (see map 9th May) and its huts and placed in Divisional Reserve. Bathing and training commenced.
 26th March 1917: Early in the morning 22nd Battalion B and C Companies moved into Bapaume (grid reference H.27.c.8.1. in trench map of 17th March) and took over from 20th Battalion, and to billet in the Town Hall. However upon arrival the Town Hall (photograph right) had been destroyed the previous day by a clockwork mine, so the two companies were given the task of shovelling the Town Hall off the road and looking for survivors. A similar mine entirely destroyed the dugout system on the edge of Bapaume that was used by the 6th and 7th Brigades as their headquarters, though fortunately when the mine went off most of the 7th Brigade staff had advanced to Vaulx-Vraucourt. Orders were given that dugouts and houses left intact by the enemy must not be used by staff or troops. Meanwhile the rest of the 6th Brigade was relieved and moved into hut shelters at Mametz Wood (see map 9th May).
25th March 1917: Church parade followed by road work. 31 other ranks reported from 2nd ADBD, Etaples.
22nd March 1917: Lieut. Spiller returned with 64 men from training camp. Salvaging and road work performed.
19th March 1917: The 22nd Battalion was relieved by the 25th Battalion of the 7th Brigade in support and moved to Malt Support tented camp in Misty Way (grid block M.12.a in trench map of 25th February).
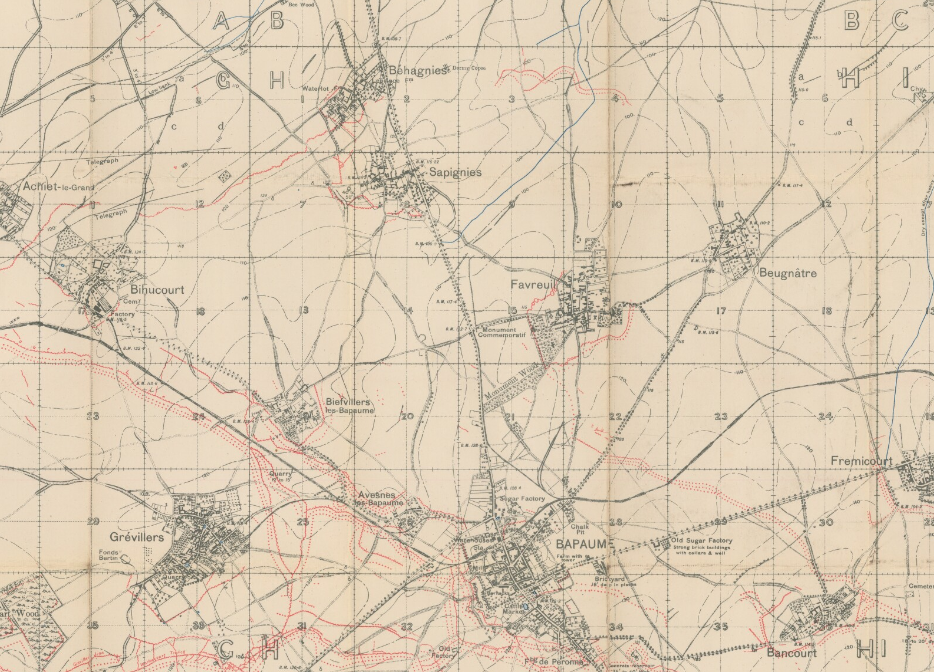 17th March 1917: As the 23rd Battalion entered Bapaume, the 22nd Battalion was to the left of the town and in front of Grevillers occupying a line in Avesnes Les Bapaume in support. [Grid blocks H.25.c & H.25.d – click on link for geo-referenced trench map reproduced with the permission of the National Library of Scotland].
13th March 1917: Order from Brigade to move forward and take up positions along the Warlencourt Road, with the 22nd Battalion to occupy positions in Le Barque village and Malt Trench (grid block N.7.a – see trench map of 25th February).
11th March 1917: Moved to Seven Elms, Flers Support and Eaucourt l’Abbaye salvaging and carrying to line.
10th March 1917: Patrols report enemy wire not cut. The 22nd Battalion was relieved by the 21st Battalion and marched out to Bazentin Camp. The camp was reached by 2am, but within six hours the Battalion was ordered to head back to the front and began retracing their steps of just a few hours before! Eaucourt, l’Abbaye and Le Barque were the first places to be garrisoned on reaching the advanced lines again, and daily progress was made on the heels of the retreating Germans.
9th March 1917: A forward line was laid out from M.5.b.3.5 to M.6.a.3.7, about 200 yards from the enemy line (see trench map of 25th February). Patrols reported enemy wire 15 to 20 feet in depth, and Machine Guns active. The vicinity around Brigade HQ was shelled heavily between 1 – 2 am.
 8th March 1917: The 22nd Battalion relieved the 23rd Battalion in Malt Trench (A & C Coys), Malt Support (B Coy) and Layton Lane and outposts. Throughout his retirement the German’s policy was to man selected strong posts and hold them with machine gun crews. These crews were often scattered along a continuous trench, all protected by wire and were very difficult to locate. Patrolling was dangerous and it was in this manner that Lieut Massie (photograph right) went missing in front of the then uncaptured Grevillers line (see trench map of 25th February), and was later reported killed in action having been taken behind German lines.
5th March 1917: Carrying to line and moved forward to Le Barque Trench (grid block M.12.c in trench map of 25th February).
3rd March 1917: Carrying supplies forward and then moved to Hexham Road, Gird Trench and Gird Support (see trench map of 25th February).
 2nd March 1917: At 4pm the 22nd Battalion began to move forward to Seven Elms, Flers Line and Eaucourt Abbaye in support as the 6th Brigade began the relief of the 5th Brigade (see right & grid block M.23.c in trench map of 9th February).
1st March 1917: Close order drill plus training of Bombers, Lewis Gunners and Signallers at Shelter Wood.
26th February 1917: The 22nd Battalion was relieved by the 24th under the cover of fog. By noon the remnants of the Battalion had concentrated back at Shelter Wood Camp (see map of 17th February) where it remained until the rest of the month, resting and receiving the next draft of reinforcements. During this last tour of front line duty the battalion had suffered some sixty casualties.
 25th February 1917: On the eve of the Battalion’s relief, orders were received to issue ammunition and bombs in preparation to send out strong patrols for an advance along with the 21st Battalion to occupy Gallwitz Trench. [click link for geo-referenced Trench map reproduced with the permission of the National Library of Scotland]. Without the usual accompanying bombardment the night was eerily quiet and the fog made it difficult to navigate, and this was for the Battalion the first example of advancing under what would be termed ‘peaceful penetration’. The right hand companies of the 22nd faced with thick uncut wire entanglements sent back for duck-boards to lay across it. No enemy was encountered and they were ordered to complete their night’s task by reconnoitring and encircling with posts the ruined village of Warlencourt. Although the enemy was light in numbers, there were still casualties.
 During the day there was no shelling and the weather was fine. Many enemy could be seen in the vicinity of Malt Trench and with resistance being encountered on the left of the I Anzac Corps front held by the 2nd Division, Gellibrand, in temporary command of the Division, decided on a determined advance and to take Malt Trench which was the enemy’s most important defence on this part of the front. The 18th Battalion of the 5th Brigade was met with fire from several machine guns and casualties were heavy. Snipers were active including against the stretcher-bearers and wounded. The 6th Brigade was quickly summoned to attack with little preparation and attacked with two companies each of the 21st and 22nd Battalions. The two companies of the 22nd Battalion were led by Lieut. Bazeley (C Company) and Captain Cull (D Company) who had earlier audaciously reconnoitred the position during the day, noting that the German wire had not been cut. He was informed however that there would be no artillery support to cut the wire and that the attack must proceed at all costs at once. Scouts were sent out to discover passages through the wire. As C and D Companies reached the top of the hill outside of Warlencourt some fifty yards from the entanglements, Germans in their trench opened fire with machine-guns and rifles. Cull ordered his men to lie in shell-holes and wait for reports from the scouts, but when no report came, he gave the order to charge. His impetus carried him over the first stake but he got entangled in the second where his hip was shattered by a bomb. Lieutenant Corne and Private Martin tried to extricate him, but Corne was hit and killed. Twenty of the men found an opening in the entanglement and under the leadership of Sgt Harwood entered an unoccupied portion of Malt Trench but were shortly afterwards driven out by machine gun fire. Captain Cull and
  several of his men were captured and made prisoner of war. At dawn in Little Wood a patrol from C Company was engaged and a stray bullet detonated a box of bombs being brought forward causing 16 casualties killed and wounded, including L-Cpl Kruger, DCM. Several were also wounded by booby traps left by the enemy. In all 50% of the men engaged in the failed attack of the 25th/26th February became casualties, including nine men from the 22nd Battalion killed. During this action four men from the battalion were awarded for their gallantry including the wounded 2151 Sgt Harwood who was awarded the French Croix de Guerre (picture left), and 2346 Temporary Sgt McCormack of the 5th/22nd the Military Medal.
24th February 1917: Before dawn patrols were active and sighted an enemy fighting patrol of 20. Noted that there was an absence of flares during the early hours and no enemy shelling. Lieut-Col Davis received command of the Battalion, with Major Wiltshire second in command. That evening telephone message from HQ that the enemy was suspected of evacuating Mauramont and Serres.
23rd February 1917: A quiet day. At dark a patrol left our lines and bombed the post where Cpl Wittner was killed and recovered his body.
21st February 1917: The 22nd Battalion marched out to relieve the 23rd Battalion in the Firing Line in Le Sars sector to the west of the Albert-Bapaume road (grid reference M.16.b.6.7 to M.16.a.0.8 – click link for geo-referenced trench map), and despite the deep mud that impeded the progress, the relief was completed by 3.15am. Except for scattered shelling the night was quiet. The first patrols found No-Man’s land quiet but just after dawn Cpl Wittner lost direction and was killed by a bomb thrown from a German post that he had stumbled across.
20th February 1917: A wet day. 364 pairs of gumboots arrived and were issued to the men.
18th February 1917: Capt CEW Bean, Official War Correspondent visited the battalion. The men, scattered around in tents and leaky bivouacs were most uncomfortable.
 17th February 1917: The refreshed and clean battalion moved to Villa Camp in Divisional Reserve (grid block X.11.c), though the journey was slow owing to heavy traffic of troops and vehicles on the road. Promotions were made in the ranks to NCO’s (see Events Archive for 5th Reinforcements for this day). [click link for geo-referenced Trench map reproduced with the permission of the National Library of Scotland].
16th February 1917: In the third week of February the thaw commenced. As the month was dragging to an end the snow melted, and the forward area was a semi-frozen sea where movement was difficult, and every shell-hole a trap for the stumbler. At Shelter Wood the battalion had baths and spent time cleaning up, but mud and slush everywhere. In the evening concerts and card parties were held.
14th February 1917: Having arrived back at Shelter Wood, the Battalion Commanding Officer inspected and addressed 110 new reinforcements.
13th February 1917: Routine shelling during the day followed by enemy snipers becoming active in the evening, until they were stopped by our artillery. Later that evening the battalion was relieved by the 26th Battalion and commenced the long march back to Shelter Wood Camp (grid block X.21.d above). By dawn stragglers were still arriving.
12th February 1917: Enemy shelled Le Sars village at intervals. From our posts a good deal of singing , talking and other noise could be heard from the enemy lines. Our patrols took up a position in the enemy wire and reported it was extremely thick. Cold foggy morning.
 10th February 1917: Away to the right the 1st Australian Division conducted a raid on The Maze some distance south of the Butte de Warlencourt. The 6th Brigade assisted by firing their Machine Guns and Stokes Mortars to create a diversion (see accompanying brigade report, right). The Germans responded with a bombardment in retaliation and four men from the Battalion – Ptes Kavanagh, Matson, Biber and Jago – were killed in action, making this the worst day for the 22nd Battalion since Mouquet Farm in August 1916. In addition another 10 other ranks were wounded, including L-Cpl Batton, MM, of the 5th/22nd. The weather continued to be fine but intensely cold, and only elaborate supervision prevented many cases of frost bite.
 9th February 1917: At 4pm began the relief of the 23rd Battalion in the Firing Line east of Le Sars village, the right flank of the 22nd Battalion resting on the main Albert-Bapaume road and with a frontage of ¾ mile. [click link for geo-referenced Trench map reproduced with the permission of the National Library of Scotland]. In spite of considerable machine gun fire on approaches the relief was completed by 9.30pm without incident. Patrols sent out and located several enemy posts, some by presence of coughing. The enemy front line was a deep continuous trench heavily wired with listening posts in front or in the wire.
7th February 1917: A further move was made to rough scattered bivouacs and sunken roads just east of the ruined village of Martinpuich, the headquarters of the Battalion occupying dugouts at the foot of seven prominent trees known as Seven Elms. Further snow had fallen and all water was frozen – the men collected ice in sandbags and brought back to bivouacs to melt over braziers. No casualties resulted from light enemy 77mm shelling.
6th February 1917: The 22nd Battalion moved to Divisional Reserve in Villa Camp (see map of 17th February) near Martinpuich.
4th February 1917: Company commanders went forward and reconnoitred their sectors to the left of the Butte de Warlencourt and in front of Le Sars. The Battalion right was at the Albert-Bapaume road.
 1st February 1917: The morning was devoted to gas drill and foot rubbing. Companies fell in outside their huts in battle order wearing steel helmets and carrying two blankets fastened to their belts. Hats and puttees were dumped with the QM, and sandbags were worn as gaiters instead of the puttees. At 4pm the move was made by road to Shelter Wood Camp (grid block X.21.d map of 17th February above), replacing the 17th Battalion. The 22nd Battalion was heading to the Le Sars sector, facing the famous Butte de Warlencourt. The land was gripped in an iron frost, and the shell-pitted region was now a field of ice many feet thick, which men dug out with picks. It was so cold that moistened hair froze as it was brushed, and bread had to be thawed by the fire before it could be cut. The icy temperatures were also agonising on the feet and fingers, but the prospect of the thaw and return to the terrible mud of Flers and Ginchy was worse.
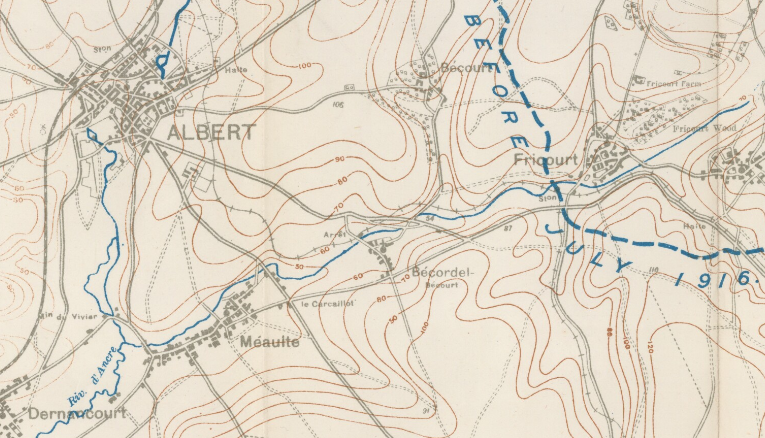 29th January 1917: At the end of January the Battalion moved to Becourt Wood Camp (click on link for geo-referenced map) near Fricourt via Meaulte with a fighting strength of 25 Officers and 668 other ranks. For the next two days the battalion trained specialists and raiders, together with medical inspection and foot washing. [Trench map reproduced with the permission of the National Library of Scotland].
25th January 1917: For three days the Battalion had drill and attack practice on high ground south of Ribemont. Capt Bunning, Lieut.’s Alderson, Woolf and Corne and 2nd Lieut. Smith reported back to the unit from 2nd ADBD.
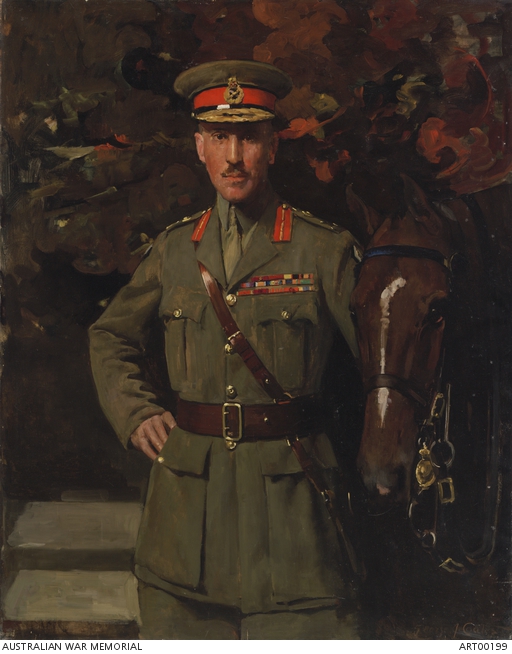 23rd January 1917: The 22nd Battalion was inspected on parade by Maj-Gen Sir NM Smyth, VC, (pictured right) soon to be commanding the AIF 2nd Division. Smyth replaced General Legge who having fallen ill with the flu was relieved of his command and returned to Australia.
18th January 1917: The Battalion entrained at Quarry for Mericourt and marched to Ribemont (click on link for geo-referenced map) for ten days, and the rest in the village revived many a man. The socks and comforts provided by the Battalion’s many good friends in Australia did much to ease the hardships.
 17th January 1917: Prisoner captured from 29th Ersatz Infantry Regiment, lost while on patrol. That night the Battalion was relieved by 31st Battalion and returned direct to ‘B’ Camp Trones Wood. [click link for geo-referenced Trench map reproduced with the permission of the National Library of Scotland].
16th January 1917: The start of the long frost which lasted for six weeks, with the freezing temperatures causing problems to keep a footing on the earth and duckboards. Arranged and carried out Stokes mortar bombardment of suspected enemy post with good results, but brought heavy bombardment in retaliation. The 25th Battalion to the right sent up an SOS and the whole Divisional artillery came into action, with normal conditions again after an hour.
15th January 1917: Captured a prisoner from the 361st Regiment. He was a stretcher-bearer who was attending to an officer shot by our snipers.
14th January 1917: Relieved the 21st Battalion in the Firing Line (as per grid references of 2nd January 1917).
12th January 1917: Battalion relieved the 23rd Battalion in support at Needle Trench
6th January 1917: Battalion relieved by 23rd Battalion and returned to Brigade reserve at ‘B’ Camp at Trones Wood (see map 17th January). During this time 35 other ranks reported in from 2nd ADBD, Etaples. 2nd Lieutenant Corne was promoted to Lieutenant.
5th January 1917: One hour of intense bombardment of enemy trenches in front of the battalion line carried out by all available guns. Results appeared good, and enemy retaliation was moderate. Relieved by 24th Battalion and moved to Needle Trench in support.
3rd January 1917: Patrols reconnoitred enemy lines and located advance posts by the sound of heavy coughing. Bombing parties bombed these posts, and our snipers claimed a bag of five. The length of front line held by the Battalion was approximately 1200 yards, and the front line was impassable in places. Garrison of 480 All Ranks.
 2nd January 1917: The 22nd Battalion relieved the left company of the 21st Battalion in Spring and Spectrum trenches in the Firing Line opposite Le Transloy, and took over new line from 6th Dorset Regiment, British 51st Brigade (line ran from grid reference N28.d.5.5 to N35.c.6.6). [click on link for geo-referenced Trench map reproduced with the permission of the National Library of Scotland]. This new sector was found to be in an extremely bad condition filled with mud and water. Enemy snipers were very active and causing much annoyance amongst the men.
1st January 1917: The 22nd Battalion relieved 23rd Battalion as support in Needle Trench in area of Trones Wood (see above trench map of 17th January) with a fighting strength of 23 Officers and 747 other ranks. Divisional artillery ushered in 1917 by firing many tons of shells on the German lines.
Events Archive 1916
Published as ‘news’ 100 years on to the day, follow the 22nd Battalion on the project website and via Facebook and Twitter
 FIRST WORLD WAR TIMELINE
1914 1915 1916 1917 1918 1919
